如何在子配置周围绘制框
|
该页面正在翻译中。 |
如果你想在一个 图 属于在一起,你可以通过将它们全部放在一个容器中来做到这一点。 诀窍是使用嵌套 网格布局 对于每组对象并放置一个 盒子 在与此相同的位置 网格布局. 然后将 alignmode=外部(some_padding) 确保有突出物伸出的物体,如 轴心,轴心,完全包含在包装盒内。
</无翻译>
using CairoMakie
f = Figure()

g1 = GridLayout(f[1, 1], alignmode = Outside(15))
g2 = GridLayout(f[1, 2], alignmode = Outside(15))
box1 = Box(f[1, 1], cornerradius = 10, color = (:tomato, 0.5), strokecolor = :transparent)
box2 = Box(f[1, 2], cornerradius = 10, color = (:teal, 0.5), strokecolor = :transparent)

# move the boxes back so the Axis background polys are in front of them
Makie.translate!(box1.blockscene, 0, 0, -100)
Makie.translate!(box2.blockscene, 0, 0, -100)

Axis(g1[1, 1], backgroundcolor = :white)
Axis(g1[2, 1], backgroundcolor = :white)

Axis(g2[1, 1], backgroundcolor = :white)
Axis(g2[1, 2], backgroundcolor = :white)
Axis(g2[2, 1:2], backgroundcolor = :white)

Label(f[0, :], "Two boxes indicate groups of axes that belong together")

f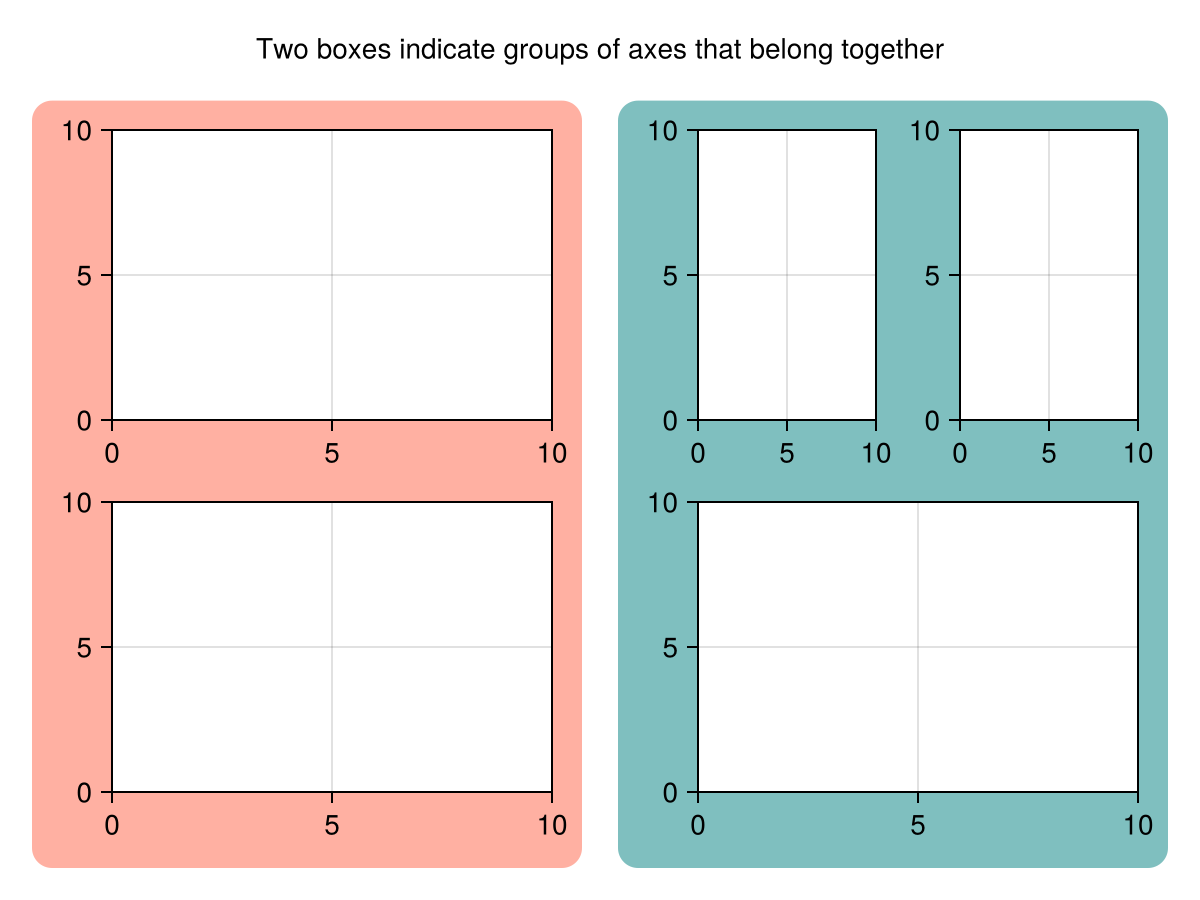
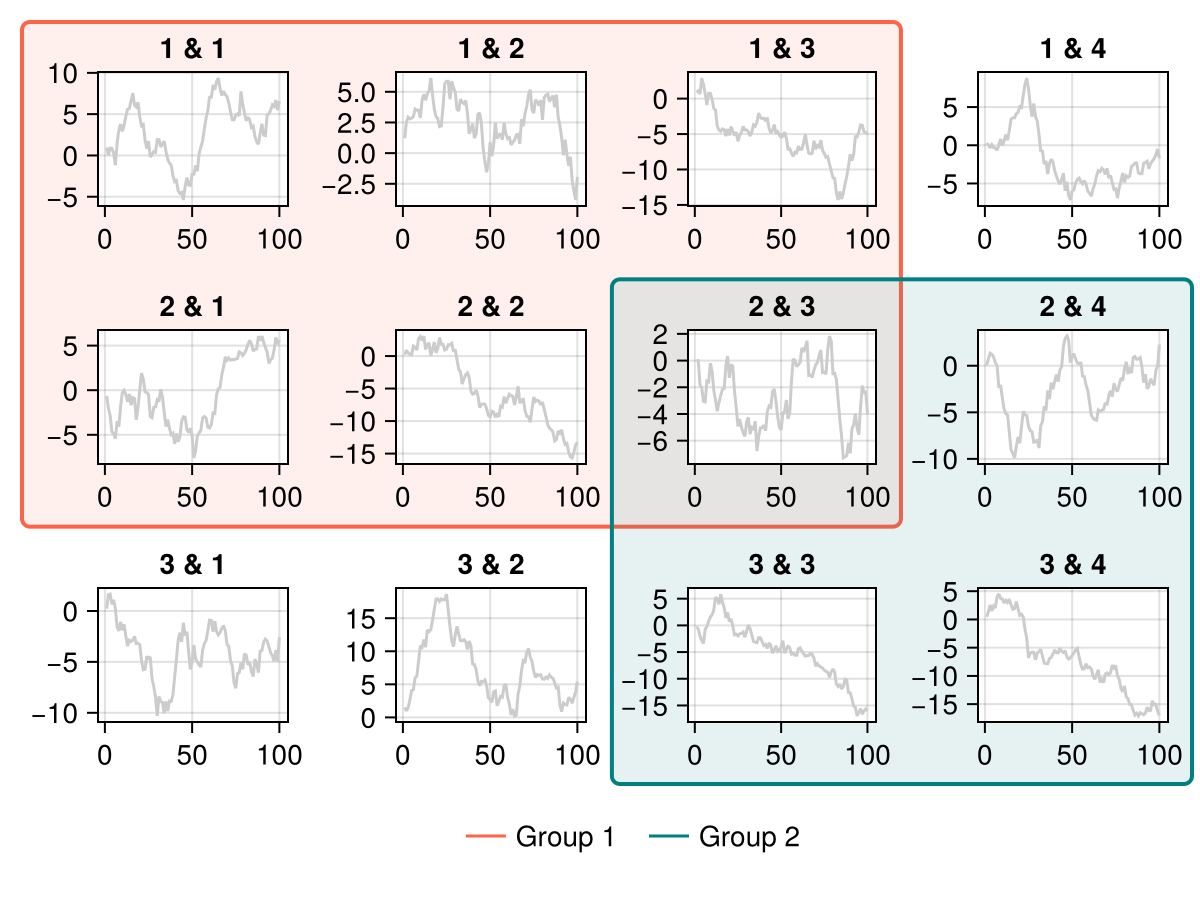
在其他情况下,您可能只想包围现有布局的部分,而不以其他方式更改它。 您可以使用 外,外 将盒子放在邻居的外边缘,再加上一个稍微负的 外面(。..) alignmode(这里好看的需要调整口味)。
</无翻译>
using CairoMakie
f = Figure()

for i in 1:3, j in 1:4
    Axis(f[i, j], title = "$i & $j")
    lines!(cumsum(randn(100)), color = :gray80)
end

b = Box(
    f[1:2, 1:3, Makie.GridLayoutBase.Outer()],
    alignmode = Outside(-5, -12, -8, -5),
    cornerradius = 4,
    color = (:tomato, 0.1),
    strokecolor = :tomato,
    strokewidth = 2,
)
translate!(b.blockscene, 0, 0, -200)

b2 = Box(
    f[2:3, 3:4, Makie.GridLayoutBase.Outer()],
    alignmode = Outside(-5, -12, -8, -5),
    cornerradius = 4,
    color = (:teal, 0.1),
    strokecolor = :teal,
    strokewidth = 2,
)
translate!(b2.blockscene, 0, 0, -200)

Legend(
    f[end+1, :],
    [LineElement(color = :tomato), LineElement(color = :teal)],
    ["Group 1", "Group 2"],
    framevisible = false,
    orientation = :horizontal)
f