Makies场景图入门
|
该页面正在翻译中。 |
场景构造函数:
scene = Scene(;
    # clear everything behind scene
    clear = true,
    # the camera struct of the scene.
    visible = true,
    # ssao and light are explained in more detail in `Documentation/Lighting`
    ssao = Makie.SSAO(),
    # Creates lights from theme, which right now defaults to `
    # set_theme!(lightposition=:eyeposition, ambient=RGBf(0.5, 0.5, 0.5))`
    lights = Makie.automatic,
    backgroundcolor = :gray,
    size = (500, 500);
    # gets filled in with the currently set global theme
    theme_kw...
)
一个场景在做四件事:
-
持有一个局部主题,该主题应用于该场景中的所有情节对象
-
管理摄像机、投影和变换矩阵
-
定义窗口大小。 对于子场景,子场景可以具有比父区域更小的窗口区域。
-
持有对所有窗口事件的引用
场景和子窗口
using GLMakie
scene = Scene(backgroundcolor=:gray)
subwindow = Scene(scene, viewport=Rect(100, 100, 200, 200), clear=true, backgroundcolor=:white)
scene
cam3d!(subwindow)
meshscatter!(subwindow, rand(Point3f, 10), color=:gray)
center!(subwindow)
scene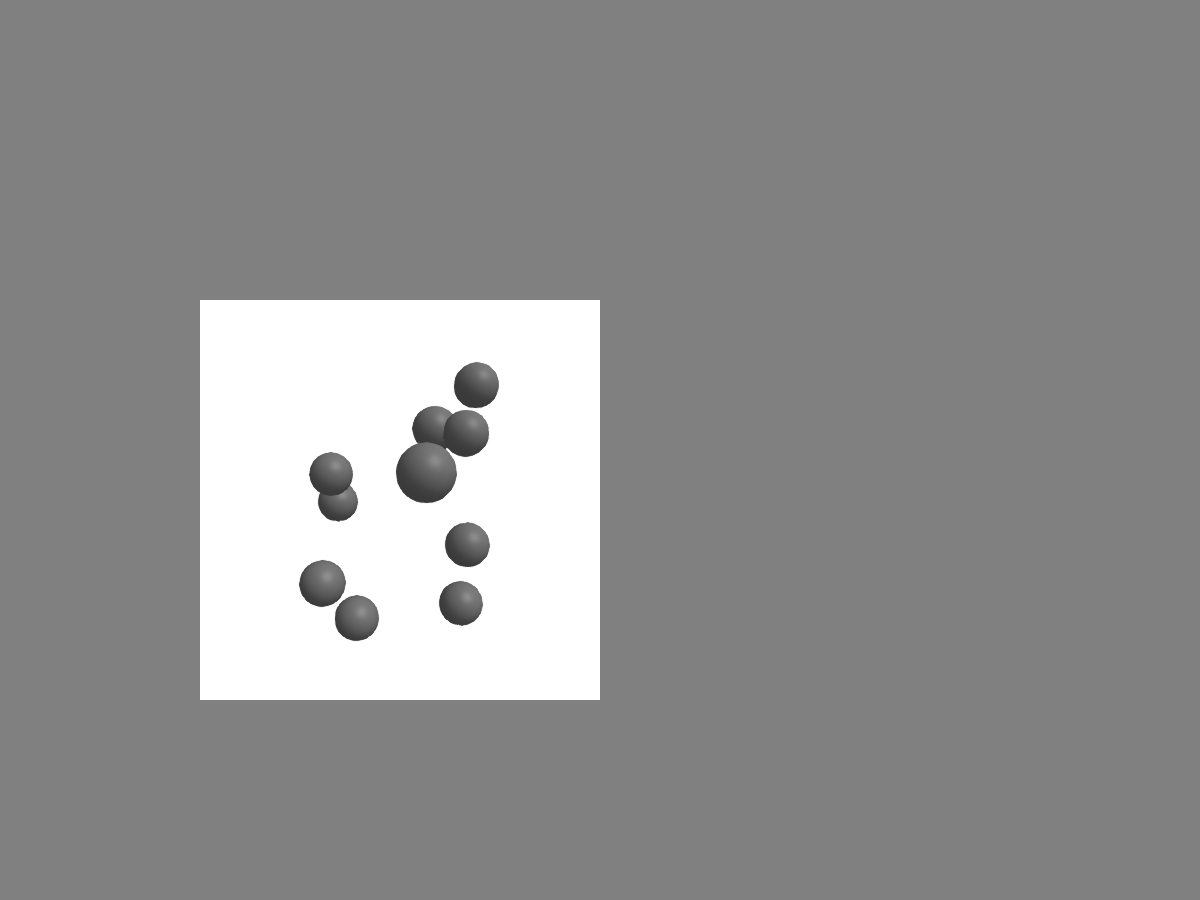
我们也可以停止清除背景以使场景透明,而不是白色背景,而是给它一个轮廓。 创建轮廓的最简单方法是,使用从0开始的投影制作子场景。.1为整个窗口。 为了制作具有特定投影类型的子场景,Makie为每个相机功能提供了一个没有 !,这将创建一个子场景,并应用相机类型。 我们称之为从0开始的空间。.1 亲戚 空间,所以 [医]嗜血性 会给出这个投影:
</无翻译>
subwindow.clear = false
relative_space = Makie.camrelative(subwindow)
# this draws a line at the scene window boundary
lines!(relative_space, Rect(0, 0, 1, 1))
scene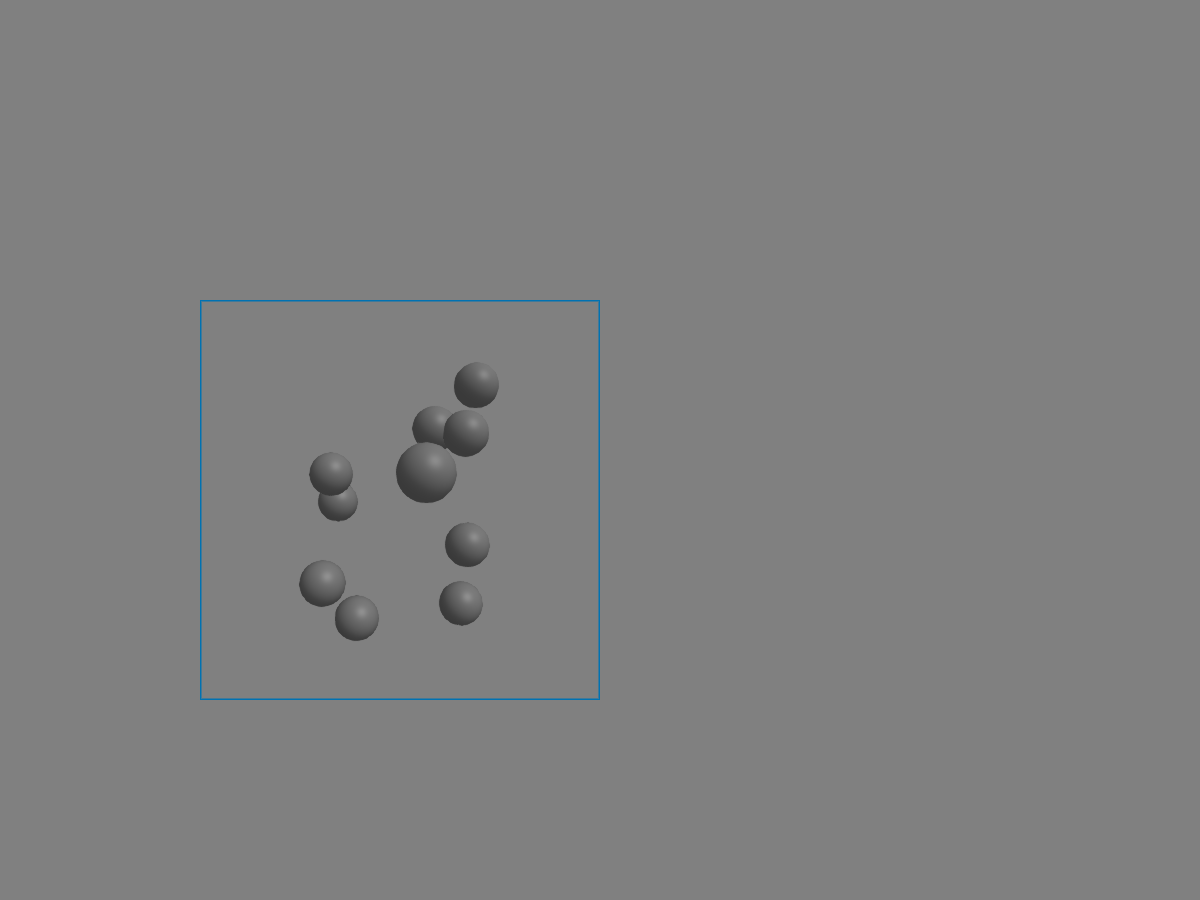
campixel!(scene)
w, h = size(scene) # get the size of the scene in pixels
# this draws a line at the scene window boundary
image!(scene, [sin(i/w) + cos(j/h) for i in 1:w, j in 1:h])
scene
translate!(scene.plots[1], 0, 0, -10000)
scene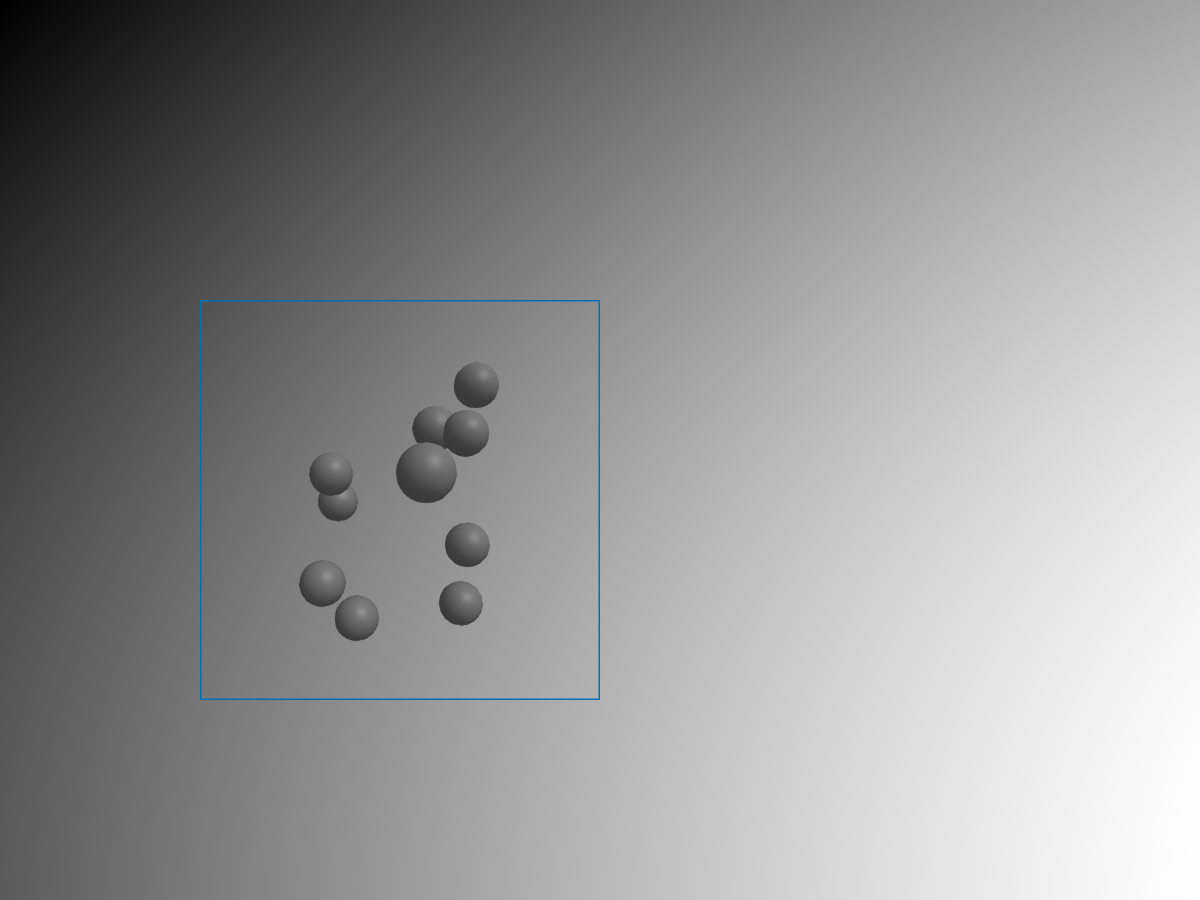
我们需要一个相当高的翻译,因为远+近平面为 campixel! 从 -1000 到 1000,而对于 cam3d! 这些会自动调整到相机参数。 两者最终都在同一个depthbuffer中,转换为范围 0..1 由远&近平面,所以要留在3d场景后面,需要将其设置为高值。
与 clear=true 我们不会有这个问题的!
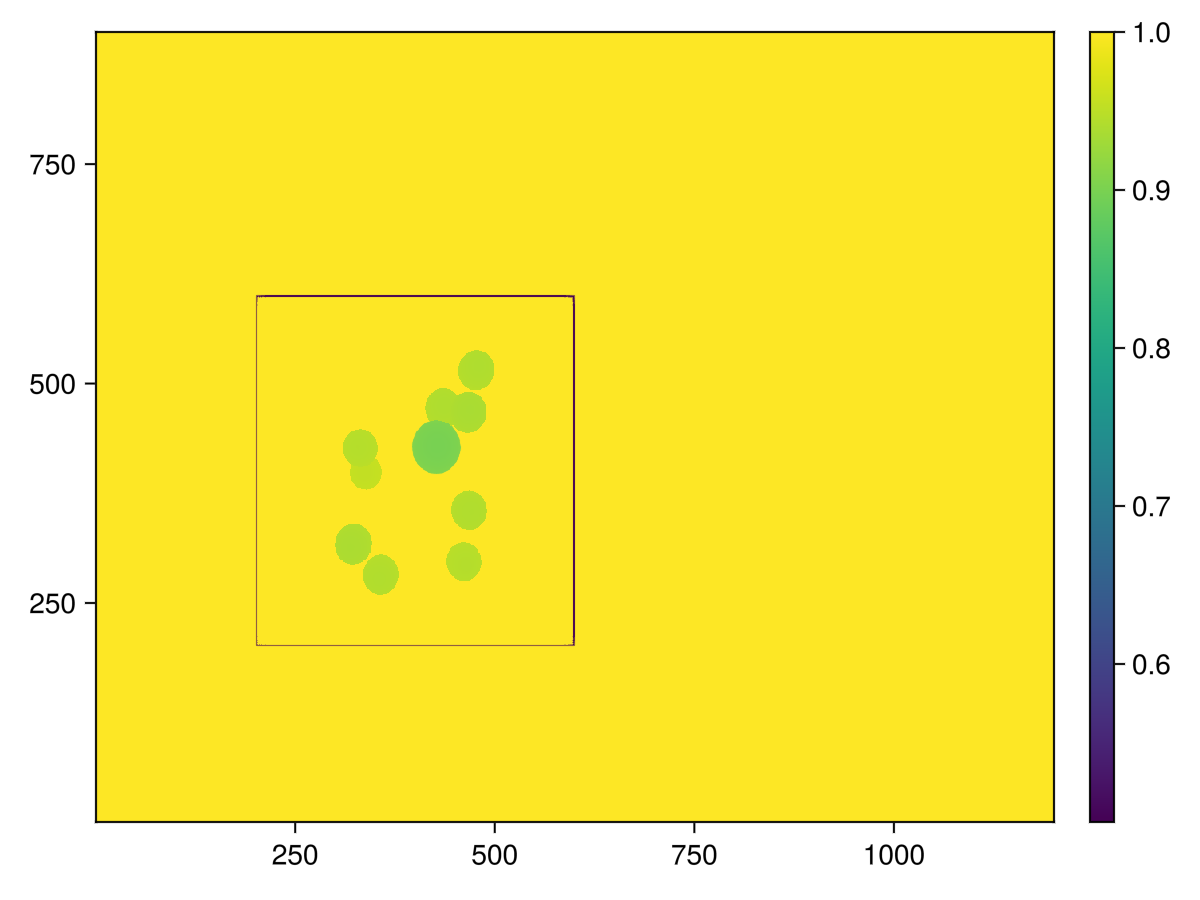
screen = display(scene) # use display, to get a reference to the screen object
depth_color = GLMakie.depthbuffer(screen)
close(screen)
# Look at result:
f, ax, pl = heatmap(depth_color)
Colorbar(f[1, 2], pl)
f
┌ Warning: │ Makie.inline!(do_inline) was set to true, but we didn't detect a display that can show the plot, │ so we aren't inlining the plot and try to show the plot in a window. │ If this wasn't set on purpose, call `Makie.inline!()` to restore the default. └ @ Makie ~/work/Makie.jl/Makie.jl/src/display.jl:157
窗口事件
每个场景还包含对所有全局窗口事件的引用:
scene.eventsEvents:
window_area: GeometryBasics.HyperRectangle{2, Int64}([0, 0], [600, 450])
window_dpi: 96.09458128078816
window_open: false
mousebutton: Makie.MouseButtonEvent(Makie.Mouse.none, Makie.Mouse.release)
mousebuttonstate: Set{Makie.Mouse.Button}()
mouseposition: (0.0, 0.0)
scroll: (0.0, 0.0)
keyboardbutton: Makie.KeyEvent(Makie.Keyboard.unknown, Makie.Keyboard.release)
keyboardstate: Set{Makie.Keyboard.Button}()
unicode_input: �
dropped_files: String[]
hasfocus: false
entered_window: false
tick: Makie.Tick(Makie.OneTimeRenderTick, 0, 0.0, 0.0)
我们可以使用这些事件来移动子窗口。 如果您在GLMakie中执行以下操作,则可以通过按鼠标左键和ctrl来移动子窗口:
on(scene.events.mouseposition) do mousepos
    if ispressed(subwindow, Mouse.left & Keyboard.left_control)
        subwindow.viewport[] = Rect(Int.(mousepos)..., 200, 200)
    end
end
投影及摄影机
scene = Scene(backgroundcolor=:gray)
lines!(scene, Rect2f(-1, -1, 2, 2), linewidth=5, color=:black)
scene
这是因为投影矩阵和视图矩阵默认是单位矩阵,而Makie的单位空间就是所谓的 剪辑空间 在OpenGL世界
cam = Makie.camera(scene) # this is how to access the scenes cameraCamera: 0 steering observables connected pixel_space: [0.0033333333333333335 0.0 0.0 -1.0; 0.0 0.0044444444444444444 0.0 -1.0; 0.0 0.0 -0.0001 -0.0; 0.0 0.0 0.0 1.0] view: [1.0 0.0 0.0 0.0; 0.0 1.0 0.0 0.0; 0.0 0.0 1.0 0.0; 0.0 0.0 0.0 1.0] projection: [1.0 0.0 0.0 0.0; 0.0 1.0 0.0 0.0; 0.0 0.0 1.0 0.0; 0.0 0.0 0.0 1.0] projectionview: [1.0 0.0 0.0 0.0; 0.0 1.0 0.0 0.0; 0.0 0.0 1.0 0.0; 0.0 0.0 0.0 1.0] resolution: Float32[600.0, 450.0] eyeposition: Float32[1.0, 1.0, 1.0] view direction: Float32[0.0, 0.0, -1.0]
cam.projection[] = Makie.orthographicprojection(-3f0, 5f0, -3f0, 5f0, -100f0, 100f0)
scene
w, h = size(scene)
nearplane = 0.1f0
farplane = 100f0
aspect = Float32(w / h)
cam.projection[] = Makie.perspectiveprojection(45f0, aspect, nearplane, farplane)
# Now, we also need to change the view matrix
# to "put" the camera into some place.
eyeposition = Vec3f(10)
lookat = Vec3f(0)
upvector = Vec3f(0, 0, 1)
cam.view[] = Makie.lookat(eyeposition, lookat, upvector)
scene
与轴和布局的交互
轴包含一个场景,该场景具有投影设置以使坐标从 (x/y)limits_min。.. (x/y)极限值. 这就是我们的阴谋。 除此之外,这是一个正常的场景,我们可以用它来创建具有较小窗口大小或不同投影的子场景。
figure, axis, plot_object = scatter(1:4)
relative_projection = Makie.camrelative(axis.scene);
scatter!(relative_projection, [Point2f(0.5)], color=:red)
# offset & text are in pixelspace
text!(relative_projection, "Hi", position=Point2f(0.5), offset=Vec2f(5))
lines!(relative_projection, Rect(0, 0, 1, 1), color=:blue, linewidth=3)
figure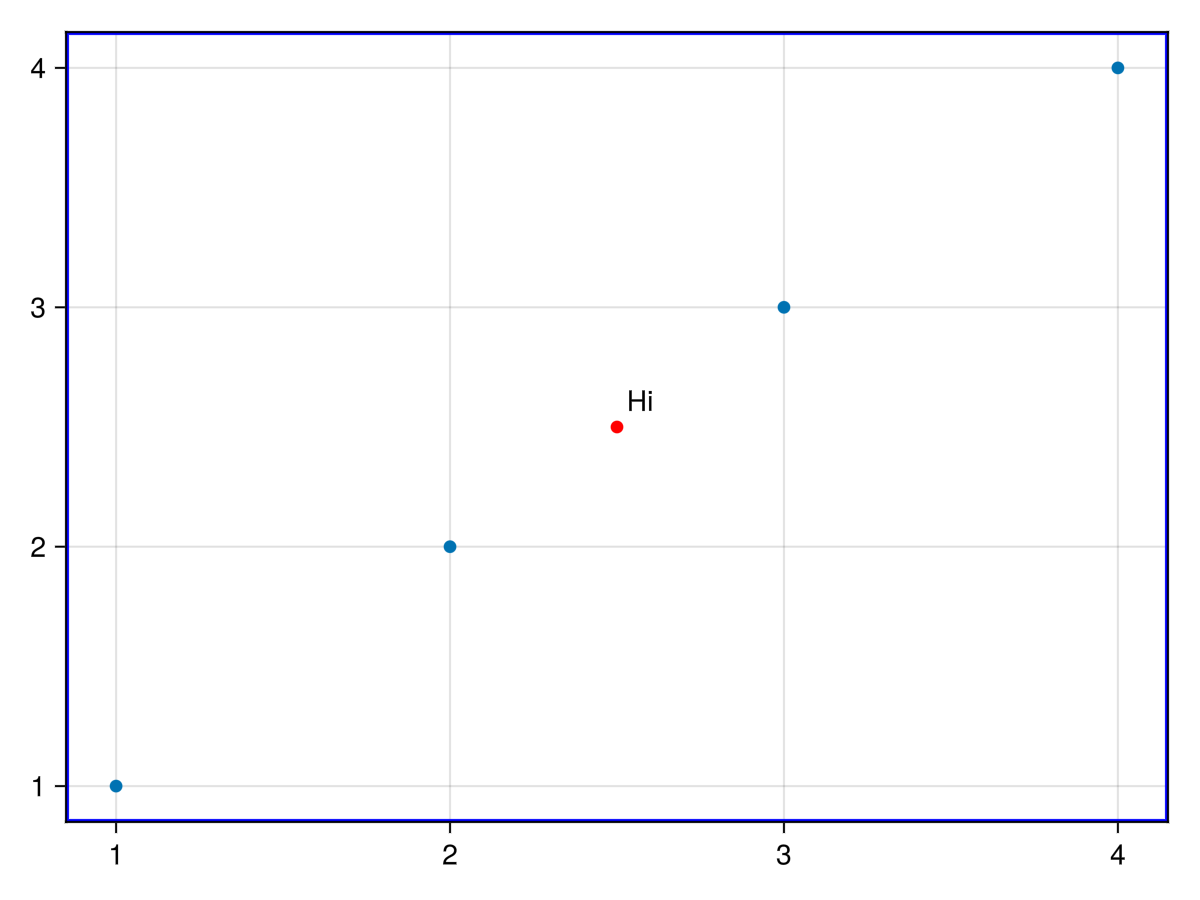
变换和场景图
到目前为止,我们只讨论场景的相机变换。 相比之下,还有场景变换,或者通常称为世界变换。 要了解更多关于不同空间的信息,https://learnopengl.com/Getting-started/Coordinate-Systems[学习opengl]提供了一些非常好的解释
"世界"转型是通过 转型 结构在Makie。 场景和情节都包含这些,因此这些类型被认为是"Makie。可转换"。 场景的转换将由添加到场景中的所有情节继承。 一个简单的方法来操纵任何 可转换 是通过这3个函数:
#
<无翻译>*麦琪翻译!*-Function
translate!(t::Transformable, xyz::VecTypes)
translate!(t::Transformable, xyz...)
对给定的应用绝对翻译 可转换 (一个场景或情节),将其翻译为 x,y,z.
#
<无翻译>*麦琪规模!*-Function
scale!([mode = Absolute], t::Transformable, xyz...)
scale!([mode = Absolute], t::Transformable, xyz::VecTypes)
缩放给定的 t::可转换 (一个场景或情节)给出的参数 xyz. 任何缺失的维度都将按1缩放。 如果 模式==Accum 给定的缩放将与前一个相乘。
scene = Scene()
cam3d!(scene)
sphere_plot = mesh!(scene, Sphere(Point3f(0), 0.5), color=:red)
scale!(scene, 0.5, 0.5, 0.5)
rotate!(scene, Vec3f(1, 0, 0), 0.5) # 0.5 rad around the y axis
scene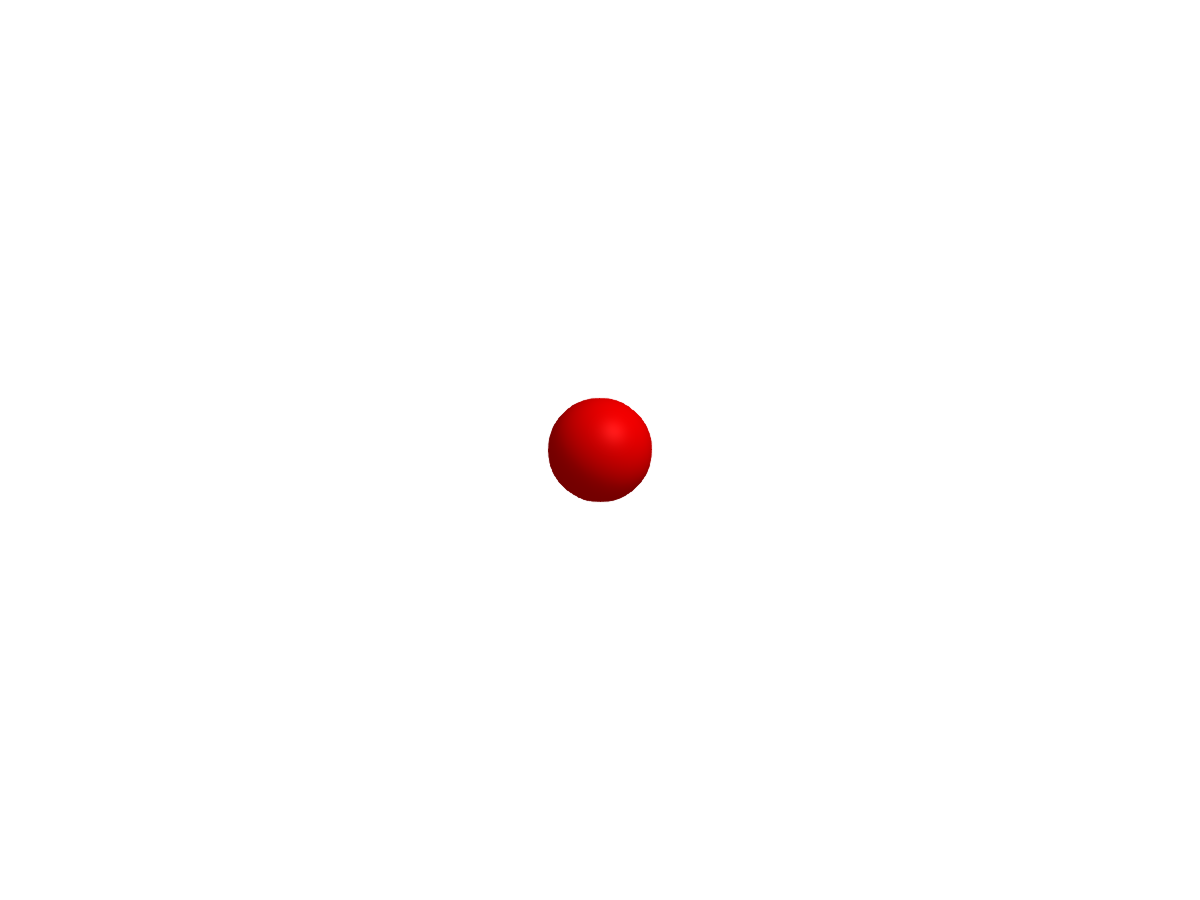
translate!(sphere_plot, Vec3f(0, 0, 1))
scene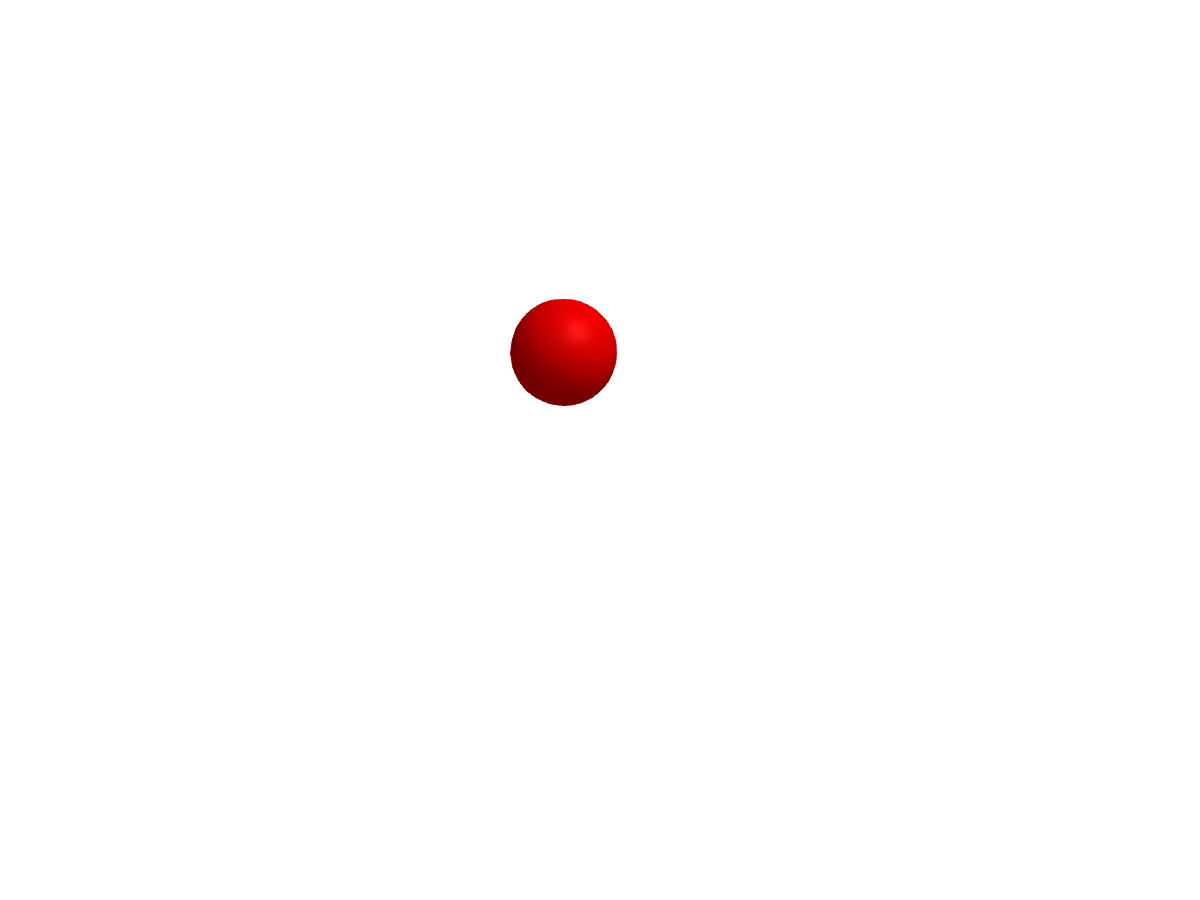
parent = Scene()
cam3d!(parent; clipping_mode = :static)

# One can set the camera lookat and eyeposition, by getting the camera controls and using `update_cam!`
camc = cameracontrols(parent)
update_cam!(parent, camc, Vec3f(0, 8, 0), Vec3f(4.0, 0, 0))
# One may need to adjust the
# near and far clip plane when adjusting the camera manually
camc.far[] = 100f0
s1 = Scene(parent, camera=parent.camera)
mesh!(s1, Rect3f(Vec3f(0, -0.1, -0.1), Vec3f(5, 0.2, 0.2)))
s2 = Scene(s1, camera=parent.camera)
mesh!(s2, Rect3f(Vec3f(0, -0.1, -0.1), Vec3f(5, 0.2, 0.2)), color=:red)
translate!(s2, 5, 0, 0)
s3 = Scene(s2, camera=parent.camera)
mesh!(s3, Rect3f(Vec3f(-0.2), Vec3f(0.4)), color=:blue)
translate!(s3, 5, 0, 0)
parent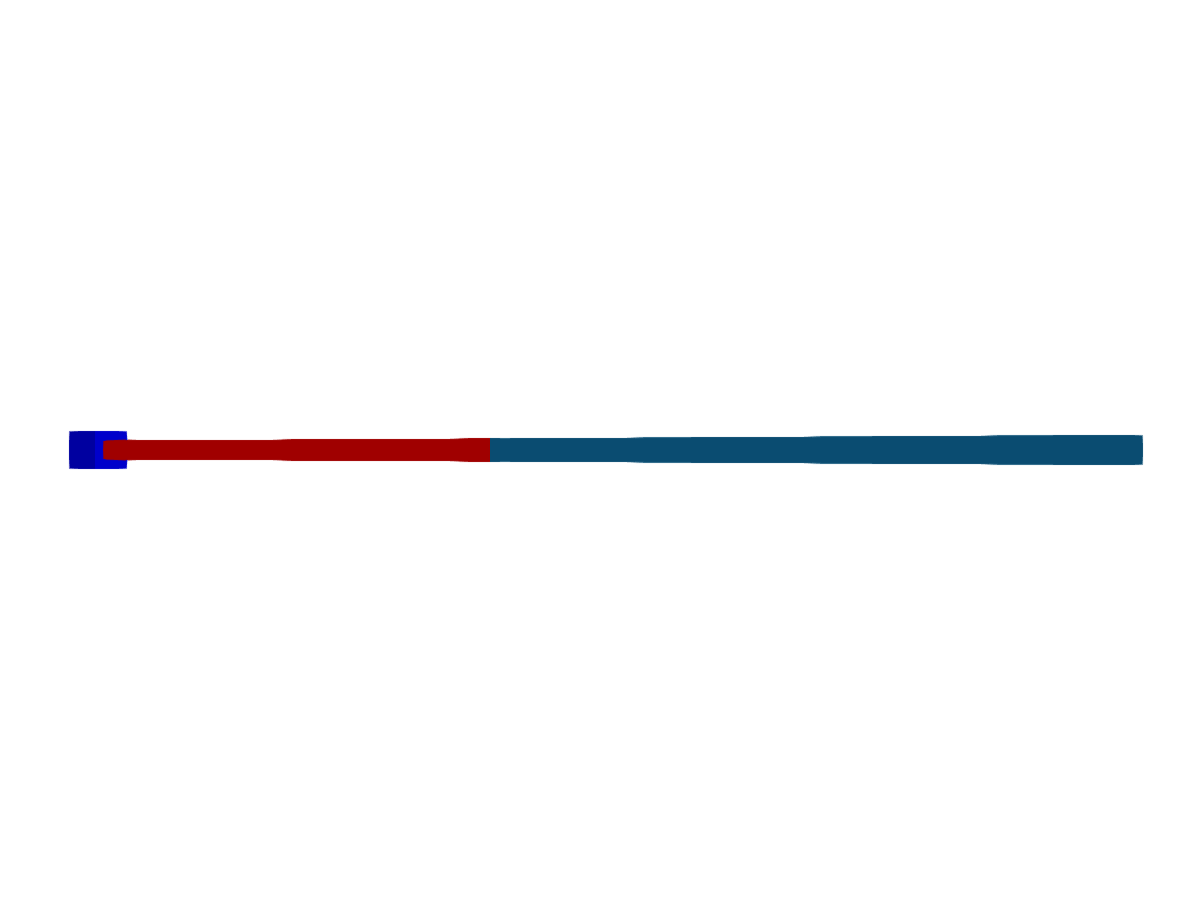
# Now, rotate the "joints"
rotate!(s2, Vec3f(0, 1, 0), 0.5)
rotate!(s3, Vec3f(1, 0, 0), 0.5)
parent
有了这个基本原则,我们甚至可以将机器人带入生活:)凯文莫曼是如此的好,提供一个乐高网格,我们要动画! 当场景图实际上只是一个变换图时,可以使用 转型 直接构造,这就是我们在这里要做的。 这比为每个模型创建场景更有效,更容易。
using MeshIO, FileIO, GeometryBasics

colors = Dict(
    "eyes" => "#000",
    "belt" => "#000059",
    "arm" => "#009925",
    "leg" => "#3369E8",
    "torso" => "#D50F25",
    "head" => "yellow",
    "hand" => "yellow"
)

origins = Dict(
    "arm_right" => Point3f(0.1427, -6.2127, 5.7342),
    "arm_left" => Point3f(0.1427, 6.2127, 5.7342),
    "leg_right" => Point3f(0, -1, -8.2),
    "leg_left" => Point3f(0, 1, -8.2),
)

rotation_axes = Dict(
    "arm_right" => Vec3f(0.0000, -0.9828, 0.1848),
    "arm_left" => Vec3f(0.0000, 0.9828, 0.1848),
    "leg_right" => Vec3f(0, -1, 0),
    "leg_left" => Vec3f(0, 1, 0),
)

function plot_part!(scene, parent, name::String)
    # load the model file
    m = load(assetpath("lego_figure_" * name * ".stl"))
    # look up color
    color = colors[split(name, "_")[1]]
    # Create a child transformation from the parent
    child = Transformation(parent)
    # get the transformation of the parent
    ptrans = Makie.transformation(parent)
    # get the origin if available
    origin = get(origins, name, nothing)
    # center the mesh to its origin, if we have one
    if !isnothing(origin)
        centered = m.position .- origin
        m = GeometryBasics.mesh(m, position = centered)
        translate!(child, origin)
    else
        # if we don't have an origin, we need to correct for the parents translation
        translate!(child, -ptrans.translation[])
    end
    # plot the part with transformation & color
    return mesh!(scene, m; color=color, transformation=child)
end

function plot_lego_figure(s, floor=true)
    # Plot hierarchical mesh and put all parts into a dictionary
    figure = Dict()
    figure["torso"] = plot_part!(s, s, "torso")
        figure["head"] = plot_part!(s, figure["torso"], "head")
            figure["eyes_mouth"] = plot_part!(s, figure["head"], "eyes_mouth")
        figure["arm_right"] = plot_part!(s, figure["torso"], "arm_right")
            figure["hand_right"] = plot_part!(s, figure["arm_right"], "hand_right")
        figure["arm_left"] = plot_part!(s, figure["torso"], "arm_left")
            figure["hand_left"] = plot_part!(s, figure["arm_left"], "hand_left")
        figure["belt"] = plot_part!(s, figure["torso"], "belt")
            figure["leg_right"] = plot_part!(s, figure["belt"], "leg_right")
            figure["leg_left"] = plot_part!(s, figure["belt"], "leg_left")

    # lift the little guy up
    translate!(figure["torso"], 0, 0, 20)
    # add some floor
    floor && mesh!(s, Rect3f(Vec3f(-400, -400, -2), Vec3f(800, 800, 2)), color=:white)
    return figure
end

# Finally, lets let him walk and record it as a video with the new, experimental ray tracing backend.

# Note: RPRMakie is still not very stable and rendering out the video is quite slow on CI, so the shown video is prerendered!

using RPRMakie
# iterate rendering 200 times, to get less noise and more light
RPRMakie.activate!(iterations=200)

radiance = 50000
# Note, that only RPRMakie supports `EnvironmentLight` so far
lights = [
    EnvironmentLight(1.5, rotl90(load(assetpath("sunflowers_1k.hdr"))')),
    PointLight(Vec3f(50, 0, 200), RGBf(radiance, radiance, radiance*1.1)),
]
s = Scene(size=(500, 500), lights=lights)
cam3d!(s)
c = cameracontrols(s)
c.near[] = 5
c.far[] = 1000
update_cam!(s, c, Vec3f(100, 30, 80), Vec3f(0, 0, -10))
figure = plot_lego_figure(s)

rot_joints_by = 0.25*pi
total_translation = 50
animation_strides = 10

a1 = LinRange(0, rot_joints_by, animation_strides)
angles = [a1; reverse(a1[1:end-1]); -a1[2:end]; reverse(-a1[1:end-1]);]
nsteps = length(angles); #Number of animation steps
translations = LinRange(0, total_translation, nsteps)

麦琪record(s,"lego_walk.mp4",zip(translations,angles))do(translation,angle)
    #旋转右臂+手
    对于名称在["arm_left","arm_right",
                            "leg_left","leg_right"]
        旋转!(图[名称],rotation_axes[名称],角度)
    结束
    翻译!(图["躯干"],翻译,0,20)
结束