Verilog(HDL)代码生成
此外 C代码生成,Verilog代码也可以从 AnyMath 中的有限块集生成。 Verilog 是一种流行的硬件描述语言(HDL),用于Asic和Fpga的设计和测试。 生成的代码可以合成到网表中,用于ASIC光刻或FPGA固件创建。
生成Verilog代码的过程在外观上类似于生成C代码。
您也可以使用该功能 generate_code,指定Verilog作为目标语言。
Verilog代码生成器功能
支持的数据类型:
-
任何宽度可达128位的整数类型,包括非标准大小(不仅仅是2的幂);
-
具有固定点和正小数部分长度的有符号类型。
也可:
-
从虚拟和原子子系统生成代码;
-
自定义模板(请参阅 根据自定义模板生成代码);
-
验证生成的代码(参见[验证])。
例子:
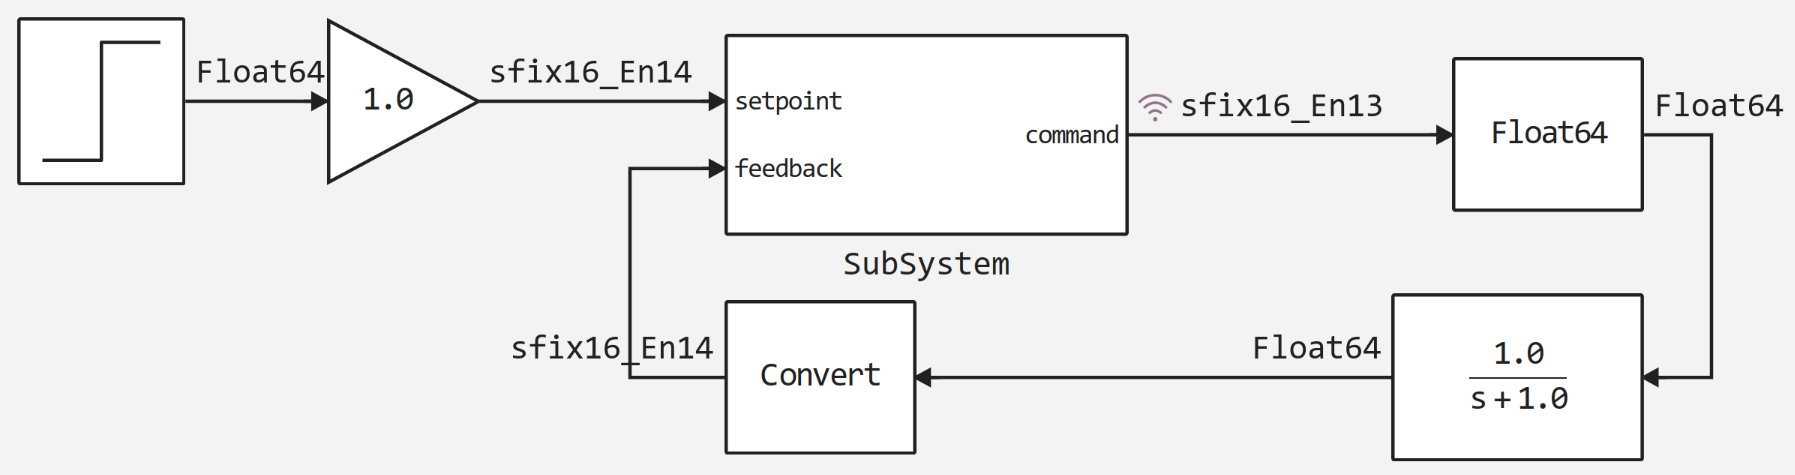
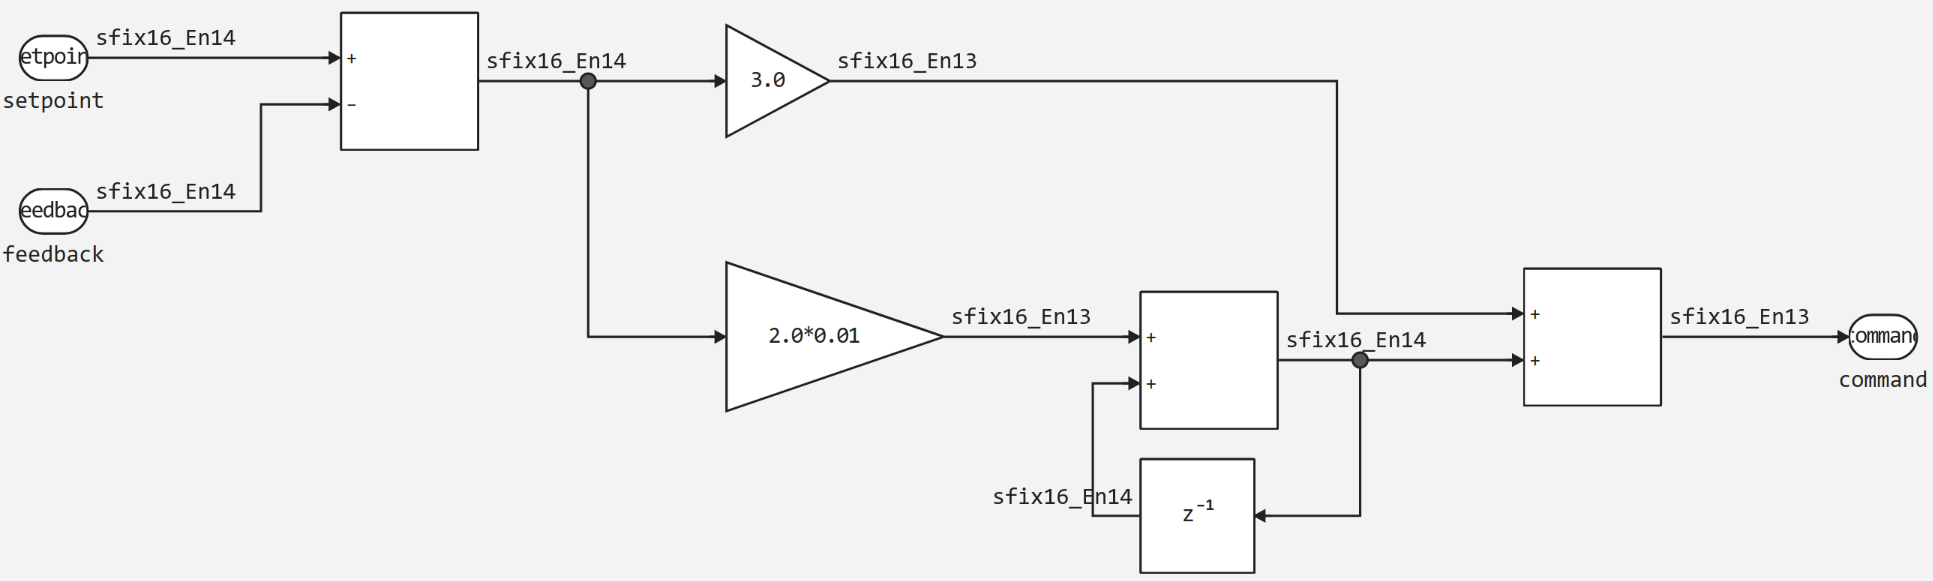
主算法在子系统中实现(块 子系统):
由于该算法是在子系统中实现的,因此将从中生成Verilog代码。 为此,您需要将Verilog设置为目标平台 设置窗口 ![]() 并在终端中执行命令:
并在终端中执行命令:
engee.generate_code("pid_fixed.engee", "pid_fixed_code", subsystem_name="SubSystem", target="verilog")这里:
-
'pid_fixed。工程师-模型名称;
-
'pid_fixed_code’是生成Verilog代码的文件夹。;
-
'subsystem_name="SubSystem"-指示从中生成代码的子系统;
-
'target="verilog"-指定代码生成器的语言。
|
您也可以使用"engee"传输当前打开的模型,而不是显式指定文件名。gcm()`: |
在执行命令后 文件浏览器  此时将显示pid_fixed文件。v在Verilog上使用以下代码:
module pid_fixed_SubSystem(
  input         clock,
                reset,
  input  [15:0] io_setpoint,
                io_feedback,
  output [15:0] io_command
);

  reg  [15:0] UnitDelay_state;
  wire [15:0] _AddAccum_T = io_setpoint - io_feedback;
  wire [41:0] _Gain_2_new_T_3 = {{26{_AddAccum_T[15]}}, _AddAccum_T} * 42'h148000;
  wire [29:0] _Gain_new_T_1 = {{14{_AddAccum_T[15]}}, _AddAccum_T} * 30'h6000;
  wire [15:0] _Add_1Accum_T = {_Gain_2_new_T_3[41:27], 1'h0} + UnitDelay_state;
  always @(posedge clock) begin
    if (reset)
      UnitDelay_state <= 16'h0;
    else
      UnitDelay_state <= _Add_1Accum_T;
  end // always @(posedge)
  assign io_command = _Gain_new_T_1[29:14] + {_Add_1Accum_T[15], _Add_1Accum_T[15:1]};
endmodule
生成的代码具有以下特性:
-
始终生成"时钟"和"复位"信号;
-
使用顺序逻辑和组合逻辑,但不支持组合循环。;
-
当信号电平为高电平时`reset’总是同步且有效(active-high)。
核实资料
验证涉及使用块创建验证模型 C函数,其仿真结果必须与具有相同输入数据的原始模型的结果相匹配。
与C代码生成一样,在"代码生成"选项卡上的设置窗口中,您可以启用"生成C功能块"选项。 在这种情况下,除了Verilog(。v)文件,带有生成的Verilog代码的文件夹将包含:
-
.jl脚本;
-
包含以下辅助文件的obj_dir文件夹:
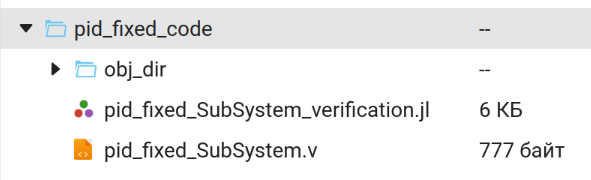
Pid_fixed_subsystem_verification文件。jl包含命令管理语言中的脚本。 要获取验证模型,您需要运行此文件。 有两种方法可以做到这一点。:

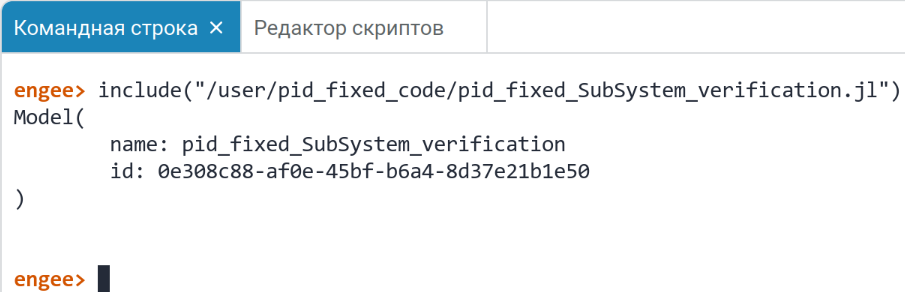


作为执行脚本的结果,将创建一个模型`{model_name}_验证。恩吉。 它包括:
-
初始模型(或子系统)的输入和输出块;
-
C功能块;
-
转换信号类型的辅助块(如果模型使用定点类型)。

简单地说,C函数 块包含从源模型生成的Verilog代码。 多亏了这一点,你可以:
|
传统的通用处理器无法直接执行用于合成的Verilog RTL代码。 但是,这是可能的使用仿真器,如 Verilator。 该工具将Verilog代码转换为行为等效的C++代码,可以运行它来比较结果。 生成的C++代码被打包到一个包含用于控制仿真的接口的库中,辅助文件被放置在obj_dir文件夹中(前面提到过)。 然后验证模型中的 C函数 块使用这个库来工作。 |
如何从内部使用Verilog

对于高级用户,例如用于生成HDL代码的模板的开发人员,了解Verilog生成的步骤非常重要。 简化,过程如下所示:
-
翻译成凿子-代码生成器将输入模型翻译成凿子语言代码。 Chisel是一种用于scala中内置的高级硬件描述的语言。 它提供了简化硬件设计的抽象,并允许您使用Scala功能来处理设计。;
-
转换为FIRRTL-Chisel暴露了高级构造并转换为FIRRTL(用于RTL的灵活中间表示)。 在这个阶段:
-
1. Reduce等高级方法正在被其低级等效方法所取代;
-
2. 定点运算转换为位运算。
-
-
使用CIRCT(firtool工具)转换为Verilog—FIRRTL的翻译将转换为最终的Verilog代码。
我如何获得凿子代码?
默认情况下,在第一阶段生成的凿子代码不会保存在代码文件夹中。 但是,它可以用于调试或开发。 要获取此文件,请使用 程序控制通过将`target="chisel"`参数传递给`generate_code`命令。 例如:
engee.generate_code(engee.gcm(), "pid_fixed_code", target="chisel", subsystem_name="SubSystem")执行Chisel命令后,代码将保存在指定的文件夹中,可用于进一步的工作。:
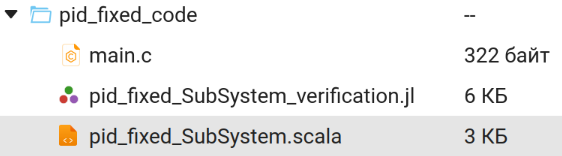
带的文件。scala扩展包含凿子代码:
凿子代码示例
//> using scala "2.13.14"
//> using dep "org.chipsalliance::chisel:6.5.0"
//> using plugin "org.chipsalliance:::chisel-plugin:6.5.0"
//> using options "-unchecked", "-deprecation", "-feature", "-language:reflectiveCalls", "-Xcheckinit", "-Xfatal-warnings", "-Wdead-code"

import chisel3._
import circt.stage.ChiselStage
import fixedpoint._

class pid_fixed_SubSystem extends Module {
	val io = IO(new Bundle{
		val setpoint = Input(FixedPoint(16.W,14.BP)) /* /setpoint */
		val feedback = Input(FixedPoint(16.W,14.BP)) /* /feedback */
		val command = Output(FixedPoint(16.W,13.BP)) /* /command */
	})
	val Add = Wire(FixedPoint(16.W,14.BP))
	val AddAccum = Wire(FixedPoint(16.W,14.BP))
	val AddCast0iosetpoint = Wire(FixedPoint(16.W,14.BP))
	val AddCast1iofeedback = Wire(FixedPoint(16.W,14.BP))
	val UnitDelay = Wire(FixedPoint(16.W,14.BP))
	val Gain_2 = Wire(FixedPoint(16.W,13.BP))
	val Gain = Wire(FixedPoint(16.W,13.BP))
	val Add_1 = Wire(FixedPoint(16.W,14.BP))
	val Add_1Accum = Wire(FixedPoint(16.W,14.BP))
	val Add_1Cast0Gain_2 = Wire(FixedPoint(16.W,14.BP))
	val Add_1Cast1UnitDelay = Wire(FixedPoint(16.W,14.BP))
	val Add_2 = Wire(FixedPoint(16.W,13.BP))
	val Add_2Accum = Wire(FixedPoint(16.W,13.BP))
	val Add_2Cast0Gain = Wire(FixedPoint(16.W,13.BP))
	val Add_2Cast1Add_1 = Wire(FixedPoint(16.W,13.BP))
	val UnitDelay_state = RegInit({ val _init = Wire(FixedPoint(16.W,14.BP)); _init := 0.0.F(16.W,14.BP); _init })

	/* Output for UnitDelay: /Unit Delay */
	UnitDelay := UnitDelay_state
	/* Sum: /Add incorporates:
	 *  Inport: /setpoint
	 *  Inport: /feedback
	 */
	AddCast0iosetpoint := io.setpoint
	AddCast1iofeedback := io.feedback
	AddAccum := AddCast0iosetpoint - AddCast1iofeedback
	Add := AddAccum
	/* Gain: /Gain-2 incorporates:
	 *  Sum: /Add
	 */
	Gain_2 := 0.02.F(16.W,13.BP) * Add
	/* Gain: /Gain incorporates:
	 *  Sum: /Add
	 */
	Gain := 3.0.F(16.W,13.BP) * Add
	/* Sum: /Add-1 incorporates:
	 *  Gain: /Gain-2
	 *  UnitDelay: /Unit Delay
	 */
	Add_1Cast0Gain_2 := Gain_2
	Add_1Cast1UnitDelay := UnitDelay
	Add_1Accum := Add_1Cast0Gain_2 + Add_1Cast1UnitDelay
	Add_1 := Add_1Accum
	/* Sum: /Add-2 incorporates:
	 *  Gain: /Gain
	 *  Sum: /Add-1
	 */
	Add_2Cast0Gain := Gain
	Add_2Cast1Add_1 := Add_1
	Add_2Accum := Add_2Cast0Gain + Add_2Cast1Add_1
	Add_2 := Add_2Accum
	/* Outport: /command incorporates:
	 *  Sum: /Add-2
	 */
	io.command := Add_2
	/* Update for UnitDelay: /Unit Delay */
	UnitDelay_state := Add_1

}


object pid_fixed_SubSystemDriver extends App {
	ChiselStage.emitSystemVerilogFile(
		new pid_fixed_SubSystem,
		firtoolOpts = Array("--disable-all-randomization", "--strip-debug-info",
		                    "--lowering-options=disallowLocalVariables"))
}| 从中创建的验证模型。只有选择Verilog作为目标平台时,jl脚本才会工作。 如果obj_dir文件夹尚未生成,则验证模型将不会启动。 |
代码模板是在生成的第一阶段公开的,因此HDL模板应该主要用凿子语言创建,必要时使用Julia的内置控制结构。
有关使用自定义代码生成模板的详细信息,请参阅文章 根据自定义模板生成代码.