条纹插件
Stipple 下载
StippleDownloads 是 Stipple 的一个插件,用于下载动态生成的文件。基于事件的处理程序可确保只有提出请求的客户端才能收到文件副本。
它支持文本和二进制文件,文件名可自由选择。
范例
Downloading a variable’s content as raw data or as BSON
using Stipple, Stipple.ReactiveTools
using StippleUI, StippleDownloads
using BSON

@app begin
    @in data = randn(1000)

    @event download_raw begin
        download_binary(__model__, data, "raw")
    end
    @event download_bson begin
        # calling @save on `data` throws an error because it is a reactive variable. Need to make a copy
        data_var = data
        io = IOBuffer()
        BSON.@save io data_var
        seekstart(io)
        download_binary(__model__, take!(io), "data.bson")
    end

end

function ui()
    row([
            cell(btn(class="q-ml-lg", "Raw", icon="download", @on(:click, :download_raw, :addclient), color="primary", nocaps=true))
            cell(btn(class="q-ml-lg", "BSON", icon="download", @on(:click, :download_bson, :addclient), color="secondary", nocaps=true))
        ])

end

@page("/", ui)
Downloading a DataFrame as an Excel sheet
using Stipple, Stipple.ReactiveTools
using StippleUI
using StippleDownloads

using DataFrames
using XLSX

import Stipple.opts
import StippleUI.Tables.table

function df_to_xlsx(df)
    io = IOBuffer()
    XLSX.writetable(io, df)
    take!(io)
end

@app begin
    @out table = DataTable(DataFrame(:a => rand(1:10, 5), :b => rand(1:10, 5)))
    @in text = "The quick brown fox jumped over the ..."

    @event download_text begin
        download_text(__model__, :text)
    end

    @event download_df begin
        try
            download_binary(__model__, df_to_xlsx(table.data), "file.xlsx"; client = event["_client"])
        catch ex
            println(ex)
        end
    end
end

function ui()
    row(cell(class = "st-module", [

        row([
            cell(textfield(class = "q-pr-md", "Download text", :text, placeholder = "no output yet ...", :outlined, :filled, type = "textarea"))
            cell(table(class = "q-pl-md", :table))
        ])

        row([
            cell(col = 1, "Without client info")
            cell(btn("Text File", icon = "download", @on(:click, :download_text), color = "primary", nocaps = true))
            cell(col = 1, "With client info")
            cell(btn(class = "q-ml-lg", "Excel File", icon = "download", @on(:click, :download_df, :addclient), color = "primary", nocaps = true))
        ])
    ]))
end

@page("/", ui)

up(open_browser = true)
要查看有无客户信息呼叫的区别,请复制应用程序的选项卡并单击 "下载文本 "按钮。
将下载两个完全相同的文件,因为复制标签页会建立应用程序的同步副本。为确保只有提出请求的客户端才会收到文件,应通过`event["_client"]` 将下载限制在客户端,并确保触发按钮有一个额外的`:addclient` ,以包含此信息。
StippleMarkdown
在 Genie 应用程序中渲染 Markdown 文本
此软件包提供了两个新的 Stipple 组件:markdowntext 和`markdowncard` 。作为参数,您可以传递 Markdown 文本字符串或指向包含 Markdown 文本的变量的符号。
using GenieFramework
@genietools
using StippleMarkdown

@app begin
    @out txt = "**hello** world"
end
@deps StippleMarkdown

ui() = [ markdowntext(:txt), markdowntext("## Hello World!"), markdowncard(:txt), markdowncard("## Hello World!\n This is a Markdown card")]

@page("/", ui)
StippleLatex
StippleLatex 使用 Vue-Katex 在 Stipple 中加入 LaTeX 格式。在网页中输入 LaTeX 内容有三种可能性
-
Latex-span 元素。
latex(<LaTeX formula>, <formatting options>) -
通过带有可选修饰符的字符串宏来显示含有乳胶内容的 HTML 元素,修饰符的值可以是
auto或`display`span(latex"<LaTeX formula>")span(latex"<LaTeX formula>"display) -
通过带有附加选项的`@latex` 宏,为 HTML 元素添加 latex 内容
span(@latex(raw"<LaTeX formula>")span(@latex(raw"<LaTeX formula>", display = true)
所有参数还支持符号绑定到模型字段。下面是一个演示应用程序,展示了可能的用例。
using Stipple, Stipple.ReactiveTools
using StippleUI
using StippleLatex

## define a small formula generator
function nestlist(f, a; init = nothing)
    T = eltype(a)
    list = T[]
    el = init
    for (i, x) in enumerate(a)
        el = i == 1 && init === nothing ? x : f(el, x)
        push!(list, el)
    end
    list
end

formula = nestlist(*, ["", raw"\sin", "^2", " x", " +", raw" \sqrt{", "a", "^2", " +", " b", "^2"])
formula[contains.(formula, "sqrt")] .*= "}"

## setting up the app
@app begin
    @in x = 0
    @in formula_1 = raw"\int_{a}^{b} f(x) \, dx = F(x)\Biggr|^b_a"
    @in formula_2 = raw""
    @private p = @task 1 + 1

    @onchange isready begin
        if !istaskstarted(p) || istaskdone(p)
            p = @task begin
                println("Task started")
                while x <= 100
                    sleep(1)
                    x += 1
                    pos = x < 6 ? 1 : (x - 5) % (length(formula) + 5) + 1
                    formula_2 = formula[min(pos, length(formula))]
                end
            end
            schedule(p)
        end
    end
end

function ui()
    [
        row(cell(class = "st-module", [
            cell(h1(latex("\\LaTeX") * "-Demo"))
            cell(h2(latex"a^2 + b^2 = c^2"))
        ]))

        row(cell(class = "st-module", [
            textfield("Enter your LaTeX-Forumla", :formula_1,)
            cell(class = "q-pa-md", latex":formula_1"display)
            row([
                cell(class = "q-pa-md bg-red-1", raw"""cell(latex"\cos^2x"display)""")
                cell(class = "q-pa-md bg-green-1", latex"\cos^2x"display)
            ])
            row([
                cell(class = "q-pa-md bg-red-1", raw"""cell(latex"This is auto mode with a formula \(\cos^2x\)"auto)""")
                cell(class = "q-pa-md bg-green-1", latex"This is auto mode with a formula \(\cos^2x\)"auto)
            ])
            row([
                cell(class = "q-pa-md bg-red-1", raw"""latex(class = "q-pa-md", raw"\tan^2x", display = true)""")
                cell(class = "bg-green-1 q-pa-md", latex(class = "q-pa-md", raw"\tan^2x", display = true))
            ])
            bignumber("Wait for 5", :x, color = R"x >= 5 ? 'negative' : 'positive'", icon = "calculate")

            row([
                cell(class = "q-pa-md bg-red-1", raw"""cell(class = "q-pa-md", @latex(raw"\tanh^2 y", display = R"x >= 5"))""")
                cell(class = "q-pa-md bg-green-1", @latex(raw"\tanh^2 y", display = R"x >= 5"))
            ])


            row([
                cell(class = "q-pa-md bg-red-1", raw"""@latex(raw"This is auto mode with an inline formula \(\cos^2x\) and a display formula $$\sin^2x$$""")
                cell(class = "q-pa-md bg-green-1", @latex(raw"This is auto mode with an inline formula \(\cos^2x\) and a display formula $$\sin^2x$$", auto = true))
            ])
        ]))

        row(cell(class = "st-module", [
            textfield(class = "q-pa-lg", "LaTeX", :formula_2)
            cell(class = "q-pa-md", "Result:")
            cell(class = "q-pa-md", latex":formula_2"display)
        ]))
    ]
end

route("/") do
    page(@init(), ui()) |> html
end

up()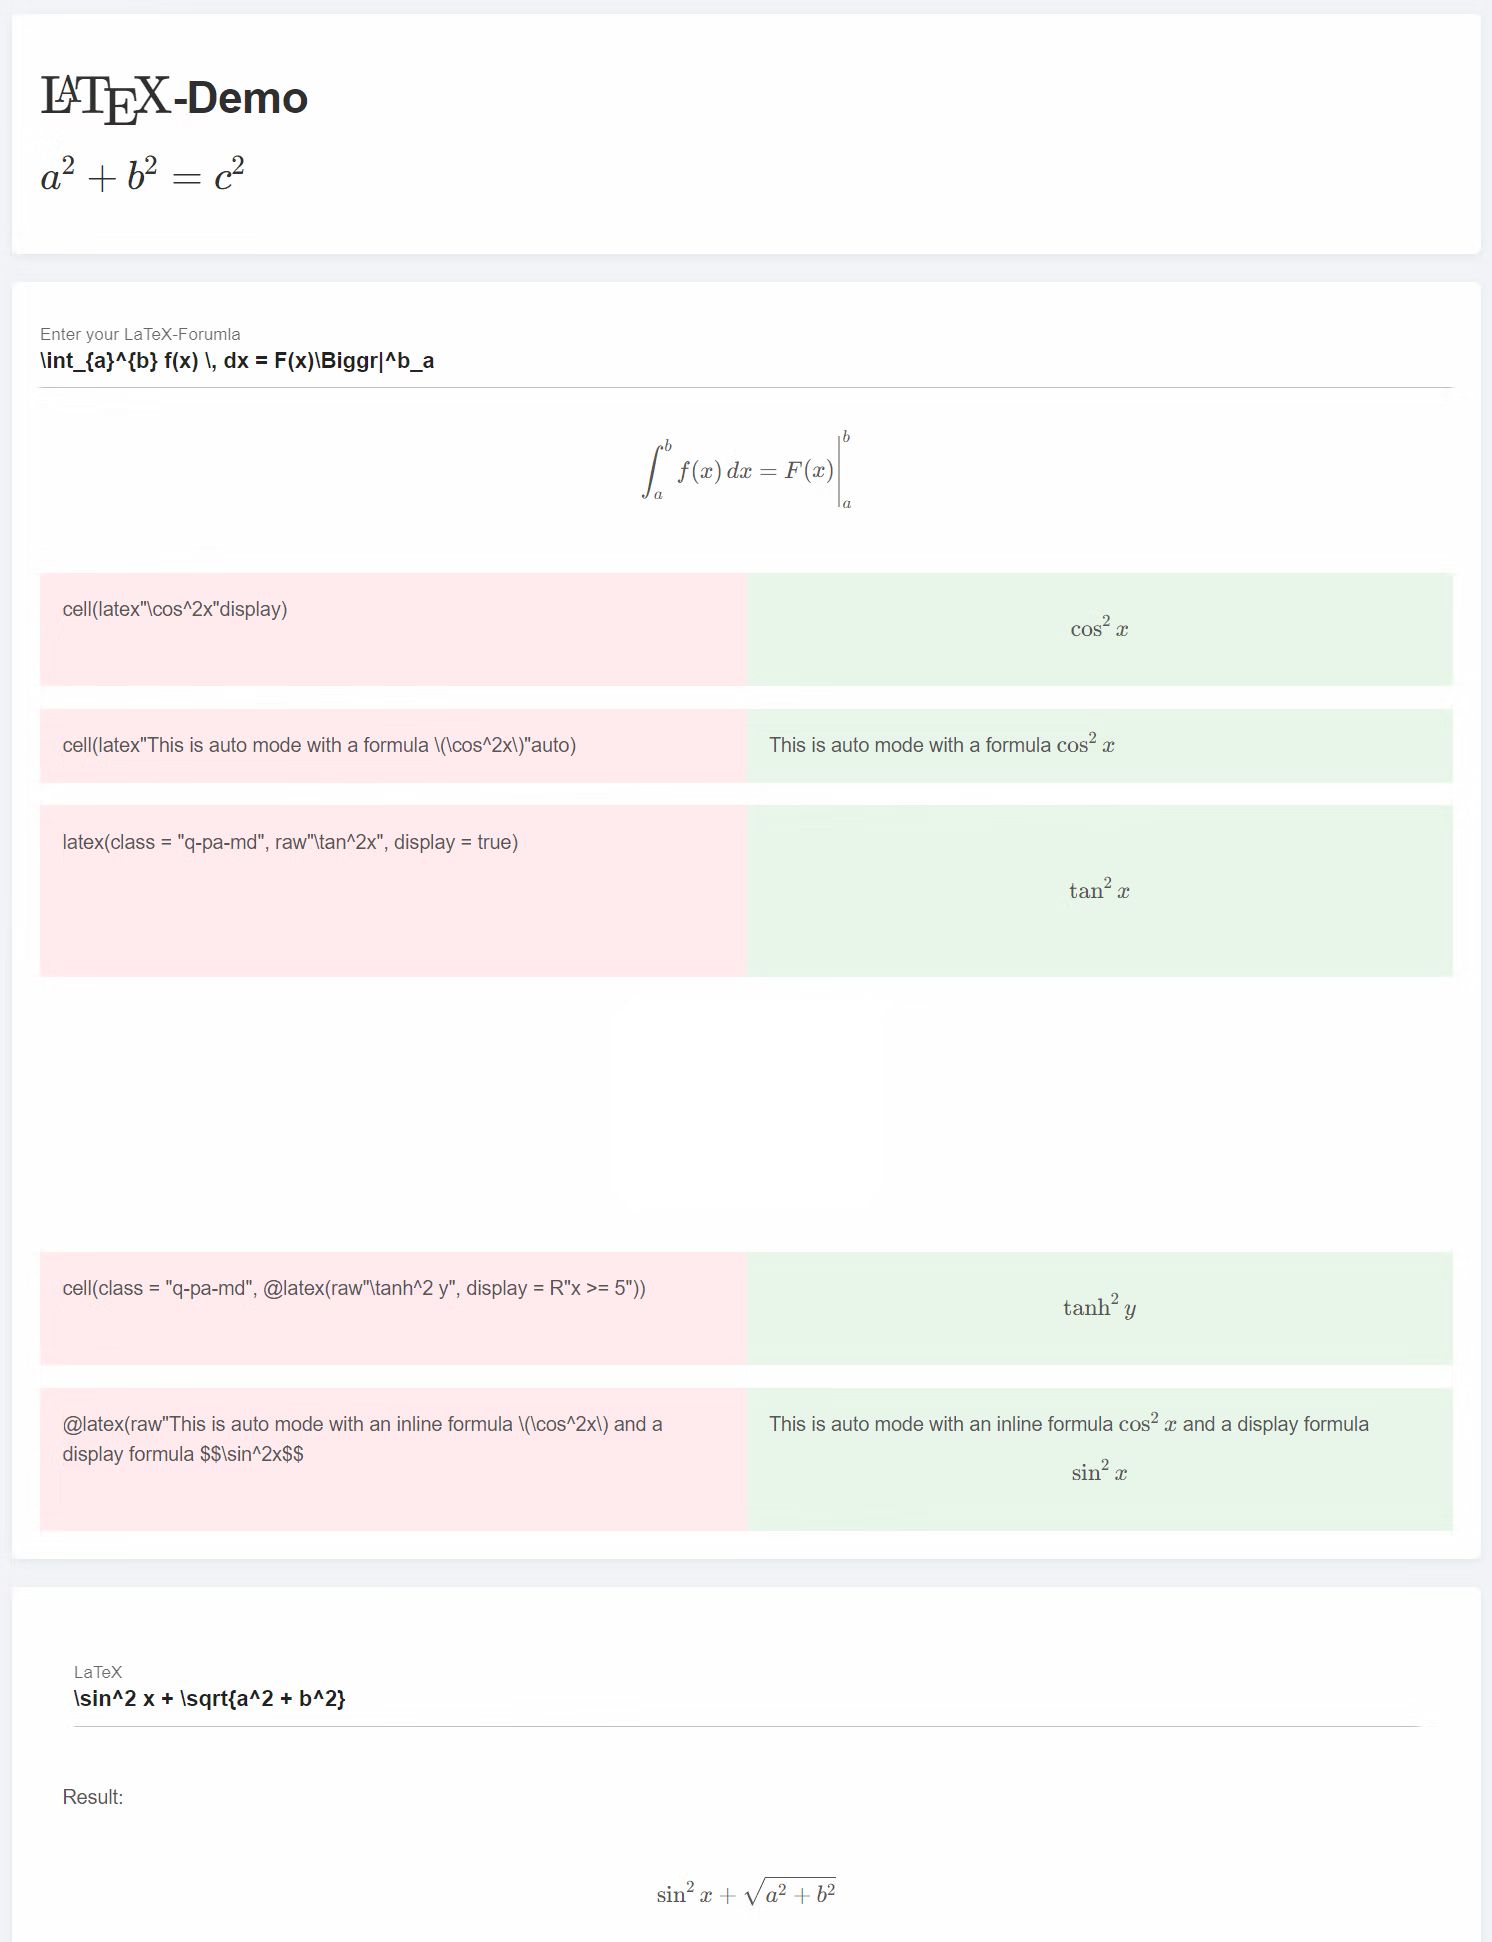
StippleMathjs
StippleMathjs 将 mathjs 添加到您的 Stipple 或 GenieFramwork 项目中。
此外,它还能在服务器和客户端之间自动转换所有类型的`Complex` 数字。
应用程序示例
using Stipple, Stipple.ReactiveTools
using StippleUI
using StippleMathjs


x0 = 1.0
y0 = 2.0

@app begin
    @in x = x0
    @in y = y0
    @in z = x0 + y0 * im
    @in z2::ComplexF64 = x0 + y0 * im

    @onchange x, y begin
        # update z without triggering `@onchange z`
        z[!] = x + y * im

        # update x and y of the client(s)
        @push z
    end

    @onchange z begin
        # update x and y without triggering `@onchange x, y`
        x[!] = z.re
        y[!] = z.im

        # update x and y of the client(s)
        @push x
        @push y
    end
end

@deps StippleMathjs

function ui()
    [
        card(class = "q-pa-md", [
            numberfield(class = "q-ma-md", "x", :x)
            numberfield(class = "q-ma-md", "y", :y)
        ])

        card(class = "q-pa-md q-my-md", [
            row([cell(col = 2, "z"),        cell("{{ z }}")])
            row([cell(col = 2, "z.mul(z)"), cell("{{ z.mul(z) }}")])
            row([cell(col = 2, "z.abs()"),  cell("{{ z.abs() }}")])

            btn(class = "q-my-md", "square(z)", color = "primary", @click("z = z.mul(z)"))
        ])
    ]
end

@page("/", ui, debounce = 10)
up()
带有正确 Manifest.toml 的示例应用程序可从 StippleDemos.jl 上获取。
StippleKeplerGL.jl
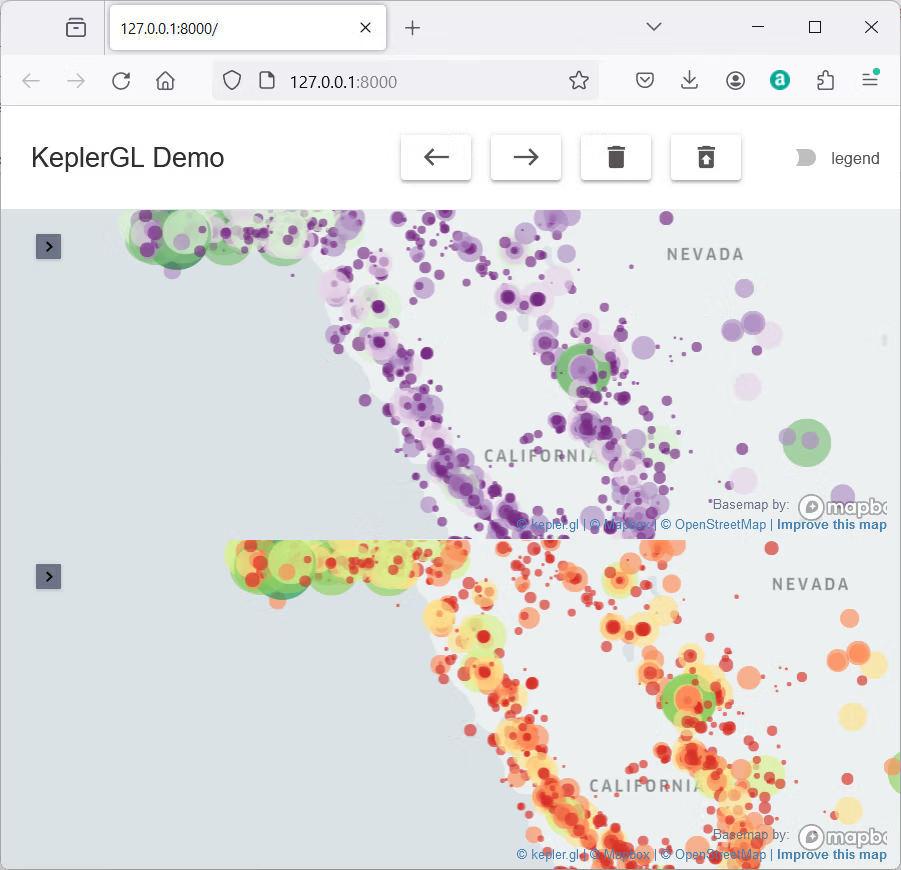
Julia 软件包,用于将 KeplerGL 地图集成到 Genie/Stipple 应用程序中。
示例
using Stipple, Stipple.ReactiveTools
using StippleUI
using StippleKeplerGL
using DataFrames
using CSV
using Colors
using ColorBrewer

keplergl_path = Base.pkgdir(isdefined(@__MODULE__, :KeplerGLBase) ? KeplerGLBase : KeplerGL)
df = CSV.read(joinpath(keplergl_path, "assets", "example_data", "data.csv"), DataFrame)

## token = "token please"

m1 = KeplerGL.KeplerGLMap(token, center_map=false)

KeplerGL.add_point_layer!(m1, df, :Latitude, :Longitude,
    color = colorant"rgb(23,184,190)", color_field = :Magnitude, color_scale = "quantize",
    color_range = ColorBrewer.palette("PRGn", 6),
    radius_field = :Magnitude, radius_scale = "sqrt", radius_range = [4.2, 96.2], radius_fixed = false,
    filled = true, opacity = 0.39, outline = false
)

m1.config[:config][:mapState][:latitude] = 38.32068477880718
m1.config[:config][:mapState][:longitude]= -120.42806781055732
m1.config[:config][:mapState][:zoom] = 4.886825331541375
m1.window[:map_legend_show] = m1.window[:map_legend_active] = m1.window[:visible_layers_show] = m1.window[:visible_layers_active] = false

m2 = KeplerGL.KeplerGLMap(token, center_map=false)

KeplerGL.add_point_layer!(m2, df, :Latitude, :Longitude,
    color = colorant"rgb(23,184,190)", color_field = :Magnitude, color_scale = "quantize",
    color_range = ColorBrewer.palette("RdYlGn", 6),
    radius_field = :Magnitude, radius_scale = "sqrt", radius_range = [4.2, 96.2], radius_fixed = false,
    filled = true, opacity = 0.39, outline = false
)

m2.config[:config][:mapState][:latitude] = 38.32068477880718
m2.config[:config][:mapState][:longitude]= -122.42806781055732
m2.config[:config][:mapState][:zoom] = 4.886825331541375
m2.window[:map_legend_show] = m2.window[:map_legend_active] = m2.window[:visible_layers_show] = m2.window[:visible_layers_active] = false

d1, d2 = m1.datasets, m2.datasets

@app begin
    @out map1 = m1
    @out map2 = m2
    @in clear_data = false
    @in restore_data = false
    @in show_legend = false
    @in go_west = false
    @in go_east = false

    @onbutton clear_data begin
        __model__["map1.datasets"] = []
        __model__["map2.datasets"] = []
    end

    @onbutton restore_data begin
        __model__["map1.datasets"] = d1
        __model__["map2.datasets"] = d2
    end

    @onbutton go_west begin
        map1.config[:config][:mapState][:longitude] -= 1
        __model__["map1.config.config.mapState.longitude"] = map1.config[:config][:mapState][:longitude]

        map2.config[:config][:mapState][:longitude] -= 1
        __model__["map2.config.config.mapState.longitude"] = map2.config[:config][:mapState][:longitude]
    end

    @onbutton go_east begin
        map1.config[:config][:mapState][:longitude] += 1
        __model__["map1.config.config.mapState.longitude"] = map1.config[:config][:mapState][:longitude]

        map2.config[:config][:mapState][:longitude] += 1
        __model__["map2.config.config.mapState.longitude"] = map2.config[:config][:mapState][:longitude]
    end

    @onchange show_legend begin
        __model__["map1.window.map_legend_show"] = show_legend
        __model__["map2.window.map_legend_show"] = show_legend

        # alternatively, one could use the following lines to show the legend via the backend
        # but this will transmit the full map data to the frontend

        # map1.window[:map_legend_show] = show_legend
        # notify(map1)
    end
end

@deps StippleKeplerGL
isdefined(Stipple, :register_global_components) && Stipple.register_global_components("VueKeplerGl", legacy = true)

ui() = [
    column(class = "full-height", [
        row(col = :auto, class = "items-center", [
            h5(class = "col-auto q-pl-lg q-py-md", "KeplerGL Demo")
            cell()
            btn(col = :auto, "", icon = "west", @click(:go_west), class = "q-mr-md", [tooltip("go west")])
            btn(col = :auto, "", icon = "east", @click(:go_east), class = "q-mr-md", [tooltip("go east")])
            btn(col = :auto, "", icon = "delete", @click(:clear_data), class = "q-mr-md", [tooltip("clear data")])
            btn(col = :auto, "", icon = "restore_from_trash", @click(:restore_data), class = "q-mr-md", [tooltip("restore data")])
            toggle(col = :auto, "legend", :show_legend, class = "q-mr-md")
        ])

        cell(keplergl(:map1, ref = "map1", id = "map1"))
        cell(keplergl(:map2, ref = "map2"))
    ])
]

route("/") do
    # uncomment next line for testing / debugging
    global model
    model = @init
    page(class = "fixed-full", model, ui) |> html
end

up(open_browser = true)
纹理类型数组
StippleTypedArrays 是一个用于集成 Javascript TypedArrays 的 Stipple 插件。
典型用例是用于下载文件或通过二进制通道处理和发送信息的缓冲区。
StippleTypedArrays 引入了一个 Vector wrapper`TypedArray` ,可用于应用程序变量的类型声明。
注意事项
在后台,所有处理程序都能正常工作。但是,在客户端,JavaScript 无法观察类型数组,因此客户端缓冲区的任何变化都不会自动同步。
如果要将数据同步到服务器,必须在更新值后调用`this.push('data')` 。
演示应用程序
using Stipple, Stipple.ReactiveTools
using StippleUI
using StippleTypedArrays
using StippleDownloads
@app begin
@in data = TypedArray(UInt8[])a
@in data64 = TypedArray(UInt64[])
@in add_data = false
@in clear_data = false
@onbutton add_data begin
x = rand(0:255)
push!(data, x)
notify(data)
push!(data64, x + 1000)
notify(data64)
end
@onbutton clear_data begin
data = data64 = []
end
end
@deps StippleTypedArrays
function ui()
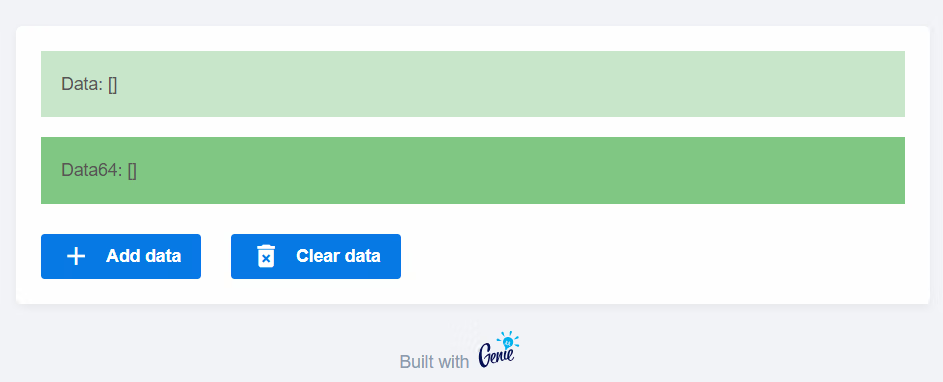
row(cell(class = "st-module q-ma-md", [
row(class = "q-pa-md bg-green-2", "Data: [{{ data }}]")
row(class = "q-pa-md q-my-lg bg-green-4", "Data64: [{{ data64 }}]")
row([
btn("Add data", icon = "add", @click(:add_data), color = "primary", nocaps = true)
btn(class = "q-ml-lg", "Clear data", icon = "delete_forever", @click(:clear_data), color = "primary", nocaps = true)
])
]))
end
@page("/", ui)
up(open_browser = true)