A primer on Makies scene graph
|
The page is in the process of being translated. |
The scene constructor:
scene = Scene(;
    # clear everything behind scene
    clear = true,
    # the camera struct of the scene.
    visible = true,
    # ssao and light are explained in more detail in `Documentation/Lighting`
    ssao = Makie.SSAO(),
    # Creates lights from theme, which right now defaults to `
    # set_theme!(lightposition=:eyeposition, ambient=RGBf(0.5, 0.5, 0.5))`
    lights = Makie.automatic,
    backgroundcolor = :gray,
    size = (500, 500);
    # gets filled in with the currently set global theme
    theme_kw...
)
A scene is doing four things:
-
holds a local theme, that gets applied to all plot objects in that scene
-
manages the camera, projection and transformation matrices
-
defines the window size. For sub-scenes, the child scene can have smaller window areas than the parent area.
-
holds a reference to all window events
Scenes and subwindows
With scenes, one can create subwindows. The window extends are given by a Rect{2, Int} and the position is always in window pixels and relative to the parent.
using GLMakie
scene = Scene(backgroundcolor=:gray)
subwindow = Scene(scene, viewport=Rect(100, 100, 200, 200), clear=true, backgroundcolor=:white)
scene
When using Scenes directly, one needs to manually set up the camera and center the camera to the content of the scene As described in more detail the camera section, we have multiple cam***! functions to set a certain projection and camera type for the scene.
cam3d!(subwindow)
meshscatter!(subwindow, rand(Point3f, 10), color=:gray)
center!(subwindow)
scene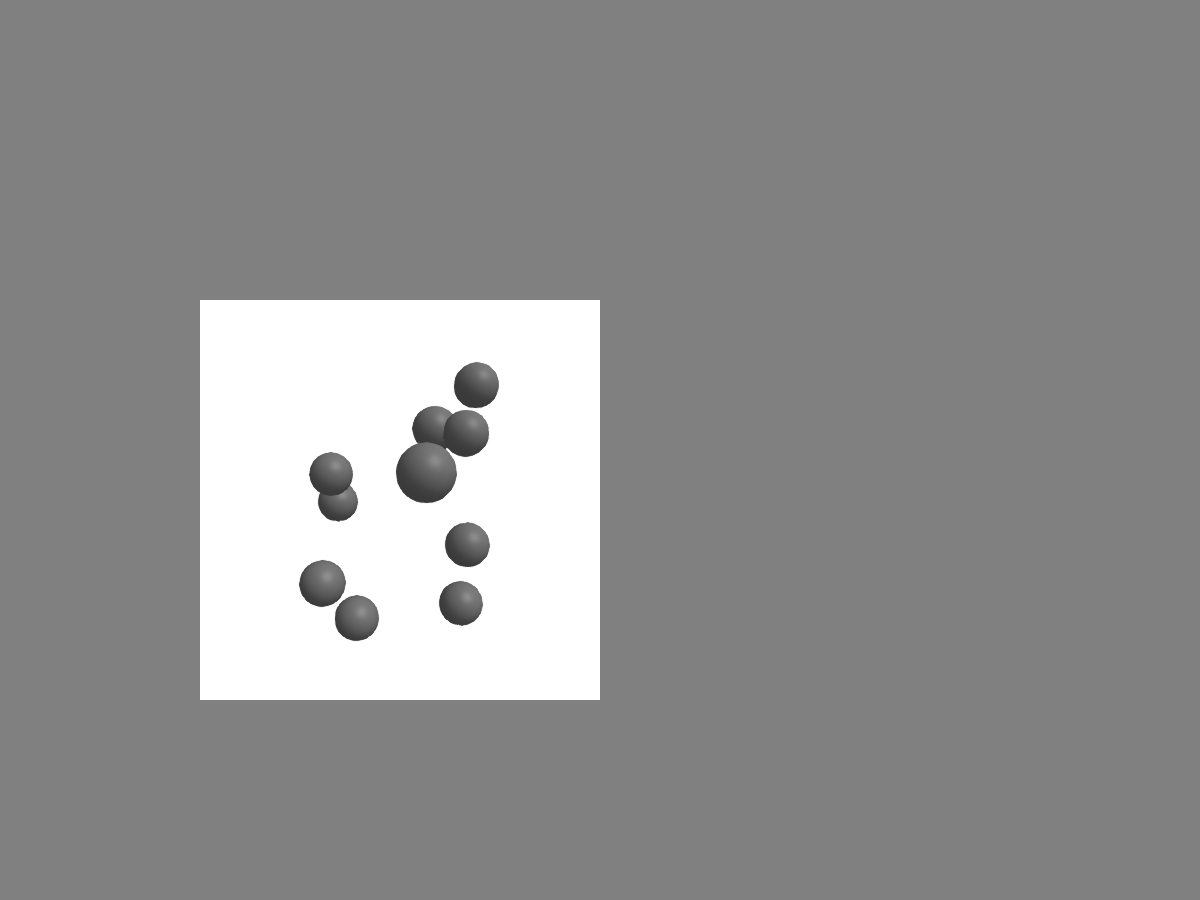
Instead of a white background, we can also stop clearing the background to make the scene see-through, and give it an outline instead. The easiest way to create an outline is, to make a sub scene with a projection that goes from 0..1 for the whole window. To make a subscene with a certain projection type, Makie offers for each camera function a version without !, that will create a subscene, and apply the camera type. We call the space that goes from 0..1 relative space, so camrelative will give this projection:
subwindow.clear = false
relative_space = Makie.camrelative(subwindow)
# this draws a line at the scene window boundary
lines!(relative_space, Rect(0, 0, 1, 1))
scene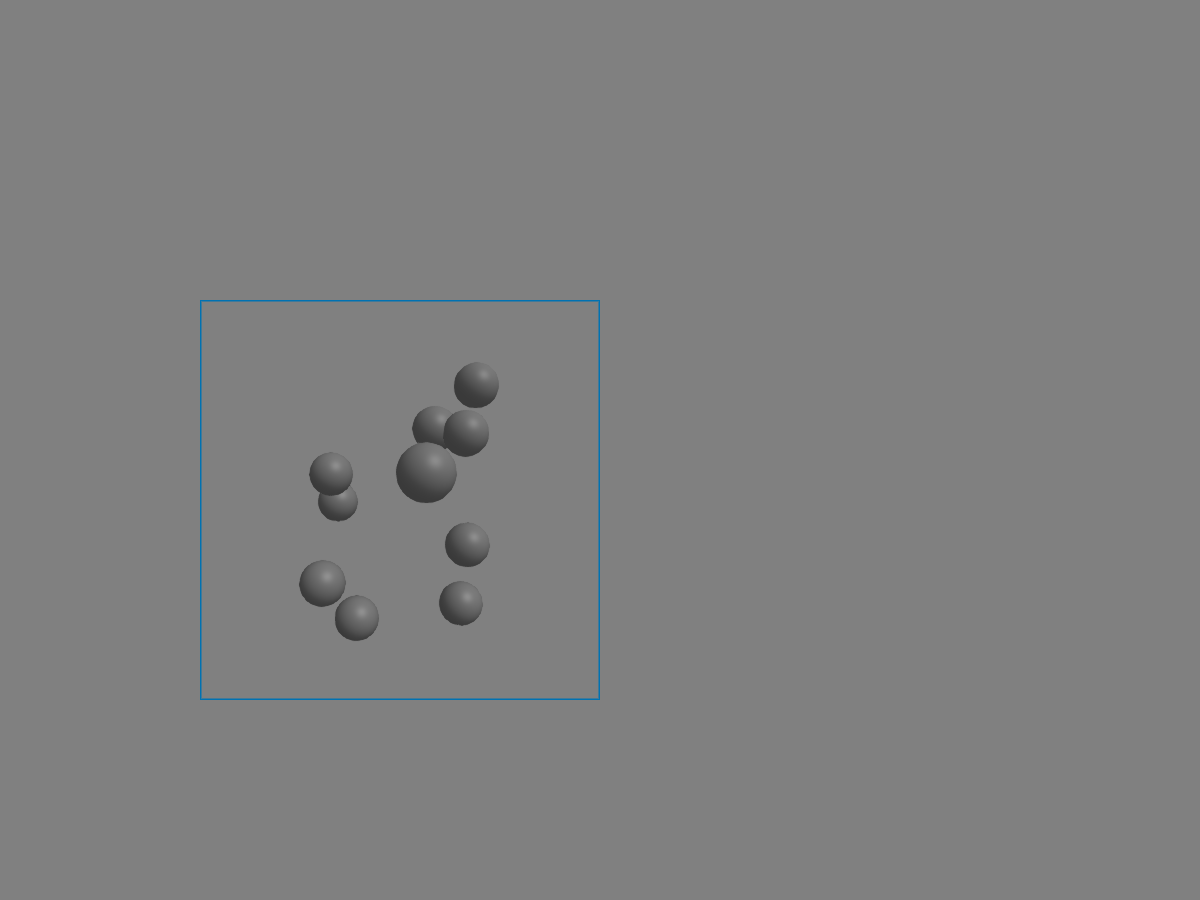
We can also now give the parent scene a more exciting background by using campixel! and plotting an image to the window:
campixel!(scene)
w, h = size(scene) # get the size of the scene in pixels
# this draws a line at the scene window boundary
image!(scene, [sin(i/w) + cos(j/h) for i in 1:w, j in 1:h])
scene
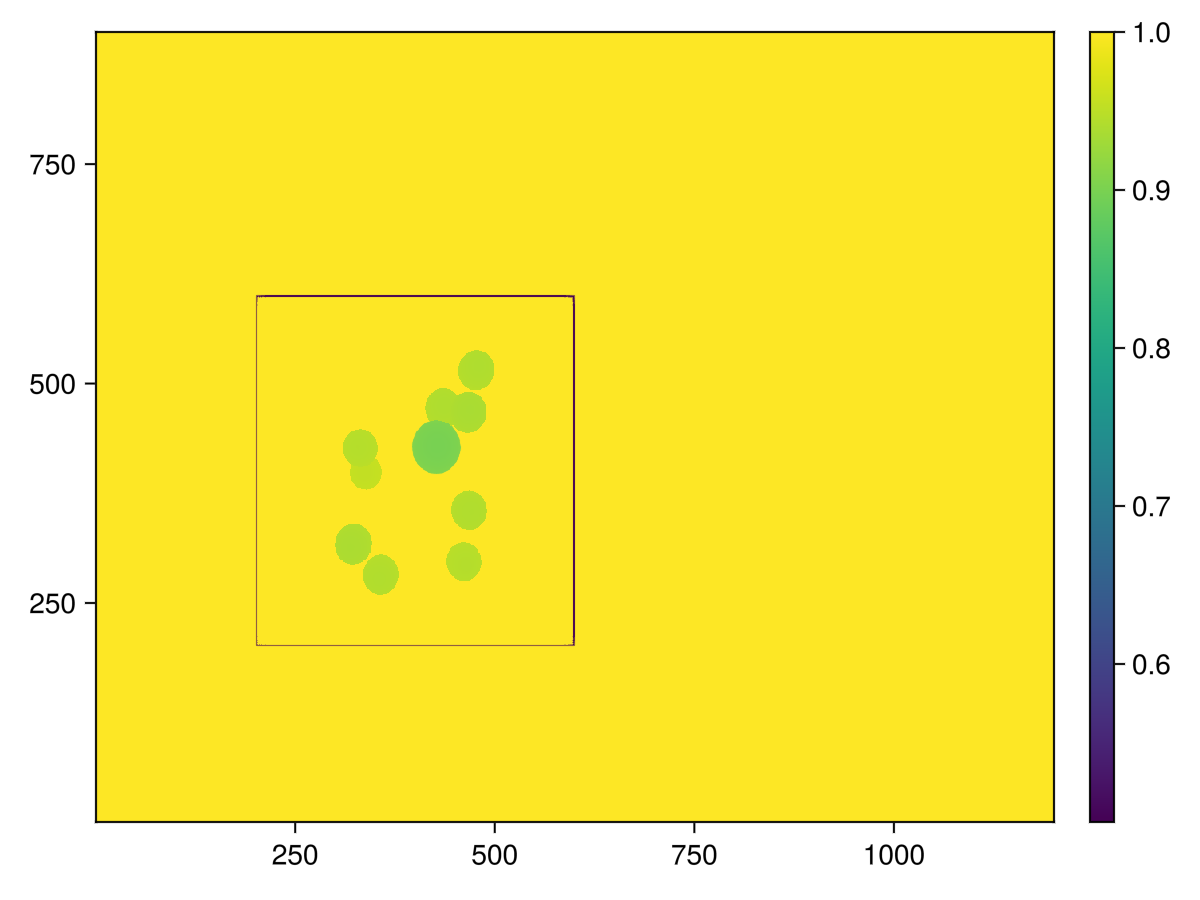
translate!(scene.plots[1], 0, 0, -10000)
scene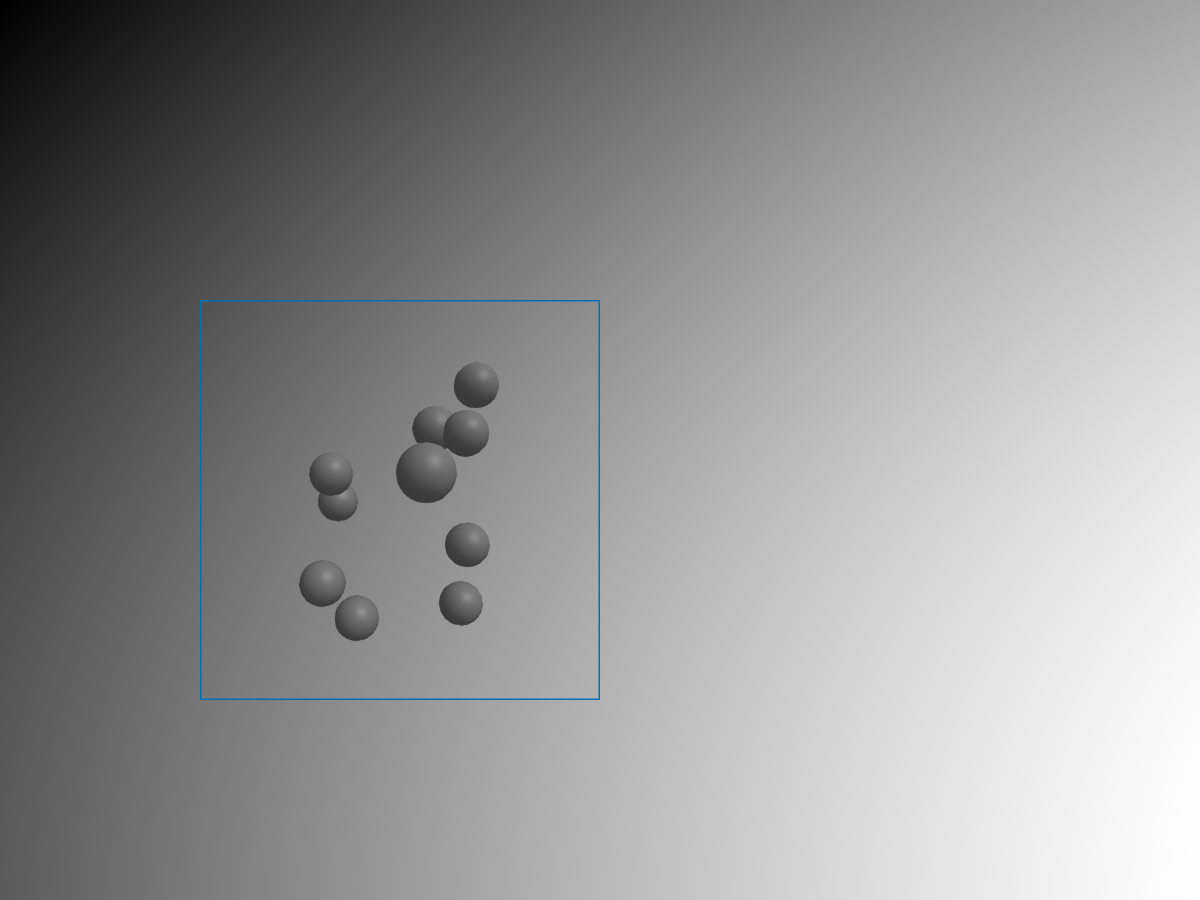
We need a fairly high translation, since the far + near plane for campixel! goes from -1000 to 1000, while for cam3d! those get automatically adjusted to the camera parameters. Both end up in the same depthbuffer, transformed to the range 0..1 by the far & near plane, so to stay behind the 3d scene, it needs to be set to a high value.
With clear = true we wouldn’t have this problem!
screen = display(scene) # use display, to get a reference to the screen object
depth_color = GLMakie.depthbuffer(screen)
close(screen)
# Look at result:
f, ax, pl = heatmap(depth_color)
Colorbar(f[1, 2], pl)
f
┌ Warning: │ Makie.inline!(do_inline) was set to true, but we didn't detect a display that can show the plot, │ so we aren't inlining the plot and try to show the plot in a window. │ If this wasn't set on purpose, call `Makie.inline!()` to restore the default. └ @ Makie ~/work/Makie.jl/Makie.jl/src/display.jl:157
Window Events
Every scene also holds a reference to all global window events:
scene.eventsEvents:
window_area: GeometryBasics.HyperRectangle{2, Int64}([0, 0], [600, 450])
window_dpi: 96.09458128078816
window_open: false
mousebutton: Makie.MouseButtonEvent(Makie.Mouse.none, Makie.Mouse.release)
mousebuttonstate: Set{Makie.Mouse.Button}()
mouseposition: (0.0, 0.0)
scroll: (0.0, 0.0)
keyboardbutton: Makie.KeyEvent(Makie.Keyboard.unknown, Makie.Keyboard.release)
keyboardstate: Set{Makie.Keyboard.Button}()
unicode_input: �
dropped_files: String[]
hasfocus: false
entered_window: false
tick: Makie.Tick(Makie.OneTimeRenderTick, 0, 0.0, 0.0)
We can use those events to e.g. move the subwindow. If you execute the below in GLMakie, you can move the sub-window around by pressing left mouse & ctrl:
on(scene.events.mouseposition) do mousepos
    if ispressed(subwindow, Mouse.left & Keyboard.left_control)
        subwindow.viewport[] = Rect(Int.(mousepos)..., 200, 200)
    end
end
Projections and Camera
We’ve already talked a bit about cameras, but not really how it works. Lets start from zero. By default, the scene x/y extends go from -1 to 1. So, to draw a rectangle outlining the scene window, the following rectangle does the job:
scene = Scene(backgroundcolor=:gray)
lines!(scene, Rect2f(-1, -1, 2, 2), linewidth=5, color=:black)
scene
this is, because the projection matrix and view matrix are the identity matrix by default, and Makie’s unit space is what’s called Clip space in the OpenGL world
cam = Makie.camera(scene) # this is how to access the scenes cameraCamera: 0 steering observables connected pixel_space: [0.0033333333333333335 0.0 0.0 -1.0; 0.0 0.0044444444444444444 0.0 -1.0; 0.0 0.0 -0.0001 -0.0; 0.0 0.0 0.0 1.0] view: [1.0 0.0 0.0 0.0; 0.0 1.0 0.0 0.0; 0.0 0.0 1.0 0.0; 0.0 0.0 0.0 1.0] projection: [1.0 0.0 0.0 0.0; 0.0 1.0 0.0 0.0; 0.0 0.0 1.0 0.0; 0.0 0.0 0.0 1.0] projectionview: [1.0 0.0 0.0 0.0; 0.0 1.0 0.0 0.0; 0.0 0.0 1.0 0.0; 0.0 0.0 0.0 1.0] resolution: Float32[600.0, 450.0] eyeposition: Float32[1.0, 1.0, 1.0] view direction: Float32[0.0, 0.0, -1.0]
cam.projection[] = Makie.orthographicprojection(-3f0, 5f0, -3f0, 5f0, -100f0, 100f0)
scene
w, h = size(scene)
nearplane = 0.1f0
farplane = 100f0
aspect = Float32(w / h)
cam.projection[] = Makie.perspectiveprojection(45f0, aspect, nearplane, farplane)
# Now, we also need to change the view matrix
# to "put" the camera into some place.
eyeposition = Vec3f(10)
lookat = Vec3f(0)
upvector = Vec3f(0, 0, 1)
cam.view[] = Makie.lookat(eyeposition, lookat, upvector)
scene
Interaction with Axis & Layouts
The Axis contains a scene, which has the projection set to make the coordinates go from (x/y)limits_min ... (x/y)limits_max. That’s what we plot into. Besides that, it’s a normal scene, which we can use to create subscenes with smaller window size or a different projection.
figure, axis, plot_object = scatter(1:4)
relative_projection = Makie.camrelative(axis.scene);
scatter!(relative_projection, [Point2f(0.5)], color=:red)
# offset & text are in pixelspace
text!(relative_projection, "Hi", position=Point2f(0.5), offset=Vec2f(5))
lines!(relative_projection, Rect(0, 0, 1, 1), color=:blue, linewidth=3)
figure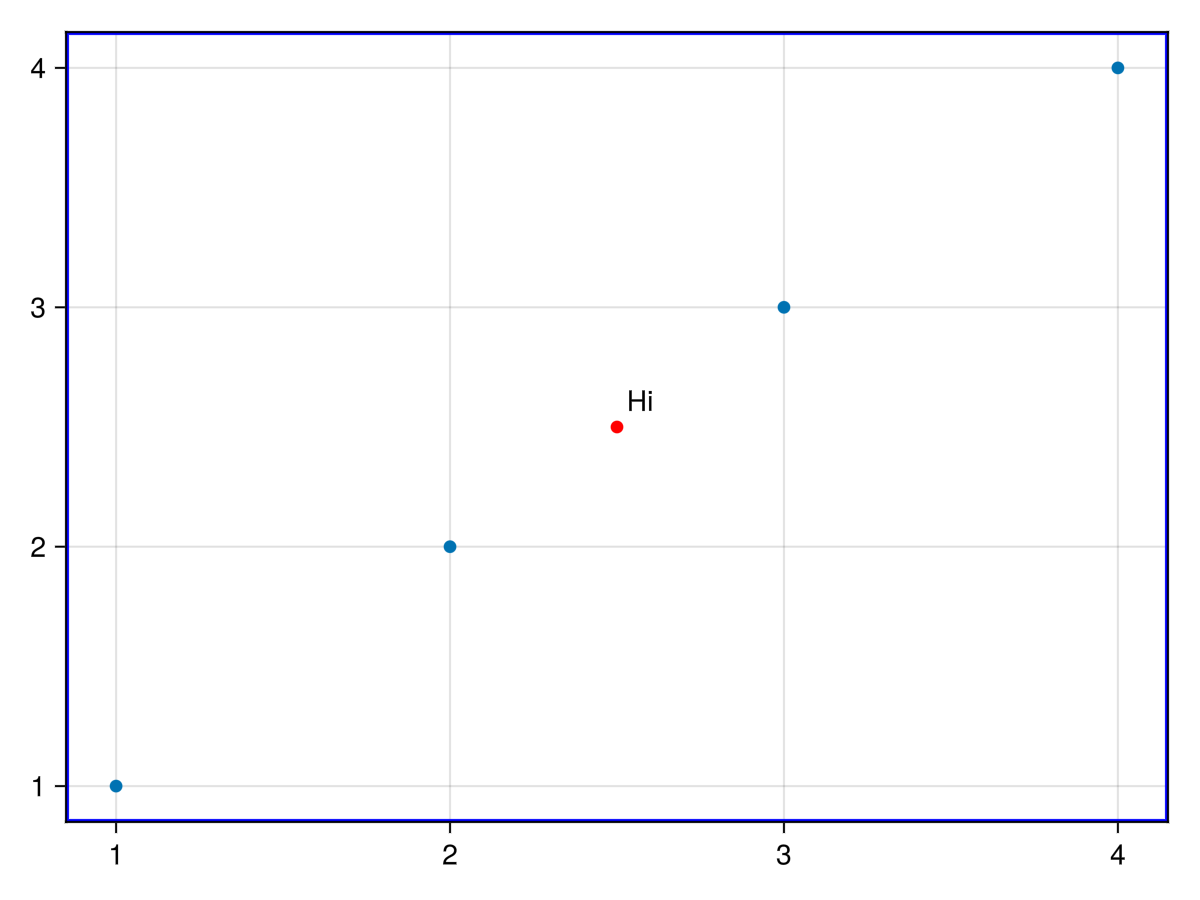
Transformations and Scene graph
So far we’ve been discussing only camera transformations of the scene. In contrast, there are also scene transformations, or commonly referred to as world transformations. To learn more about the different spaces, learn opengl offers some pretty nice explanations
The "world" transformation is implemented via the Transformation struct in Makie. Scenes and plots both contain these, so these types are considered as "Makie.Transformable". The transformation of a scene will get inherited by all plots added to the scene. An easy way to manipulate any Transformable is via these 3 functions:
#
Makie.translate! — Function
translate!(t::Transformable, xyz::VecTypes)
translate!(t::Transformable, xyz...)
Apply an absolute translation to the given Transformable (a Scene or Plot), translating it to x, y, z.
#
Makie.rotate! — Function
rotate!(Accum, t::Transformable, axis_rot...)Apply a relative rotation to the transformable, by multiplying by the current rotation.
#
Makie.scale! — Function
scale!([mode = Absolute], t::Transformable, xyz...)
scale!([mode = Absolute], t::Transformable, xyz::VecTypes)
Scale the given t::Transformable (a Scene or Plot) to the given arguments xyz. Any missing dimension will be scaled by 1. If mode == Accum the given scaling will be multiplied with the previous one.
scene = Scene()
cam3d!(scene)
sphere_plot = mesh!(scene, Sphere(Point3f(0), 0.5), color=:red)
scale!(scene, 0.5, 0.5, 0.5)
rotate!(scene, Vec3f(1, 0, 0), 0.5) # 0.5 rad around the y axis
scene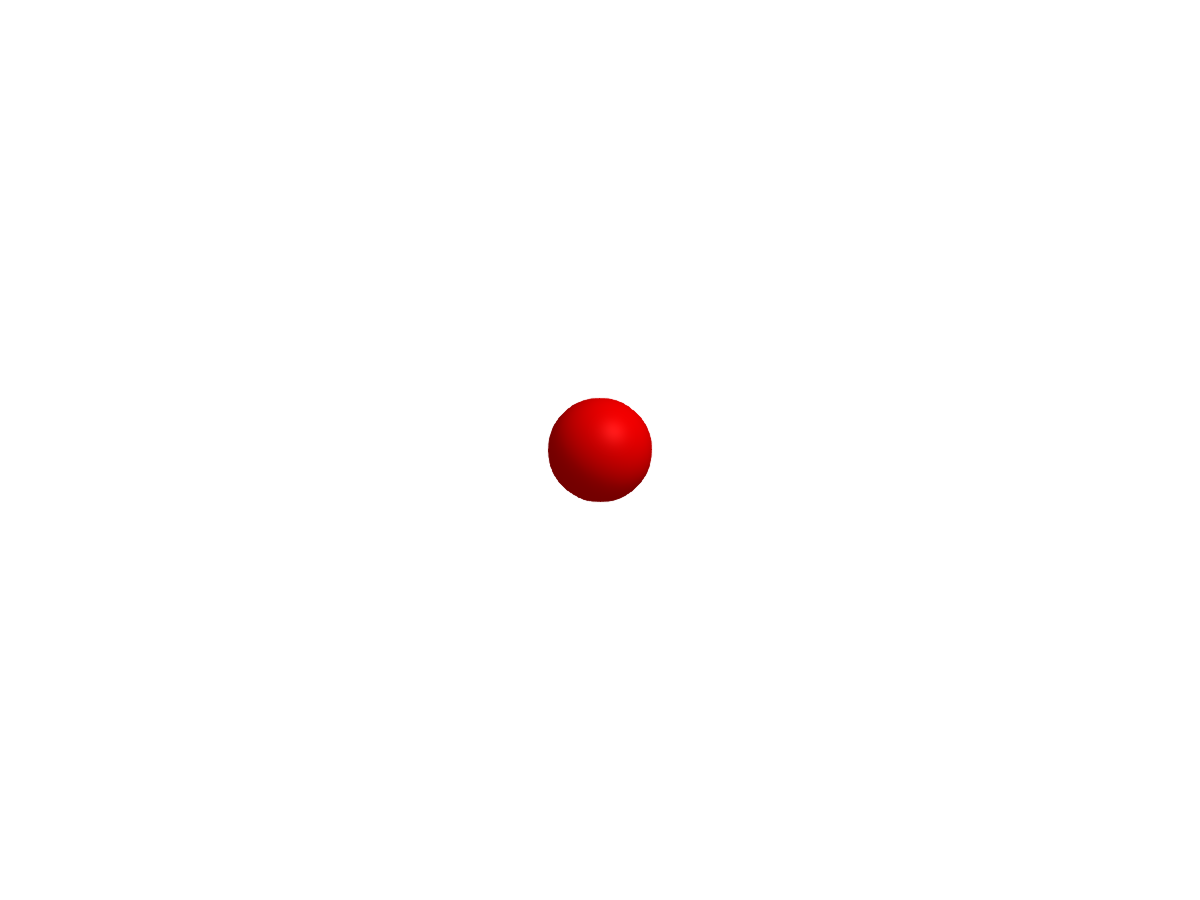
One can also transform the plot objects directly, which then adds the transformation from the plot object on top of the transformation from the scene. One can add subscenes and interact with those dynamically. Makie offers here what’s usually referred to as a scene graph.
translate!(sphere_plot, Vec3f(0, 0, 1))
scene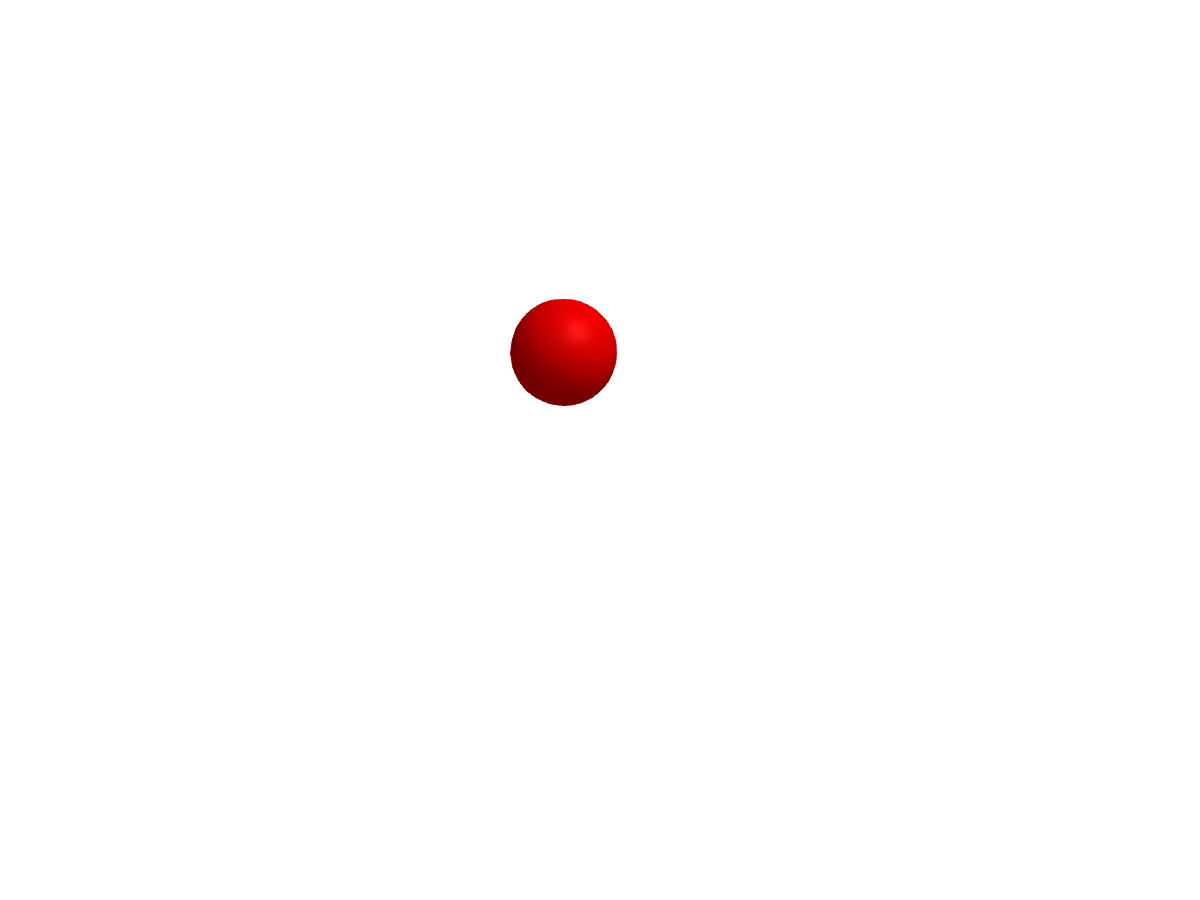
parent = Scene()
cam3d!(parent; clipping_mode = :static)

# One can set the camera lookat and eyeposition, by getting the camera controls and using `update_cam!`
camc = cameracontrols(parent)
update_cam!(parent, camc, Vec3f(0, 8, 0), Vec3f(4.0, 0, 0))
# One may need to adjust the
# near and far clip plane when adjusting the camera manually
camc.far[] = 100f0
s1 = Scene(parent, camera=parent.camera)
mesh!(s1, Rect3f(Vec3f(0, -0.1, -0.1), Vec3f(5, 0.2, 0.2)))
s2 = Scene(s1, camera=parent.camera)
mesh!(s2, Rect3f(Vec3f(0, -0.1, -0.1), Vec3f(5, 0.2, 0.2)), color=:red)
translate!(s2, 5, 0, 0)
s3 = Scene(s2, camera=parent.camera)
mesh!(s3, Rect3f(Vec3f(-0.2), Vec3f(0.4)), color=:blue)
translate!(s3, 5, 0, 0)
parent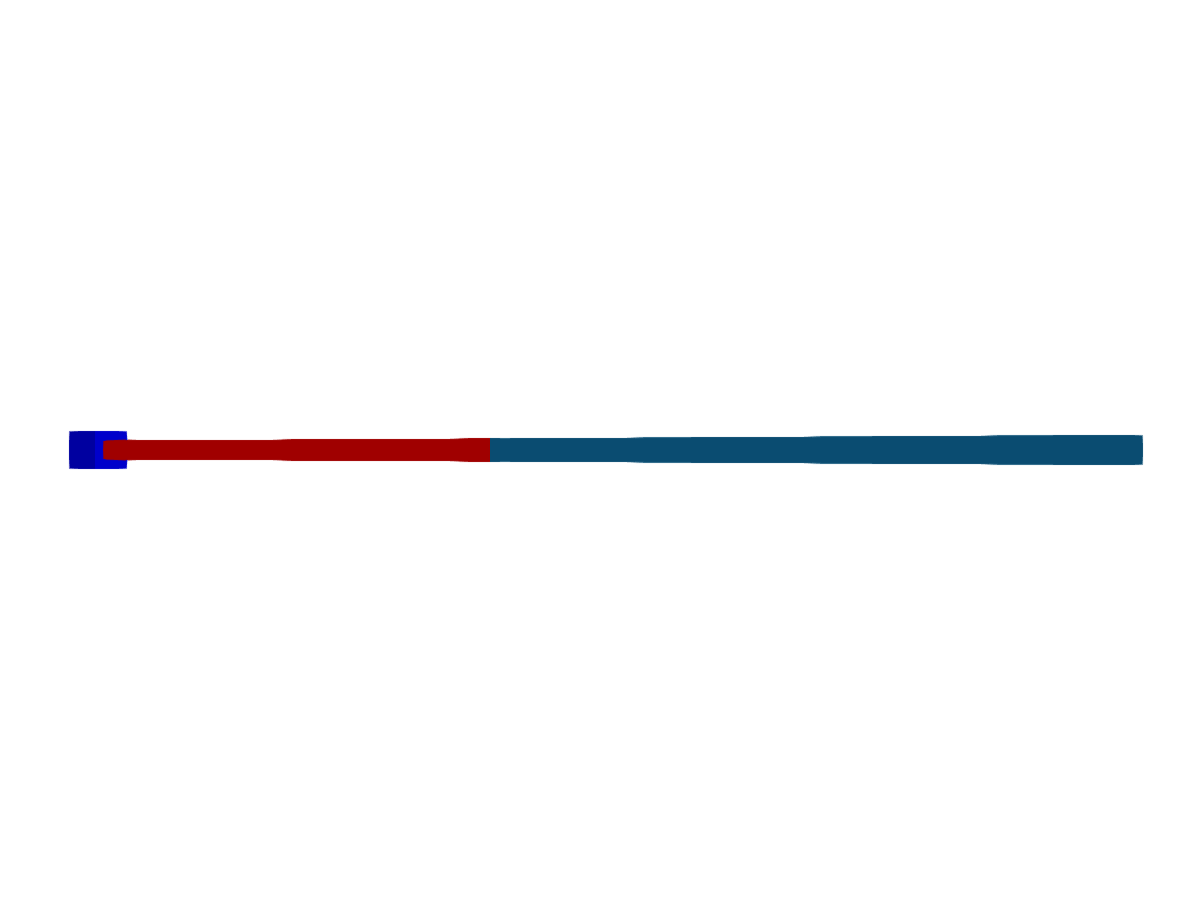
# Now, rotate the "joints"
rotate!(s2, Vec3f(0, 1, 0), 0.5)
rotate!(s3, Vec3f(1, 0, 0), 0.5)
parent
With this basic principle, we can even bring robots to life :) Kevin Moerman was so nice to supply a Lego mesh, which we’re going to animate! When the scene graph is really just about a transformation graph, one can use the Transformation struct directly, which is what we’re going to do here. This is more efficient and easier than creating a scene for each model.
using MeshIO, FileIO, GeometryBasics

colors = Dict(
    "eyes" => "#000",
    "belt" => "#000059",
    "arm" => "#009925",
    "leg" => "#3369E8",
    "torso" => "#D50F25",
    "head" => "yellow",
    "hand" => "yellow"
)

origins = Dict(
    "arm_right" => Point3f(0.1427, -6.2127, 5.7342),
    "arm_left" => Point3f(0.1427, 6.2127, 5.7342),
    "leg_right" => Point3f(0, -1, -8.2),
    "leg_left" => Point3f(0, 1, -8.2),
)

rotation_axes = Dict(
    "arm_right" => Vec3f(0.0000, -0.9828, 0.1848),
    "arm_left" => Vec3f(0.0000, 0.9828, 0.1848),
    "leg_right" => Vec3f(0, -1, 0),
    "leg_left" => Vec3f(0, 1, 0),
)

function plot_part!(scene, parent, name::String)
    # load the model file
    m = load(assetpath("lego_figure_" * name * ".stl"))
    # look up color
    color = colors[split(name, "_")[1]]
    # Create a child transformation from the parent
    child = Transformation(parent)
    # get the transformation of the parent
    ptrans = Makie.transformation(parent)
    # get the origin if available
    origin = get(origins, name, nothing)
    # center the mesh to its origin, if we have one
    if !isnothing(origin)
        centered = m.position .- origin
        m = GeometryBasics.mesh(m, position = centered)
        translate!(child, origin)
    else
        # if we don't have an origin, we need to correct for the parents translation
        translate!(child, -ptrans.translation[])
    end
    # plot the part with transformation & color
    return mesh!(scene, m; color=color, transformation=child)
end

function plot_lego_figure(s, floor=true)
    # Plot hierarchical mesh and put all parts into a dictionary
    figure = Dict()
    figure["torso"] = plot_part!(s, s, "torso")
        figure["head"] = plot_part!(s, figure["torso"], "head")
            figure["eyes_mouth"] = plot_part!(s, figure["head"], "eyes_mouth")
        figure["arm_right"] = plot_part!(s, figure["torso"], "arm_right")
            figure["hand_right"] = plot_part!(s, figure["arm_right"], "hand_right")
        figure["arm_left"] = plot_part!(s, figure["torso"], "arm_left")
            figure["hand_left"] = plot_part!(s, figure["arm_left"], "hand_left")
        figure["belt"] = plot_part!(s, figure["torso"], "belt")
            figure["leg_right"] = plot_part!(s, figure["belt"], "leg_right")
            figure["leg_left"] = plot_part!(s, figure["belt"], "leg_left")

    # lift the little guy up
    translate!(figure["torso"], 0, 0, 20)
    # add some floor
    floor && mesh!(s, Rect3f(Vec3f(-400, -400, -2), Vec3f(800, 800, 2)), color=:white)
    return figure
end

# Finally, lets let him walk and record it as a video with the new, experimental ray tracing backend.

# Note: RPRMakie is still not very stable and rendering out the video is quite slow on CI, so the shown video is prerendered!

using RPRMakie
# iterate rendering 200 times, to get less noise and more light
RPRMakie.activate!(iterations=200)

radiance = 50000
# Note, that only RPRMakie supports `EnvironmentLight` so far
lights = [
    EnvironmentLight(1.5, rotl90(load(assetpath("sunflowers_1k.hdr"))')),
    PointLight(Vec3f(50, 0, 200), RGBf(radiance, radiance, radiance*1.1)),
]
s = Scene(size=(500, 500), lights=lights)
cam3d!(s)
c = cameracontrols(s)
c.near[] = 5
c.far[] = 1000
update_cam!(s, c, Vec3f(100, 30, 80), Vec3f(0, 0, -10))
figure = plot_lego_figure(s)

rot_joints_by = 0.25*pi
total_translation = 50
animation_strides = 10

a1 = LinRange(0, rot_joints_by, animation_strides)
angles = [a1; reverse(a1[1:end-1]); -a1[2:end]; reverse(-a1[1:end-1]);]
nsteps = length(angles); #Number of animation steps
translations = LinRange(0, total_translation, nsteps)

Makie.record(s, "lego_walk.mp4", zip(translations, angles)) do (translation, angle)
    #Rotate right arm+hand
    for name in ["arm_left", "arm_right",
                            "leg_left", "leg_right"]
        rotate!(figure[name], rotation_axes[name], angle)
    end
    translate!(figure["torso"], translation, 0, 20)
end