Working with Git on a personal computer
This article provides basic commands for working with a local repository on a personal computer via the Git terminal. To work in the terminal, you need to download the remote repository using an SSH key or HTTPS key (requires login/password to execute commands). The process for obtaining them is covered in Remote repository. Both keys have their advantages and disadvantages, but the SSH key does not require a password for authentication, so it is more convenient to work with.
| If you have not worked with Git or other version control systems, we recommend that you read quick guide for basic commands beforehand. |
Local copy from GitLab
-
Go to GitLab. Open the repository you want to copy locally. Copy the link using an SSH key from the menu that opens when you click Clone:
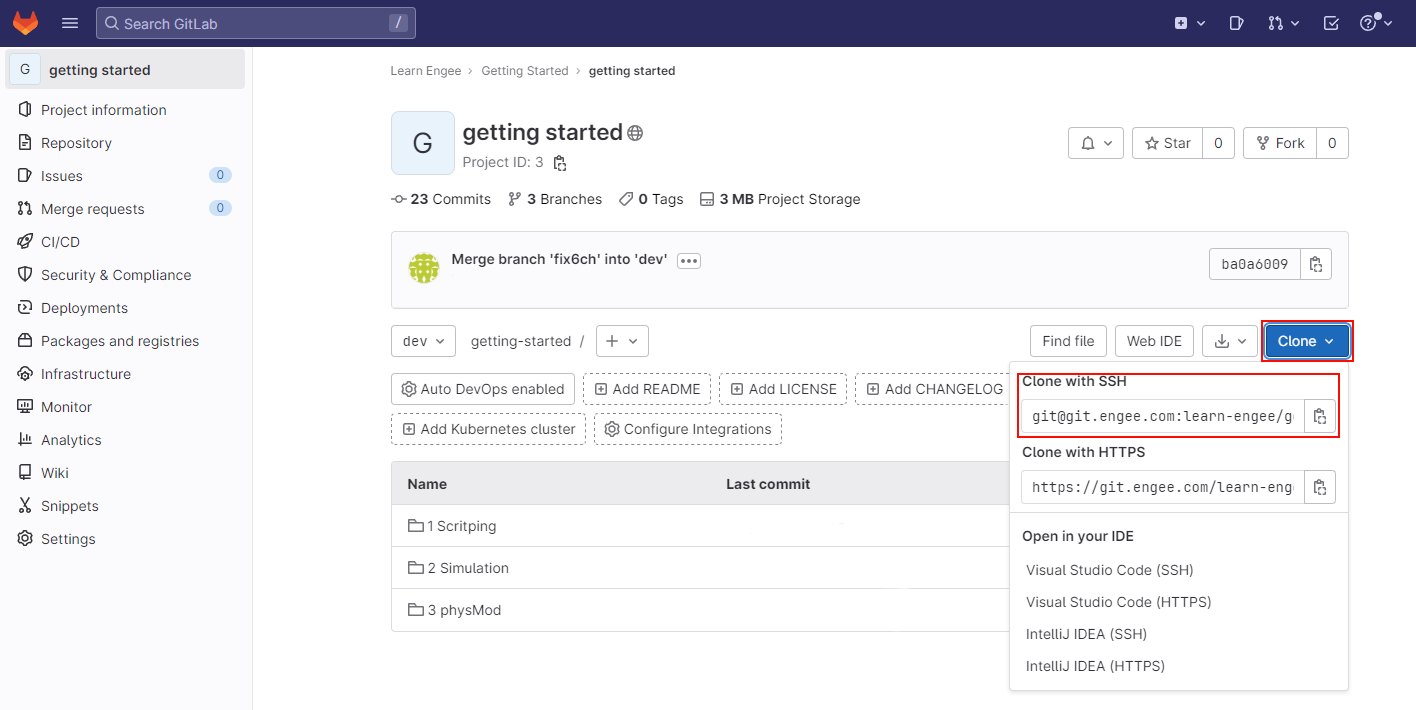
-
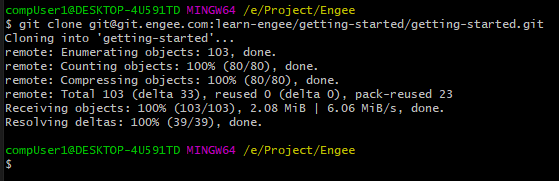
Open a terminal. Navigate to the directory where the repository will be stored (in this example
/e/Project/Engee/) and run the command:git clone <link to repository>The link to the repository was copied in the last step.
Connection via terminal
To create an empty local repository, create a folder for the repository (for example: /e/Project/Engee/test-rep-1/) and run the init command:
mkdir /e/Project/Engee/test-rep-1/
cd /e/Project/Engee/test-rep-1/
git init
The command line will return a similar response:
Initialized empty Git repository in /e/Project/Engee/test-rep-1/This means that the new repository was successfully created.

To link a local repository to a repository on GitLab, run the following command in the terminal:
git remote add origin <link to repository>To pull changes from the repository from the server, run the git pull origin command in the terminal:
git pull origin <desired branch>Sending changes via the terminal
-
Open the console in the root directory of the cloned repository.

-
Create a new local branch in which you will work (in this example
RTFM-28). To do this, run the command:git checkout -b <name of new branch>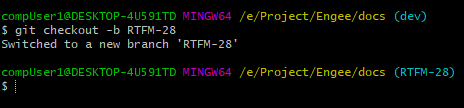
-
Make the necessary changes to the repository files.
-
Add the modified files to the commit. To do this, run the command:
git add .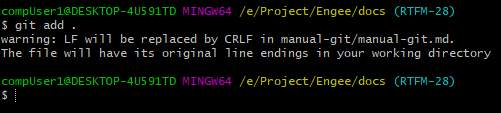
-
Create a commit. To do this, execute the command:
git commit -m "short description of the commit"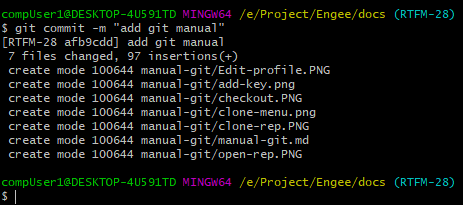
-
Upload the local branch to the repository. To do this, run the command:
git push origin <name of local branch> -
Once you have successfully submitted the modified files, you need to embed or integrate them into the master branch using the
git mergecommand. To do this, run the following commands:git checkout master git merge <name of local branch> git push origin master -
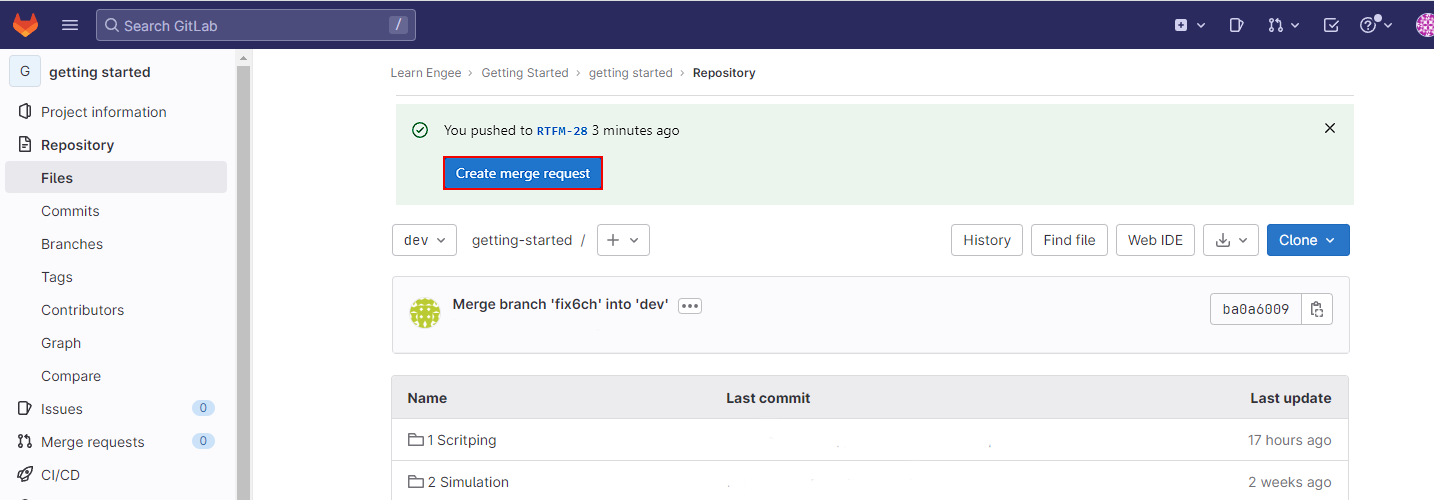
In addition, you can merge branches in graphical mode. To do this, go to the GitLab website. Open the working repository and click the Create merge request button on the green You pushed to … banner.
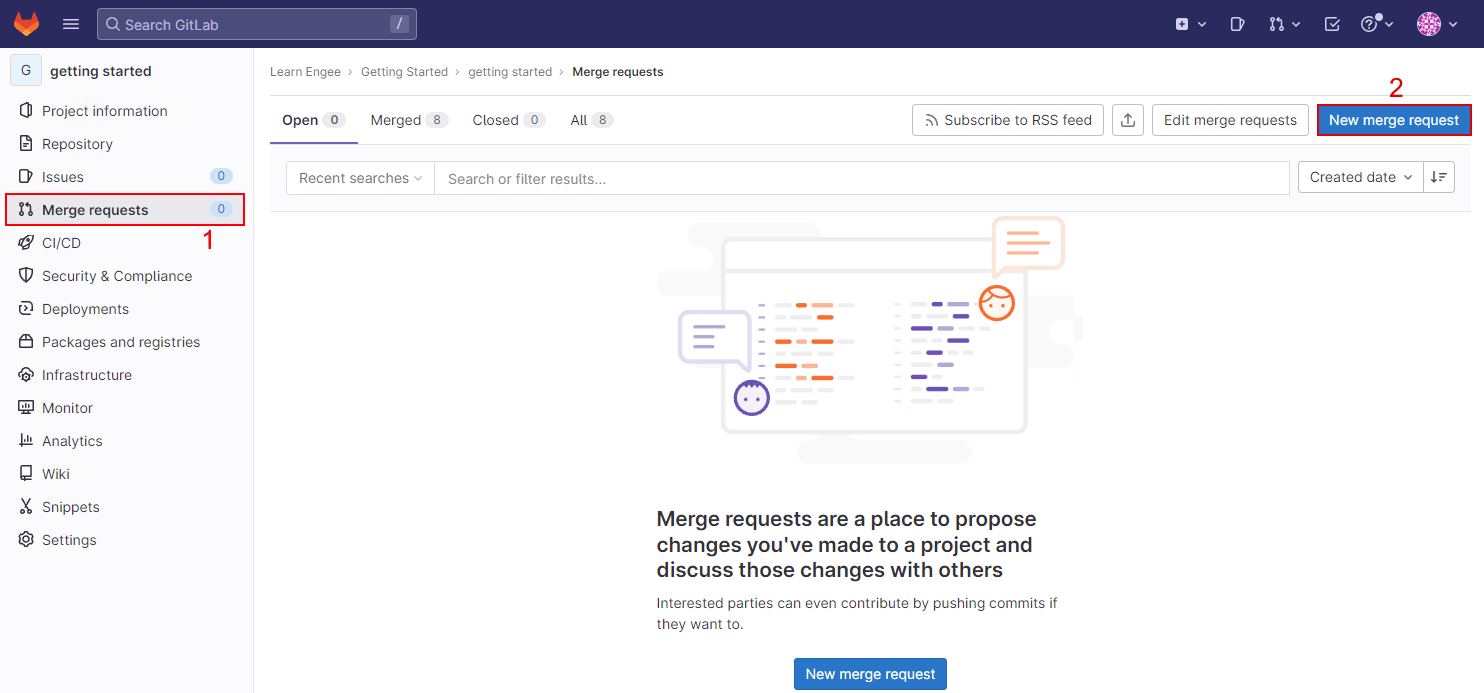
Or select Merge requests from the menu on the left side of the screen and click the New merge request button:
In the second case, GitLab will prompt you to first select the branches to create the Merge Request (MR):
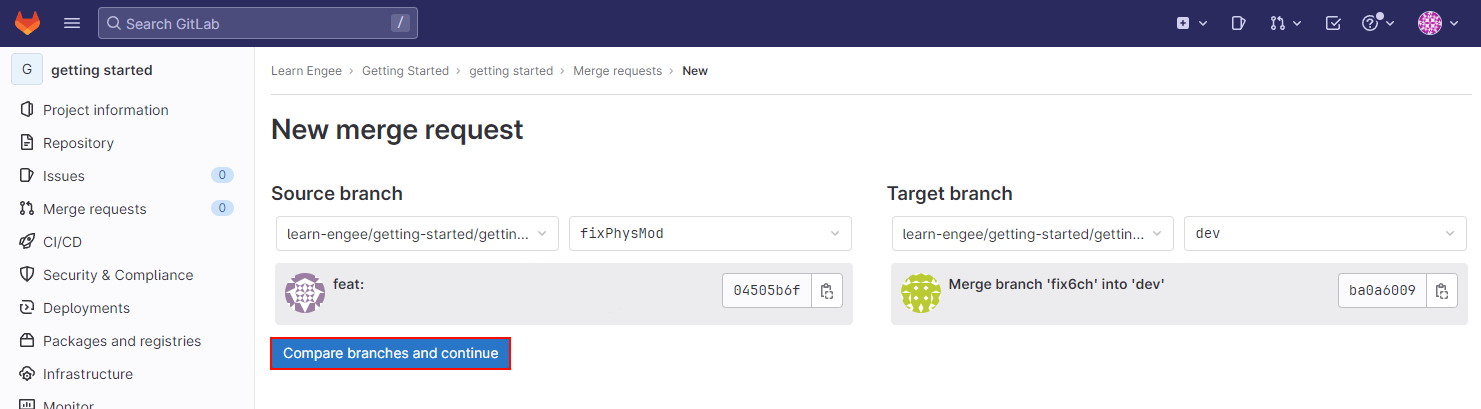
Select branches and click Compare branches and continue.
-
Fill in the fields on the form that opens:
-
At the top of the form, check that your branch will be deadlocked with the correct master branch. If necessary, click the Change branches link and specify the correct branches.
-
Title (required) - Merge Request (MR) title
-
Description - description of the MR (optional)
-
Assignee - click the Assign to me link.
-
Reviewer - select a reviewer or reviewer from the drop-down list

After completing the form, click Create merge request.
-