Airport scoreboard with dynamic table in GenieFramework
In this article, we will look at creating a web application - an airport scoreboard with a table of flights. To get acquainted with the basic logic of web applications in GenieFramework, we recommend that you read the introductory статьей. Here we will focus on working with tables through DataTable, interacting with CSV files and dynamically updating data using an asynchronous loop. We will pay special attention to why it is used to display the table. DataTable Rather than just DataFrame.
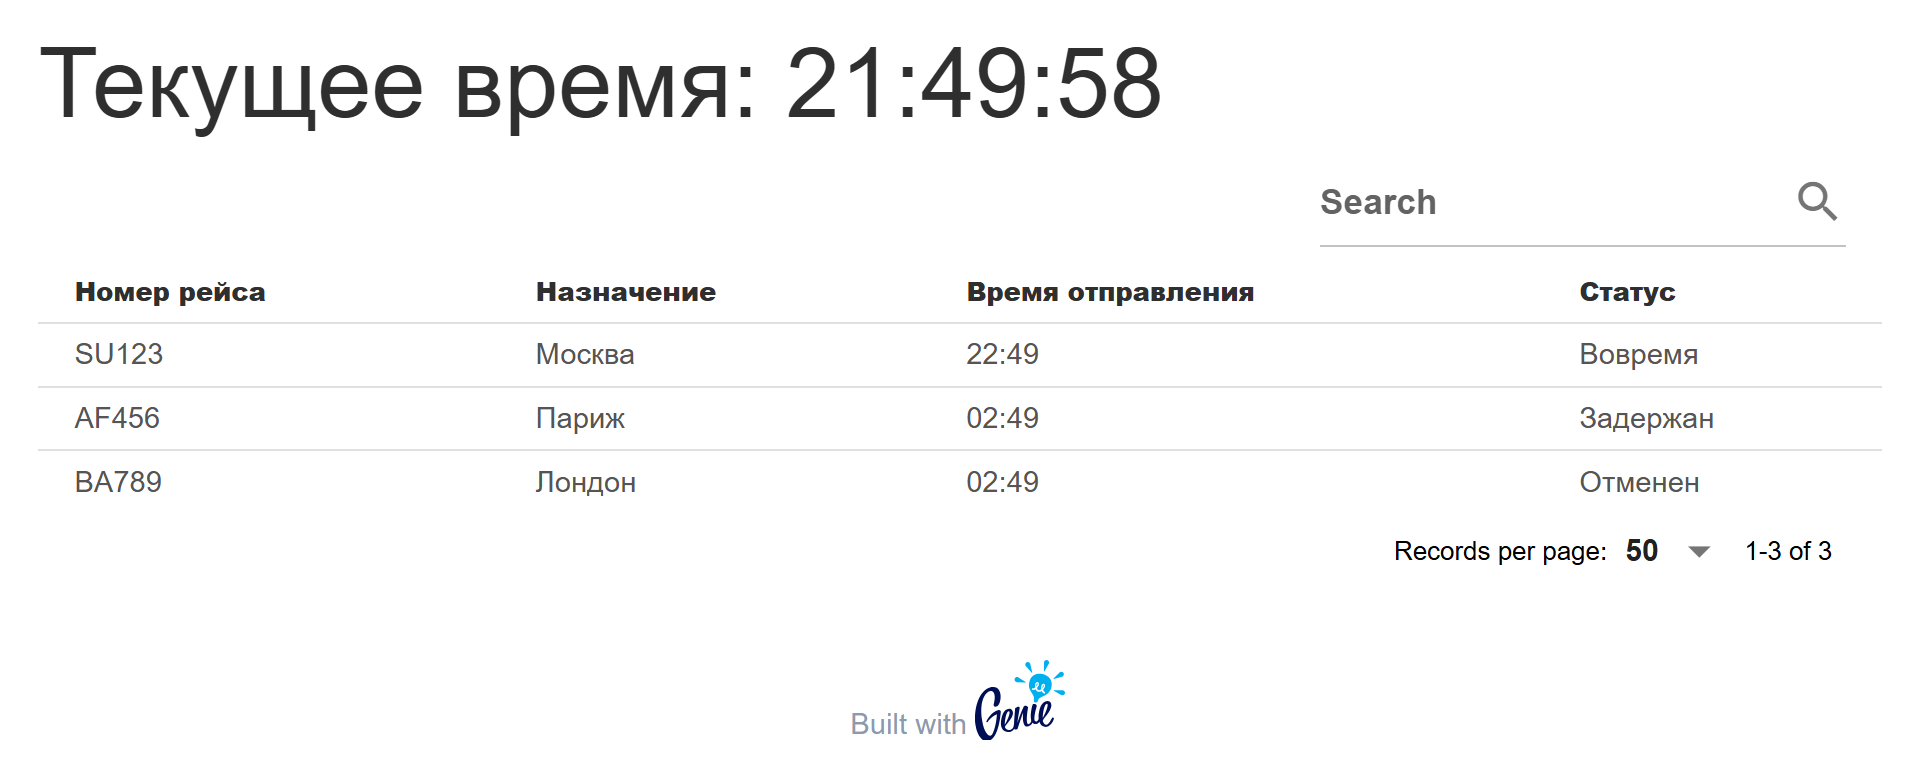
Application Code
using GenieFramework
using Stipple
using Stipple.Tables
using DataFrames
using Dates
using CSV

function generate_flight_data()
    DataFrame(
        "Номер рейса"=>["SU123", "AF456", "BA789"],
        "Назначение"=>["Москва", "Париж", "Лондон"],
        "Время отправления" => [Dates.format(now() + Hour(rand(1:5)), "HH:MM") for _ in 1:3],
        "Статус" => ["Вовремя", "Задержан", "Отменен"]
    )
end

@app begin
    @out current_time = "Текущее время: " * Dates.format(now(), "HH:MM:SS")
    @out flight_table = DataTable(DataFrame())  # Пустая таблица изначально

    @onchange isready begin
        initial_df = generate_flight_data()
        CSV.write("flight_data.csv", initial_df)
        flight_table = DataTable(initial_df)

        @async while true
            sleep(5)
            current_time = "Текущее время: " * Dates.format(now(), "HH:MM:SS")
            df = CSV.read("flight_data.csv", DataFrame, types=String)
            df.Status[rand(1:3)] = rand(["Вовремя", "Задержан", "Отменен"])
            CSV.write("flight_data.csv", df)
            flight_table = DataTable(df)
        end
    end
end

function ui()
    [
        h3("{{current_time}}"),
        table(:flight_table; dense=true, flat=true)
    ]
end

@page("/", ui)
Program logic: step-by-step analysis
Connecting packages
The following packages are used:
GenieFramework: The main framework for creating web applications.Stipple: Provides reactivity and communication between the server and the interface.Stipple.Tables: ProvidesDataTableto display tables in the web interface.DataFrames,Dates,CSV: Needed for working with tabular data, time formatting, and file operations.
Each package plays its own role, providing a minimal set of tools for the application.
Data generation
Function generate_flight_data() creates a flight table:
- Returns an object
DataFramewith four columns:FlightNumber: Flight numbers ("SU123", "AF456", "BA789").Destination: Destinations ("Moscow", "Paris", "London").DepartureTimeDeparture time in the "HH:MM" format, based on the current time plus a random offset (1-5 hours).Status: Flight statuses ("On Time", "Delayed", "Cancelled").
- This function emulates the initial data for the scoreboard, which will then be changed during the operation of the application.
Data model: variables
Block @app defines the data model:
@out current_time: A reactive variable containing a string with the current time ("Current time: HH:MM:SS"). It is initially set at startup and updated later.@out flight_table: A reactive type variableDataTable, initially empty (DataTable(DataFrame())). It will be filled with data when the application is loaded.
These variables are available for display in the interface and automatically update it when it changes.
Data model: initialization and updating
The handler @onchange isready controls the application logic:
isreadyand his role:isready— this is the built-in reactive variable Stipple, which initially has the valuefalse. She becomestruewhen the client (browser) has fully loaded the page and established a connection to the server via WebSocket.@onchange isreadymeans that the code inside the block is executed once whenisreadychanges fromfalseontruethat is, at the first successful download of the application on the client side. This does not mean that updates are limited to this moment only. —@onchangeit runs the code once, but we can initiate persistent processes inside it.- We use
@onchange isreadyto ensure that data initialization and the start of the update cycle occur only after the interface is ready for operation. Without this, the code could have been executed too early, before establishing communication with the client, which would have led to synchronization errors.
- Initialization:
- The initial table is being created
initial_dfthroughgenerate_flight_data(). - Data is written to a file
flight_data.csv. flight_tableupdated withDataTable(initial_df).
- The initial table is being created
- Asynchronous loop:
- Starts via
@async while true, which creates a background task.- Every 5 seconds (
sleep(5)):
- Every 5 seconds (
- Updated
current_time.- Data is being read from a file with the parameter
types=Stringto save the string format. - The status of one flight is randomly changed.
- Updated data is written to a file and assigned
flight_table.
- Data is being read from a file with the parameter
Interface
Function ui() sets the appearance:
h3("{{current_time}}"): Displays the current time, which is updated automatically.table(:flight_table; dense=true, flat=true): Creates a table linked toflight_table.dense=truemakes the table compact.flat=trueremoves shadows for a simple design.DataTableautomatically generates headlines from column namesDataFrame.
Page Registration
@page("/", ui): Indicates that the interface is accessible via the root route "/". This completes the configuration of the application.
Why DataTable Rather than just DataFrame?
DataFrame — this is a powerful Julia tool for working with tabular data in code. It is great for data manipulation: filtering, sorting, calculations. However, by itself DataFrame It is not intended to be displayed in a web interface. It represents data in the program's memory, but it does not have built-in logic for transferring it to the browser or rendering it as an HTML table.
DataTable from Stipple.Tables solves this problem:
- Reactivity:
DataTableintegrates with the Stipple reactivity system. When changing the data inflight_tableThe interface is updated automatically without the need to manually redraw the table. - Formatting for the web:
DataTableconvertsDataFrameto a structure compatible with Quasar (the framework used by Stipple for the interface), adding headers and data in the desired format. - Simplicity: Use
table(:flight_table)allows you to display data without writing complex HTML or JavaScript code. If we used justDataFrame, I would have to manually convert it to an array of dictionaries (Vector{Dict}) and pass it to the interface, which complicates the code.
Thus, DataFrame — this is the "raw" data, and DataTable — a "bridge" between them and the web interface, providing convenience and automation.
How do I launch the app?
Go to the folder with the current script and execute the cell below.
As a result, a window with a web application should open.
If it doesn't open in a separate tab, click on the link from the output cell.
match(r"'(https?://[^']+)'"allows you to find a link based on the output of the engee function.genie.start using regular expressionsMarkdown.parseIt is used to display "clickable" links in the output cell.
using Markdown
cd(@__DIR__)

app_url = string(engee.genie.start(string(@__DIR__,"/app.jl")))

Markdown.parse(match(r"'(https?://[^']+)'",app_url)[1])