Drivers and C Function Blocks
The target is responsible not only for launching the generated model, but also for accessing the capabilities of the target platform: GPIO, UART, ADC, PWM, timers, buses, and external chips. Usually, this access is organized through C-drivers, which are copied to the target project and called from the C-code of the model.
The main user mechanism for invoking the C code from the model is a block C Function. Therefore, when designing a target, it is important to determine in advance which API is provided to the user and how this API will get into the generated project.
What is a C Function?
Block C Function allows you to use the C code inside the model. Engee. The user adjusts the inputs, outputs, parameters, and operating variables and writes the code in the block editor.
From the editor C Function There are four main sections:
-
Output code— the code that is executed at each step of the block calculation; -
Start code— the code that is executed once during initialization; -
Terminate code— a code that is executed once during a stop; -
Shared code— shared code, functions, and global data for multiple instances C Function with the same function name.
When generating the C code, the contents of these sections are converted into C functions that are included in the generated model code. This means that the code in the block is C Function it is compiled together with the target runtime binding and can call functions from drivers if the headers and driver sources are added to the project.
Editor C Function shows a prototype function for the current inputs, outputs, parameters, and operating variables. For the target, it is important that the driver documentation allows the user to uniquely identify the location of each driver call in the generated interface functions. — init, step and term — without the need for independent analysis or assumptions.
Operating variables C Function they are intended for the state of a specific instance of the block. They are convenient to use for buffers, counters, descriptors, and other data that should not be global to the entire model. If the state should be shared by several instances of a block with the same function name, it is placed in the section Shared code.
For a normal simulation C Function It can use shared libraries with the C API. To target independent execution, another option is more often used: the necessary C code and drivers are added to the project and compiled along with the model for the target platform.
Why does target need its own drivers?
Block C Function it can contain arbitrary C code, but the user of the model does not have to write code for low-level work with registers, HAL or SDK every time again. The target can provide a stable layer of drivers.:
-
a simple C API for custom blocks;
-
header files with constants and types;
-
platform-specific implementations;
-
block templates
.nglib, which generate calls to this API.
This layer separates the model from the hardware parts. The user calls, for example, digitalWrite(…) or uart_transmit(…) and the target decides which registers, HAL functions, or SDK calls are behind it.
How do the drivers get into the project?
Drivers are usually located next to the target in the directory drivers. In generate_executable_code target copies these files to the project directory, and the build system includes them in the compilation.
Example of copying drivers to a project
drivers_files = _get_drivers_src_list()
for file in drivers_files:
    shutil.copy2(file, project_src)
If the user adds their source files via C Function target can save them via store_filed_sources(model_settings.cmi, project_src). This is useful when the model contains additional files. .c/.h which are not part of the target itself.
Example of saving user files from C Function
store_model_src(model_code.c_code, project_src, codegen_info)
store_filed_sources(model_settings.cmi, project_src)
The assembly system should see both the generated model files and the drivers. In the provided example in the CMake template ATmega328 this is done through GLOB for the directory drivers and the project files.
An example of enabling drivers in CMake
file(
    GLOB MODEL_SOURCES
    "${MODELS_PATH_DIR}/drivers/*.c"
    "${MODELS_PATH_DIR}/drivers/SWSerial/*.c"
    "${MODELS_PATH_DIR}/*.c"
)

add_executable(${TARGET}_elf ${MODEL_SOURCES})
Example of ArduinoUNO: Serial as a Si API
In the provided example in engee-support-packages/targets/ArduinoUNO/drivers there is a basic UART driver on top of the Arduino Serial. Heading serial.h declares a C-compatible API, and the implementation serial.cpp calls the Arduino C++ API.
This approach is important: the code from the block C Function and the generated C code of the model can call simple C functions, and C++ platform objects can be used inside the driver.
Example of a fragment serial.h
#ifdef __cplusplus
extern "C" {
#endif

void beginSerial(uint8_t serial_port, uint32_t baudrate, int config);
void endSerial(uint8_t serial_port);
bool isReadySerial(uint8_t serial_port);
uint8_t availableSerial(uint8_t serial_port);
size_t readBytesSerial(uint8_t serial_port, uint8_t *buffer, int len);
size_t writeSerial(uint8_t serial_port, uint8_t *buffer, int len);

#ifdef __cplusplus
}
#endif
An example of using the Arduino API inside a driver
void beginSerial(uint8_t serial_port, uint32_t baudrate, int config)
{
    if (config == UNSPEC) config = SERIAL_8N1;
    Serials[serial_port]->begin(baudrate, config);
}

size_t writeSerial(uint8_t serial_port, uint8_t *buffer, int len)
{
    return Serials[serial_port]->write(buffer, len);
}
From the block C Function the user can call this API in Start code, Output code and Terminate code.
Usage example in C Function
/* StartCode */
beginSerial(0, 115200, SERIAL_8N1);

/* OutputCode */
uint8_t value = (uint8_t)input1;
writeSerial(0, &value;, 1);

/* TerminateCode */
endSerial(0);
ATmega328 example: GPIO, ADC, UART and timers
In the provided example in engee-support-packages/targets/ATmega328/drivers the drivers are closer to the hardware: they work with AVR registers directly. There is:
-
gpio.h/gpio.c— digital I/O, ADC, PWM; -
uart.h/uart.c— receiving and transmitting UART with error statuses; -
timers.h/timers.c— setting up timers; -
interrupts.h/interrupts.c— auxiliary functions for interrupts; -
bits.h— macros for working with bits and registers; -
SWSerial— programmaticserial.
In gpio.h The API is represented by a set of simple functions and constants that can cause C Function or a generated hardware block.
Example of a fragment of the GPIO API
#define HIGH 0x01
#define LOW  0x00
#define OUT  0x01
#define IN   0x00

void pinMode(int reg, int pin, int out);
void digitalWrite(int port, int bit, uint8_t high);
int  digitalRead(int pin, int bit);
int  analogRead(int channel);
void adcInit(int prescaler);
void analogWrite(int port, int bit, int duty, int inverse);
The ATmega328 UART driver shows another useful trick: functions return a structure with the operation status. It’s better than just giving it back. 0/1 because the model can distinguish between time limit, frame error, parity error, lack of initialization, and partial reception.
Example of the result of a UART operation
typedef struct {
    uint8_t bytes_transmitted;
    uart_status_t status;
} uart_transmit_result_t;

uart_transmit_result_t uart_transmit(
    const unsigned char *data,
    const unsigned char length,
    uint16_t timeout_ms,
    uint8_t disable_interrupts
);
Custom Block Libraries
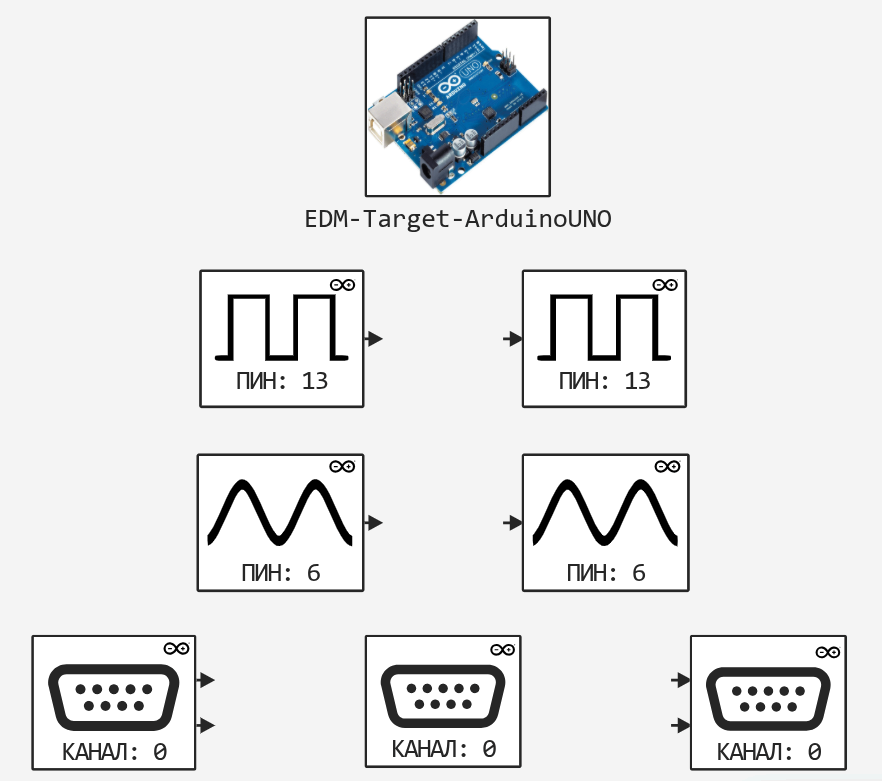
The drivers and C API by themselves do not provide a user-friendly simulation interface. So that the user can add hardware targeting functions like regular blocks. Engee, they need to be organized into a custom library.
User Library Engee — this is a file .nglib, which contains blocks or subsystems and is displayed in the block library Engee. The mechanism is described in the article. Engee User Libraries.
For the target .nglib It is usually used as a public part of a support package.:
-
The user selects a block from the library rather than writing code. C Function manually;
-
The block mask sets clear parameters: port, pin, UART speed, ADC channel, PWM frequency;
-
the code inside the block calls the Si API of the target drivers;
-
The same blocks can be used in different models.;
-
The library can be supplied with a support package and examples.
If there are few blocks, one file is enough. .nglib For example MyBoard.nglib. If the target contains many blocks, it is better to divide them by topic.: GPIO, UART, ADC, PWM, Timers, Communication. You can use a file for this structure. engee_library.toml, which describes which files .nglib and which sections of the block library should be included.
An example of a multi-level target library
[metadata]
format_version = "1"

[[categories]]
lib_path = "/MyBoard/GPIO"
files = ["gpio/digital.nglib", "gpio/analog.nglib"]

[[categories]]
lib_path = "/MyBoard/Communication/UART"
files = ["communication/uart.nglib"]

[[categories]]
lib_path = "/MyBoard/Timers"
files = ["timers/timers.nglib"]
The files themselves .nglib It can be stored in the target structure next to drivers, templates, and demo models. It is important that after downloading the support package, the user can add the library directory to the path. Engee and see the blocks in the user libraries section.
In practice, this means that the target documentation should describe not only the driver’s C functions, but also the corresponding blocks.:
-
where is
.nglib; -
which section of the library will contain the blocks?;
-
what parameters does the mask have?;
-
which Si API is called internally;
-
what are the limitations of the block: allowed ports, frequencies, buffer sizes, calculation step;
-
does the unit work only in independent mode or does it also support simulation on the host?
Relation of C Function to library blocks
The target may be limited to documentation for C Function, but it is usually more convenient to give the user ready-made hardware blocks in .nglib. Such a block inside can be built on C Function or another code generation mechanism, but its task is the same: to hide the C API behind a clear block mask.
For example, instead of the user manually writing:
pinMode(DDRB_REG, 5, OUT);
digitalWrite(PORTB_REG, 5, HIGH);
You can create a Digital Write block where the user selects the port, pin, and initial state in the mask. The block code will generate the driver calls itself.
It is important that the parameters of the block mask correspond directly to the arguments of the C API or are uniquely converted to them. If the mask uses intuitive values like PB5, Output, PullUp, then the block must convert them to driver constants.
Build parameters and additional sources
In C Function there are build options and the ability to use custom source files. For target, this means that all additional source code files must be saved when generating the project (.c/.h) and paths to include header files.
In Engee.Integrations There are two mechanisms for this.:
-
store_filed_sourcessaves user source files from blocks C Function; -
CMIParser._parse_cfunction_commentsIt can extract additional compilation parameters from special comments. C Function.
If the target supports custom dependencies in blocks C Function, you need to explicitly solve:
-
which source files are allowed to be added;
-
where are they copied to in the project;
-
which pluggable directories are added to the build?;
-
are external libraries allowed?;
-
how the user sees the build error.
For the initial version of the target, you can only support the C code that is compiled with the model, and add external libraries later.
Recommendations for designing the C API drivers
Target drivers become a public API for models, so they should be designed with long-term compatibility in mind.:
-
use simple C types:
uint8_t,uint16_t,uint32_t,float,doubleand pointers to buffers; -
avoid an API that requires dynamic memory allocation within a model step.;
-
explicitly document the units of measurement: microseconds, milliseconds, hertz, bits/s, PWM percentages;
-
return the error status if the operation may fail.;
-
do not block the scheduler for a long time: prolonged UART reception or waiting for the completion of the ADC may lead to a violation of TET;
-
separate initialization, step work, and resource release;
-
keep in mind that
Start codecalled once,Output code— at every step,Terminate code— when stopping; -
use
extern "C"in the headers, if the driver implementation is written in C++; -
explicitly specify which functions are safe to call from an interrupt handler (ISR) or an RTOS task.
Checking the drivers
Drivers need to be checked separately from the large model. In example ATmega328/tests there are small C-tests for GPIO, UART, and analog input. This format is useful for the initial startup and debugging of a new board: first, the driver is checked, then the block C Function, and then the full model.
Minimum set of checks:
-
Building a project with drivers without a model.
-
Initializing peripherals in a simple test.
-
Checking a single read or write operation.
-
Error checking: invalid port, time limit, empty buffer.
-
Checking a call from C Function in the demo model.
-
Checking that the driver does not violate TET at the target calculation step.
The checklist
-
The target has a directory
driverswith headers and implementations. -
generate_executable_codecopies the drivers to the project. -
The assembly system compiles the drivers along with the model.
-
The driver headers are available for the block code C Function.
-
Custom blocks are collected in the library
.nglib. -
Added for a large library
engee_library.tomlwith a clear hierarchy. -
Initialization is performed in
Start codeor to start the runtime. -
Resources are released in
Terminate codeif the platform supports it. -
Hardware blocks
.nglibthey use the same C API as the documentation. -
Driver errors are returned explicitly.
-
There are basic driver tests and demo models.