Engee User Libraries
User Libraries  — these are files with the .nglib extension, which can contain any Engee blocks. These files allow you to use your own blocks from the Engee block library.
  .
.
Creating your own libraries allows you to:
-
Store frequently used blocks in a convenient format to greatly simplify and speed up the modeling process.;
-
Add the necessary elements immediately from the user library, instead of creating new blocks for each model.
The advantages of custom libraries are their flexibility and reusability. Such libraries help to standardize components, ensuring uniformity in models and reducing the likelihood of errors. In addition, custom libraries make it easy to share developed blocks, which contributes to more effective teamwork and saves time.
| To download files from other users' user libraries or upload your own, use the website of the remote Engee repository. Read more about how to work with a remote repository in our articles on Git. |
| After adding your blocks to the Engee library, you will not be able to delete them while the session is active. To remove these blocks, you need to completely stop the Engee session and restart it. This will clear all user libraries, and if they are needed, they will have to be downloaded again. |
For working with custom libraries:
-
Create a library file.nglib in the window file browser
 and set the desired name:
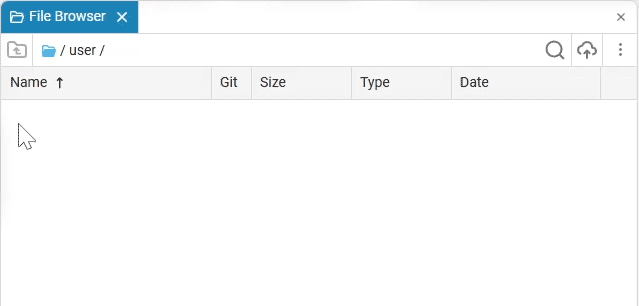
-
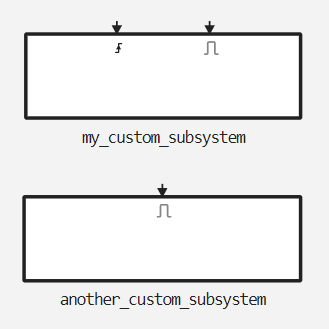
Create the required block or subsystem in the Engee model. The subsystem allows you to store multiple blocks inside yourself at the same time. Therefore, to add a group of blocks to the library, combine them into a subsystem.
-
Save the .nglib file in a file browser or navigation bar:

The directory in which the file is saved does not affect its location in the block library. -
To make blocks appear in the Engee block library
. move the .nglib file to the folder and add it to the path via path editor: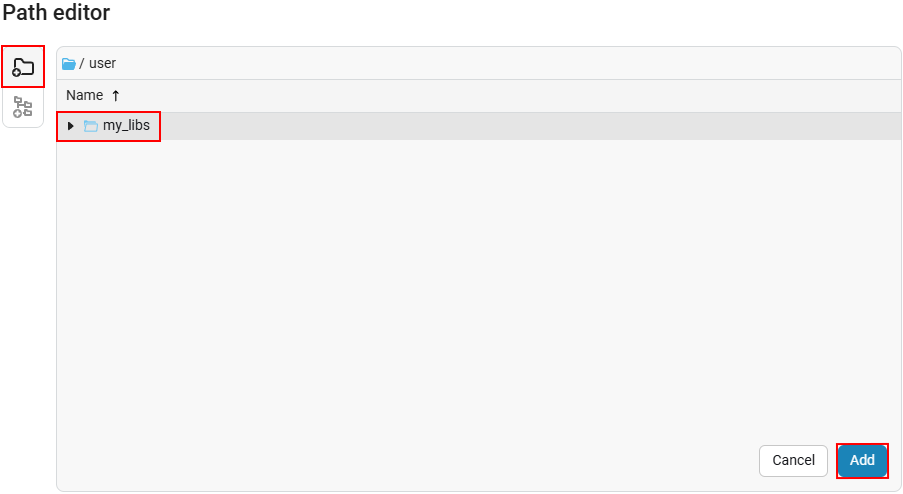
-
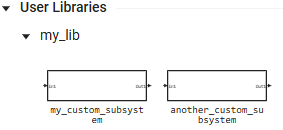
The added files will be placed in the User Libraries section, where the file name is.nglib will become the name of the corresponding subsection:
-
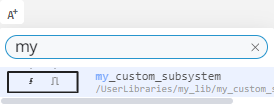
Blocks of a previously created or uploaded user library can be accessed via a workspace search, just like for regular Engee blocks.:
Multi-level libraries
Large user libraries often require a nested structure, for example, when you want to organize blocks into categories and subcategories. To do this, add a special file engee_library.toml to the library folder, which describes the hierarchy structure. An example of such a file:
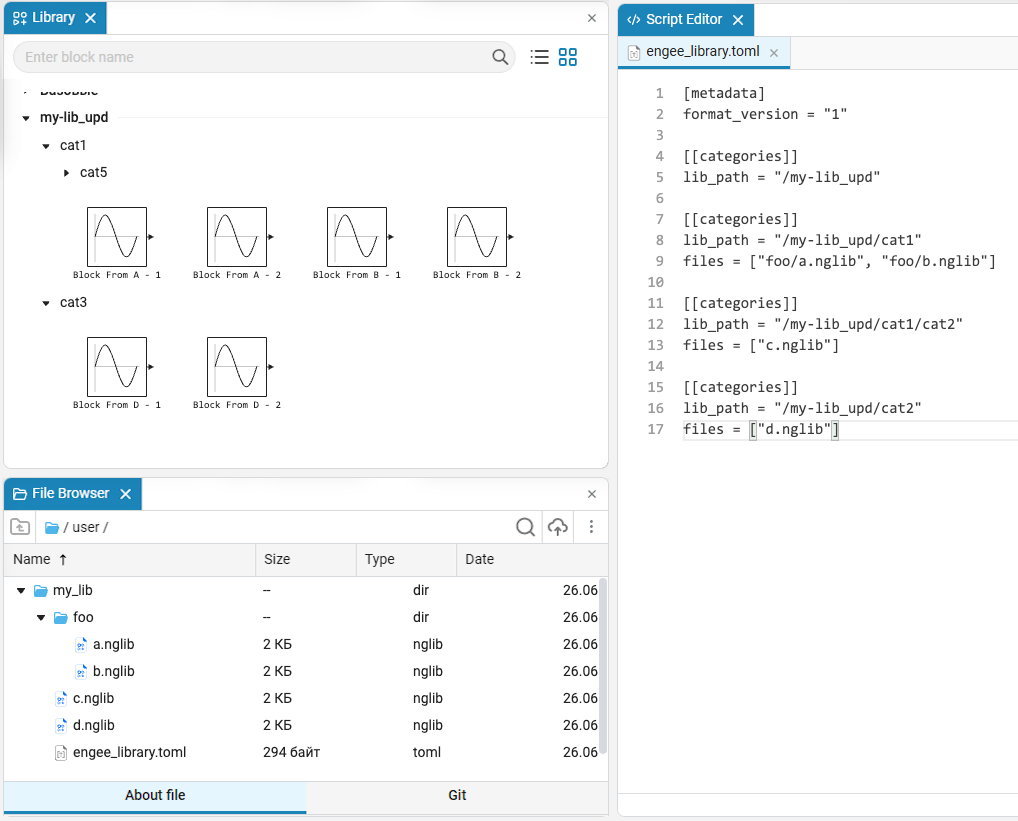
[metadata]
format_version = "1"

[[categories]]
lib_path = "/my-lib_upd"
files = ["foo/a.nglib", "foo/b.nglib"]

[[categories]]
lib_path = "/my-lib_upd/cat1"
files = ["c.nglib"]

[[categories]]
lib_path = "/my-lib_upd/cat1/cat2"
files = ["d.nglib"]
In this example:
-
format_version = "1"is the version of the file format. -
`lib_path' is the path to the library section, as it will be displayed in the Engee block library window.
. -
files' is a list of `.nglibfiles that will be uploaded to this section.Files can be freely placed in different subdirectories — the main thing is that the paths in the `files' are specified correctly.
So you can:
-
Group blocks by folders and subcategories (for example,
cat1andcat2); -
Upload multiple files to the same partition;
-
Clearly structure large libraries by subject, block type, etc.
After creating the engee_library.toml and placing the necessary .nglib files in the specified folders, add the root folder of the library to the path via path editor, and your hierarchy will appear in the block library.