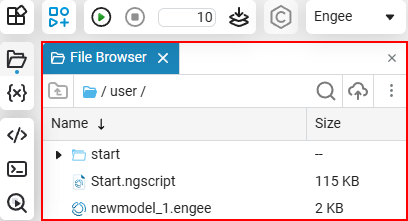
File Browser
The organization of the file system and its visual representation are two important tasks for convenient work on any project. For these purposes, the Engee platform provides its own solution, a file browser. The integration of the Git version control system, convenient navigation inside the project, working with files and archiving them helps to efficiently organize the file system in Engee.
File Browser  — it is a tool for working with the file system in the Engee environment:
Working with the file browser
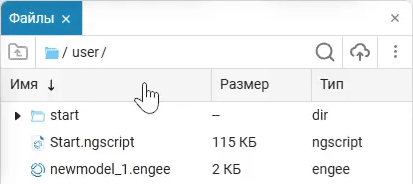
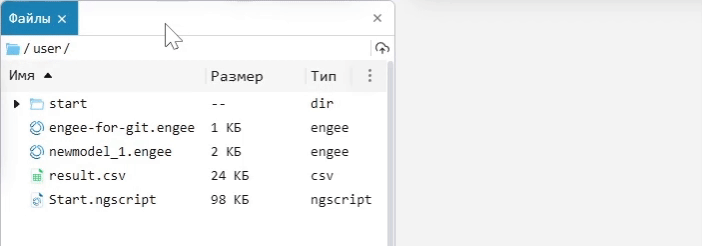
The file browser in Engee is indicated by the icon and it is a tool for organizing files and folders. Next, let’s look at the main features of the file browser.
Display Settings
To display the necessary columns of the file browser, click on the three-dot button and select Hide/show.
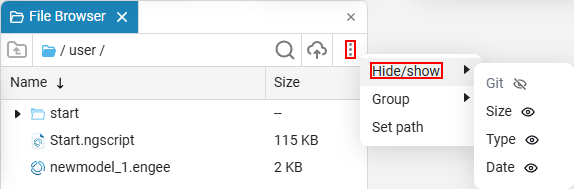
The columns of the file browser can be moved by dragging the header with the mouse. You can also change their width.
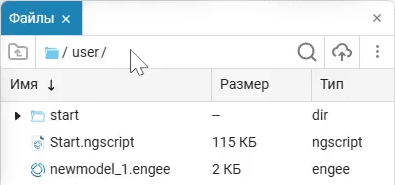
Navigating the file structure
There are three ways to navigate inside a file browser:
-
Click the button
 and enter the name of the desired file in the search bar.:
-
Use the mouse to switch between folders and files in the address bar of the file browser. Each folder and file in the address bar is clickable and allows you to navigate to their contents.
-
Enter a slash / and select the desired path using Tab or the left mouse button. The file browser will suggest the available folders in the path of your project.
|
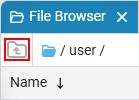
To exit folders easily, use the option Return to a higher level
|

File Management
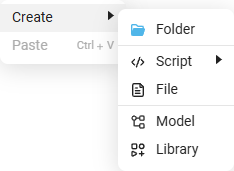
To create folders, scripts, files, and models, right-click on an empty area of the file browser or on an existing file or folder and select the function Create.
To create a model, click on  in the Navigation Bar.

|
When the system is started for the first time, a new model is created automatically in the Navigation Bar. Default Model name —
|
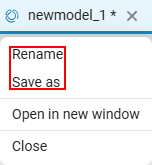
To rename a file, right-click on its name and select Rename in the menu that appears. Alternatively, you can left-click on the file and then click on the name again to open the edit line.
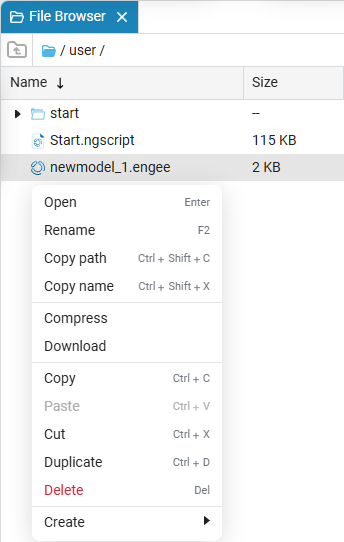
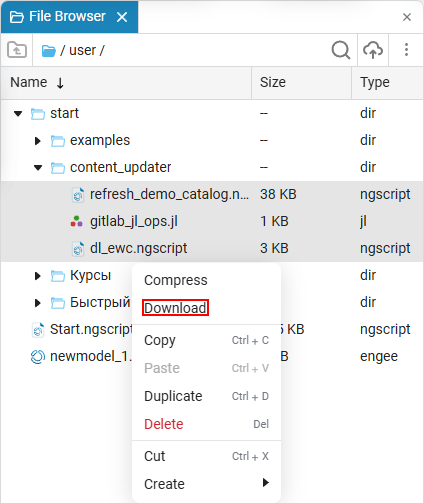
Right-click on the file/folder in the context menu and select the desired action. These operations are available for all files and folders in the project.:
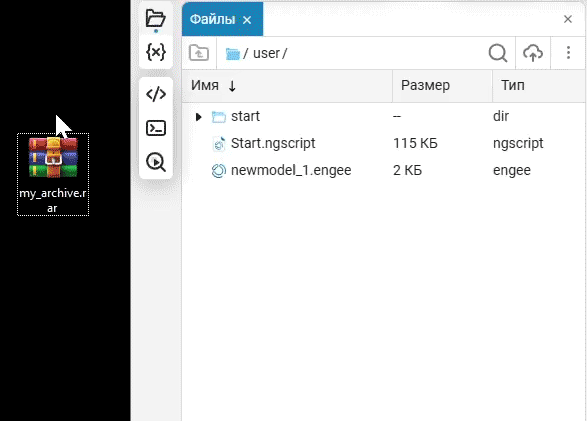
To add a file, click  in the file browser or manually move the file to the desired project directory with the mouse. The file browser highlights the place where the file was added in blue. For example, let’s add an archive from the desktop.
In addition to archives, you can also transfer folders: left-click the folder and move it from your computer to the desired project directory. The place of addition is also highlighted in blue.:
You can download files and folders immediately in the archive using a combination Ctrl+left mouse button or Shift+left mouse button to select several files and folders to open them in the context menu and download them in the archive.
To unzip files, double-click on the archive name or select an operation. Unpack in the context menu.
Working with Git
The file browser supports working with remote and local repositories using Git. The Engee file browser uses two approaches to create a repository:
-
Initializing the repository (Init) — create your own local repository in the current directory (folder).
-
Cloning a repository (Clone) — create a copy of an existing remote repository and work with it as with a local repository.
Initializing the repository
| To send changes from an initialized local repository to a remote repository, you need a link to a specific remote repository. Read more in Remote repository. |
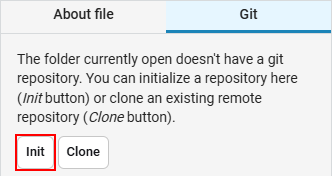
Initialization is the process of creating a new local repository in the current Engee directory.
Create an empty folder in the file browser and navigate to it. Initialize Git by clicking on the Init button:
| Remote repository is the repository where you plan to make local changes from the file browser. For example, your own remote repository from GitLab Engee. Read more about its creation. here. |
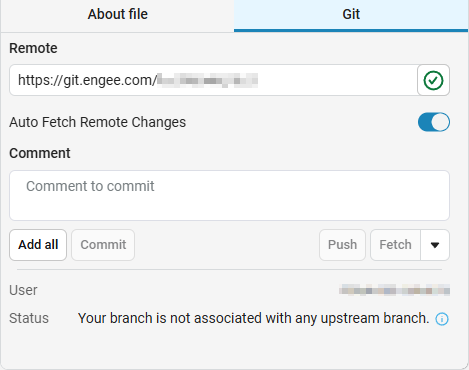
After initializing the local repository, the Git management menu of the file browser opens, where you need to specify a link to the remote repository to which the changes will be sent.:

If the local repository is not linked to the remote repository, the following message will be displayed in the Status line.: Your branch is not associated with any upstream branch.
After specifying the link to the remote repository and upon successful connection (if the address is entered correctly and access is open), an icon with a green check mark will appear next to the line.:
Now you can work with Git commands implemented in the file browser (see Implemented commands).
Cloning a repository
| To send changes from a cloned local repository to a remote repository, you need a link to a specific remote repository. Read more in Remote repository. |
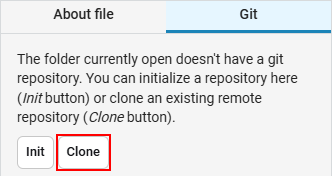
Cloning is the process of downloading a public (remote) repository from a hosting to the current directory. You can clone both the Engee public repository and related projects, as well as any other repositories that you have access to.
To clone a remote repository, click the Clone button and paste the address of the remote repository.:
After cloning the remote repository, the Git management menu of the file browser opens (the same window as during initialization, Init). The availability of the remote repository will also be marked with a green check mark.:
After cloning, you can work with the project in the same way as with any local repository. All Git commands implemented in the file browser are now available (Implemented commands).
Regardless of the method you choose to create a local repository:
-
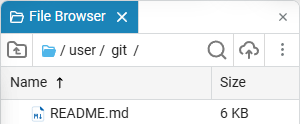
Files from the remote repository will be automatically added to the file browser, for example, a previously created project with a README file.:
-
The current directory (folder) will become a Git repository and will support the basic Git commands implemented in the file browser.
-
If the Git column is hidden, click on the ellipsis in the upper-right corner of the file browser, select hide/show from the context menu, and click on Git. In the Git column, you can add a file or folder to the index using Add for further work in Git, or remove it from the index using Remove.
Tracking changes in a remote repository
|
If the local repository in Engee does not contain the latest changes from the remote one, the Status bar will show how many updates (commits) there are.:[Commit is a fixed change in a project, such as adding or editing files.]) is missing. For example: Your branch is behind 'origin/master' by 3 commit(s), and can be fast-forwarded. This means that there are new changes in the remote repository. |
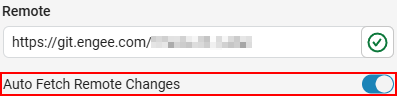
For the status to be updated automatically, the Auto Fetch Remote Changes option must be enabled (enabled by default). It is located next to the remote repository configuration.:
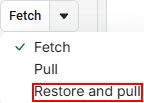
You can also manually press Fetch to check for changes.
To upload the latest changes to the file browser, use the Restore and pull command.:
Implemented commands
The following Git commands are implemented using the buttons in the file browser:
-
init— initializes an empty repository in the current directory (folder). -
clone— clones an existing remote repository to the current directory (folder). -
add— adds the specified file to tracking. If it is a folder, it adds all the files of the local repository to the index. The command is also availableadd allto add all files to the index. -
remove— deletes the specified file from tracking. -
commit— saves changes to the working directory of the local repository. The team captures the status of the project at a certain point in time and saves a history of changes. -
fetch— used to download changes from a remote or local repository to your local repository. -
restore and pull— used to update your local copy of the repository to the latest version. This allows you to have an up-to-date copy of the code and avoid conflicts when merging changes. -
pull— extracts and uploads content from a remote repository to a local repository and updates it with this content. -
push— transfers the changes made in the local repository to the remote repository.