Example of programme control in modelling
Introduction
In this example, we will create a model using programmatic control methods. Our goal is to show how a model can be implemented programmatically using the workspace tools - command line  and script editor
  .
.
To create a model using programmatic control methods, we will open the command line or the Engee script editor. The choice of tool is not fundamental and will not differ in syntax if an example is created. However, the script editor will allow refactoring already initialised lines of code, which can be useful for creating your own models. In the future we will use the script editor.
Creating/loading a model
By default, when you start Engee, the newmodel_1 model is created, which is what we will be working with later. However, you can create or load another model by selecting the method you need from the following:
Create/load/open model
Use the create method to create a model:
model = "newmodel_2" # creates a model variable with the value "model_name"
engee.create(model) # creates a model from a variable
or create the model directly without initialising the variable:
engee.create("newmodel_2")You can load an existing model using the load method:
engee.load("/user/newmodel_2.engee")

# or

engee.load("/user/newmodel_2.engee"; force = true) # force = true must be specified if the model has already been loaded earlier.
Adding a block
First, let’s add blocks from the library to our newmodel_1 model using the add_block method:
engee.add_block("/Basic/Sources/Sine Wave", "newmodel_1/") # adds the Sin Wave block from the Basic/Sources library and assigns the name automaticallyand similarly for the Terminator block:
engee.add_block("/Basic/Sinks/Terminator", "newmodel_1/") # It adds the Terminator block in the same way, but from a different library.| In this case names are assigned automatically, for example Terminator will change its name to Terminator-1 if a block with this name already exists in the model. |
If necessary, you can name the blocks yourself by adding their name after the slash / of the model name:
engee.add_block("/Basic/Sources/Sine Wave", "newmodel_1/Sine Wave-x") # adds a Sine Wave block named Sin Wave-xYou can delete an unnecessary block via the delete_block method:
engee.delete_block("newmodel_1/Sine Wave-x") # removes the Sine Wave-x block and all associated lines and blocks from the systemAdding lines
Let’s add a connecting signal line between the added blocks using the add_line method:
engee.add_line("Sine Wave/1", "Terminator/1") # sets the signal between output port No. 1 of the Sin Wave unit and input port No. 1 of the Terminator unit|
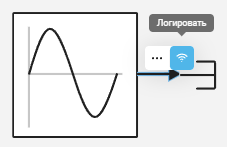
Enable signal recording for the created signal line between Sin Wave and Terminator blocks by left-clicking on the signal and selecting Record:
This is necessary to retrieve data from the block after the model simulation is complete. |
Setting the parameters of the model
Let’s get the parameters of the model using the get_param method:
engee.get_param("newmodel_1") - # getting the simulation parametersOutput get_param with constant step
ModelParameters(
  :EnableMultiTasking => false
  :GenerateComments => true

  #Integrator parameters:
  :StartTime => 0.0
  :StopTime => 10
  :SolverType => fixed-step
  :SolverName => Euler
  :FixedStep => 0.01
)
The list of configurable parameters of the models differs depending on the selected step (constant or variable). For example, get_param for the variable step model mentioned above will show the following parameters:
Variable Step get_param output.
ModelParameters(
  :EnableMultiTasking => false
  :GenerateComments => true

  # Integrator Parameters:
  :StartTime => 0.0
  :StopTime => 10
  :SolverName => Tsit5
  :SolverType => variable-step
  :MaxStep => auto # maximum step size
  :MinStep => auto # minimum step size
  :InitialStep => auto # initial step size
  :RelTol => auto # relative accuracy
  :AbsTol => auto # absolute accuracy
  :OutputOption => true # dense output
  :OutputTimes => 1e-2 # interval
)
Let’s change a few parameters of the model using the set_param! method:
engee.set_param!("newmodel_1", "FixedStep" => 0.05, "StopTime" => 40) # changing the fixed step size and the end time of the simulationNext, reuse get_param to track parameter changes:
The output of get_param with changed parameters
ModelParameters(
  :EnableMultiTasking => false
  :GenerateComments => true

  #Integrator parameters:
  :StartTime => 0.0
  :StopTime => 40.0
  :SolverType => fixed-step
  :SolverName => Euler
  :FixedStep => 0.05
)
Simulation
Let’s run a simulation of our model using the run method:
engee.run("newmodel_1")Thanks to the previously enabled signal recording, the simout variable storing the simulation results has been given the value SimulationResult("newmodel_1/Sine Wave.1" => WorkspaceArray("newmodel_1/Sine Wave.1")), represented as a table DataFrame:
Output
Dict{String, DataFrames.DataFrame} with 1 entry:
  "Sine Wave.1" => 801×2 DataFrame…
Let’s save the results of the simulation to the Engee RAM using the collect function as a result variable:
result = collect(simout["newmodel_1/Sine Wave.1"])|
Additionally, let’s get the simulation results using the method get_results without resorting to the simout variable: Both variables with simulation results ( |
For convenience, let’s continue with the result variable. The DataFrame of the result variable consists of two columns - time and value. Let’s visualise the DataFrame using the Plots library:
using Plots
plot(result.time, result.value)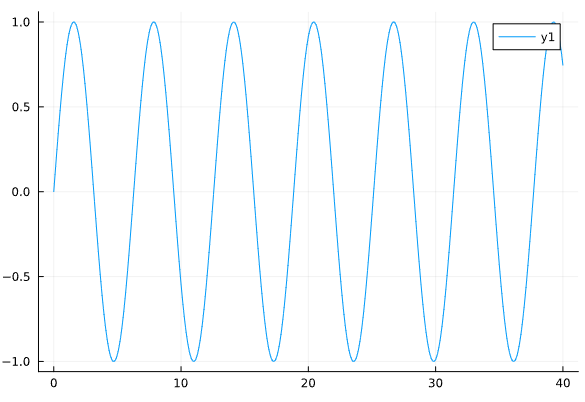
|
Additionally, you can save the simulation results in CSV format: |
Codogeneration
Let’s generate the model code using the generate_code method:
engee.generate_code("/user/newmodel_1.engee", "/user/codegen_dir") # the code was generated from the newmodel_1.engee model, the code will be stored in the codegen_dir folder.The generated code will be located in the codegen_dir folder in the files newmodel_1.h, newmodel_1.c and main.c.
At the end, let’s save our model using the save method:
engee.save("/user/newmodel_1.engee"; force=true)