Code generation for ESP 8266 (Sound sensor in Telegram bot)
This demo discusses the development of a model.
Engee for processing the signal from the sound sensor, followed by code generation from the model for the ESP 8266 microcontroller, controlled via a Telegram bot.
Introduction
The purpose of this example is to implement modeling in Engee followed by code generation of a simple algorithm applicable in home automation and the Internet of Things. The target device, a microcontroller with a built-in WiFi module, will be controlled via a Telegram bot, which is also provided by the Engee model. The telegram bot will receive from the controller the sound level at the sensor location, averaged using the moving average method.
Hardware part
The target device used in this example is the NodeMCU v1.0 debugging board with the ESP12E WiFi module on the ESP8266 microcontroller. The analog signal to the device input comes from a sound sensor implemented on the LM393 chip. The sensor receives power from the microcontroller. The connection diagram of the devices in this example is shown below.
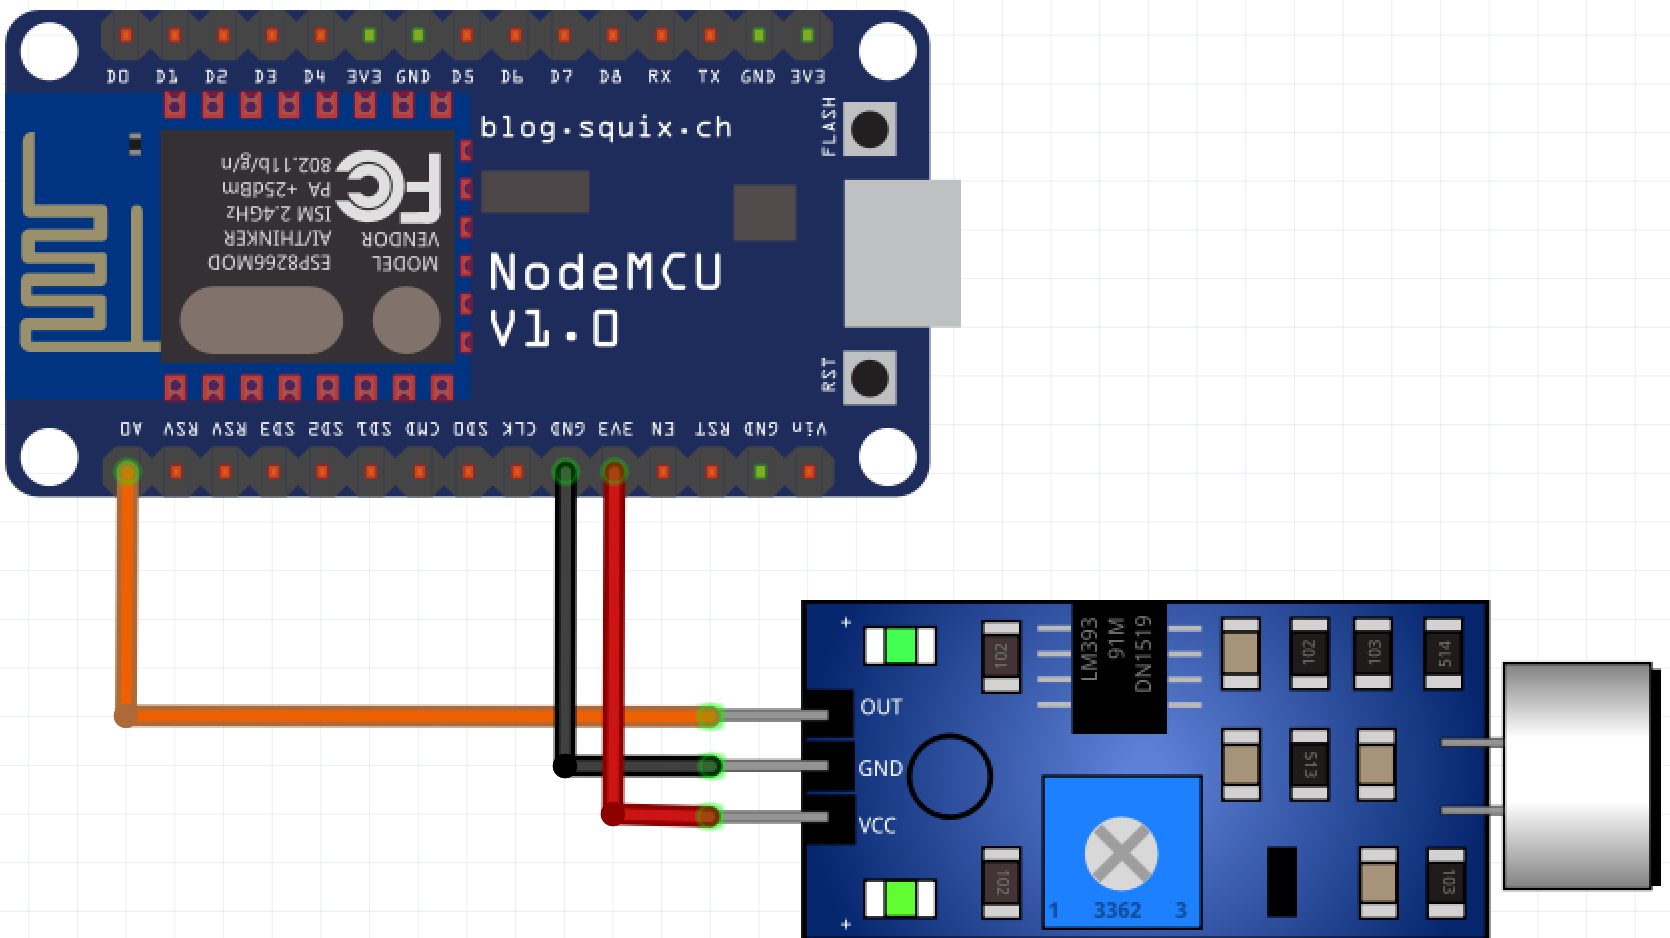
The microcontroller is programmed via a USB port, and the program is loaded into Flash memory. For further operation, the controller and sensor are powered by a power supply unit.
The user sketch is compiled and the controller is programmed via Arduino IDE 2.3.2. To work with NodeMCU v1.0 (ESP-12E), the Arduino IDE also has a library of cards based on the ESP 8266 chip from ESP8266 Community.
Telegram bot
The Telegram bot "ESP_test" ([@EngeeESPTestBot]) was created as a user interface for controlling the controller.(https://t.me/EngeeESPTestBot )). To continue working with the bot, you will need its token to access the HTTP API (generated when creating the bot) and a custom Chat ID.
There are two commands configured in the bot being used: /hi - to output a text message, /sound - to output the average sound level.
The processes of creating a Telegram bot, as well as obtaining a user's Chat ID are trivial, publicly available, and are not considered in this example.
It should be noted that the user code for processing incoming messages of the Telegram bot for this example uses an identifier for only one specified user. To access the processing of commands from any user, you should change the incoming message processing function of the bot.
Description of the Engee model
The control algorithm for the controller is reproduced in the Engee model. Its structure is shown in the figure below.
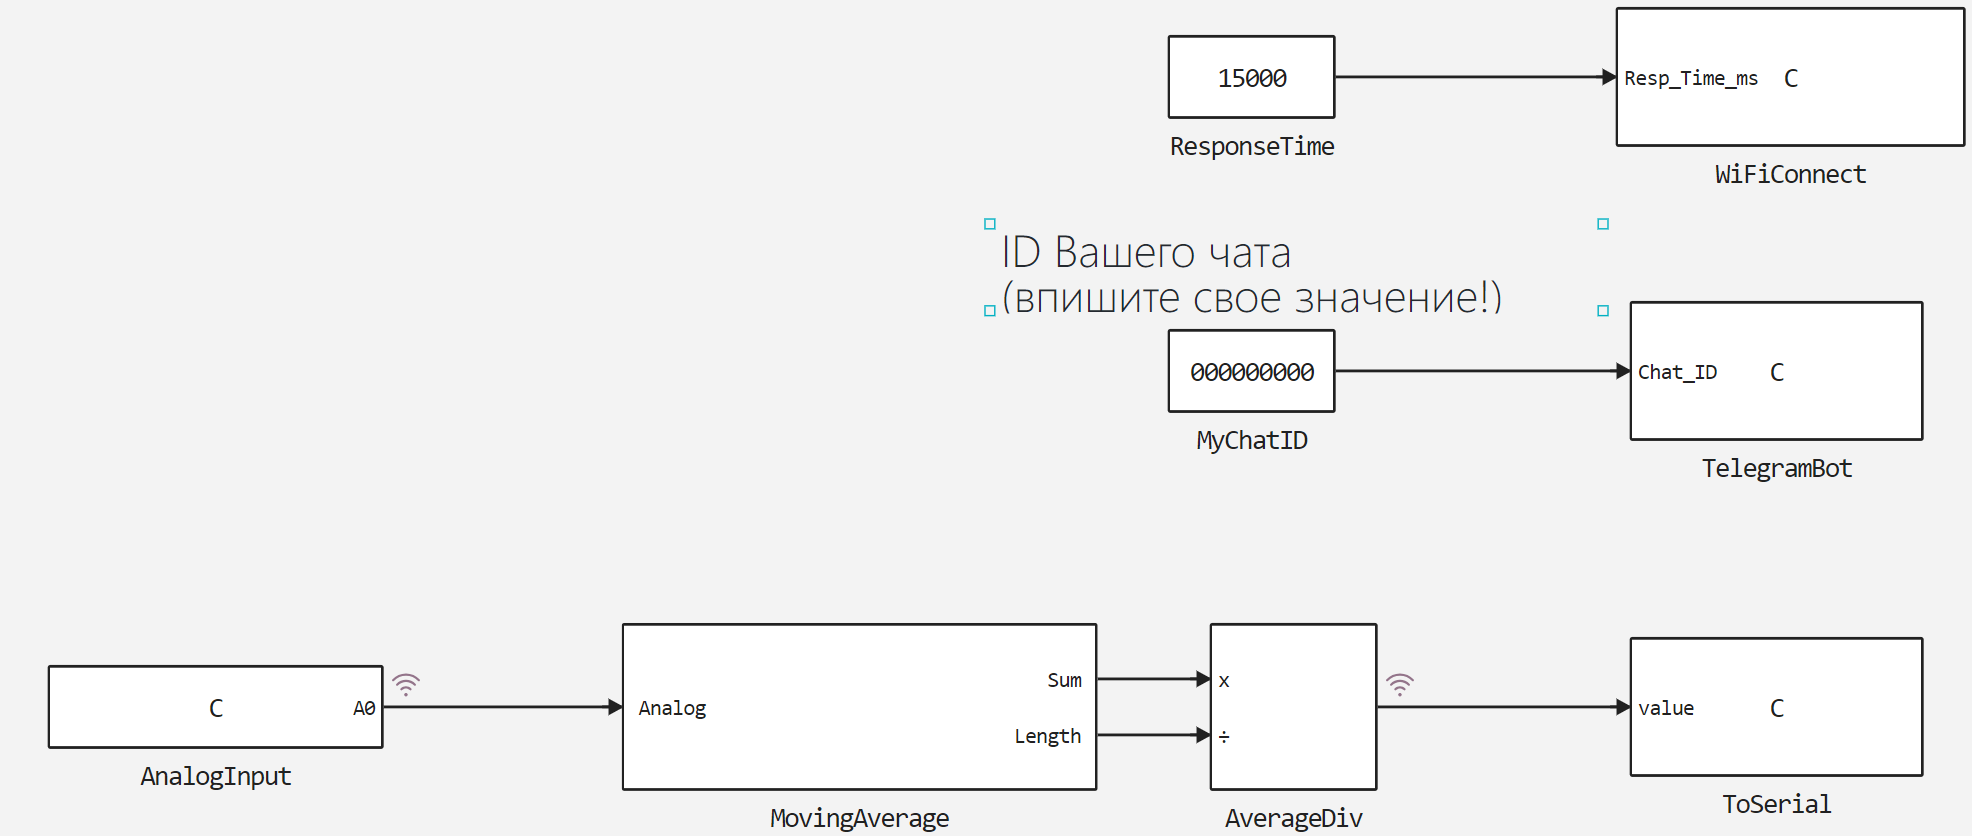
Here are the blocks MovingAverage and AverageDiv A moving average is calculated for 10 values of the signal. Interaction with the controller's peripherals is carried out by blocks C Function:
AnalogInput- receives a sound level signal from the analog input;ToSerial- initializes the serial port and transmits the value of the average sound level to it;TelegramBot- initializes the Telegram bot, checks for incoming messages;WiFiConnect- establishes a WiFi connection.
At the entrance of the block TelegramBot the ID of the user's chat is being transmitted MyChatID, and at the entrance WiFiConnect - connection waiting time ResponseTime, which should be increased if the WiFi signal is weak.
To operate the controller with a Telegram bot, you can use any available library. This example uses the C++ FastBot library.
To connect to a WiFi network in the block WiFiConnect macros are used WIFI_SSID, WIFI_PASS - the SSID and password values of the WiFi network, determined further in the user sketch.
Detailed descriptions of the algorithms of the code in blocks C Function given in the comments of the blocks.
Simulation results
To simulate the moving average algorithm at the block output AnalogInput A random output value is also generated in the range from 8 to 10. Let's check how the algorithm works by uploading and executing the assembled model.
if "esp8266_tg_sound_detect" in [m.name for m in engee.get_all_models()]
    m = engee.open( "esp8266_tg_sound_detect" );
else
    m = engee.load( "$(@__DIR__)/esp8266_tg_sound_detect.engee" );
end

data = engee.run(m);
Let's plot the analog signal (generated random values) and the result of calculating the moving average.
using Plots
plotlyjs()
plot(data["SoundFromSens"].time, data["SoundFromSens"].value,
    label="The signal from the sensor", size=(900,300), lw=2, st=:step)
plot!(data["SoundAvValue"].time, data["SoundAvValue"].value,
    label="The average signal", size=(900,300), lw=2, st=:step,
    legend = :bottomright)
The algorithm performs the correct calculation, then proceed to executing the code on the target device.
Uploading the code to ESP 8266
To upload to ESP 8266, you must first generate the code from the developed model.
engee.generate_code( "$(@__DIR__)/esp8266_tg_sound_detect.engee",
                     "$(@__DIR__)/esp8266_tg_sound_detect_code")
We will connect the files generated in the specified directory in the user sketch. esp8266_tg_sound_detect.ino. Macros, variables, and the incoming message processing function are also defined in the sketch, libraries are connected, and the Telegram bot is initialized. Download these files and upload them to ESP8266 using Arduino IDE.
Code execution on ESP 8266
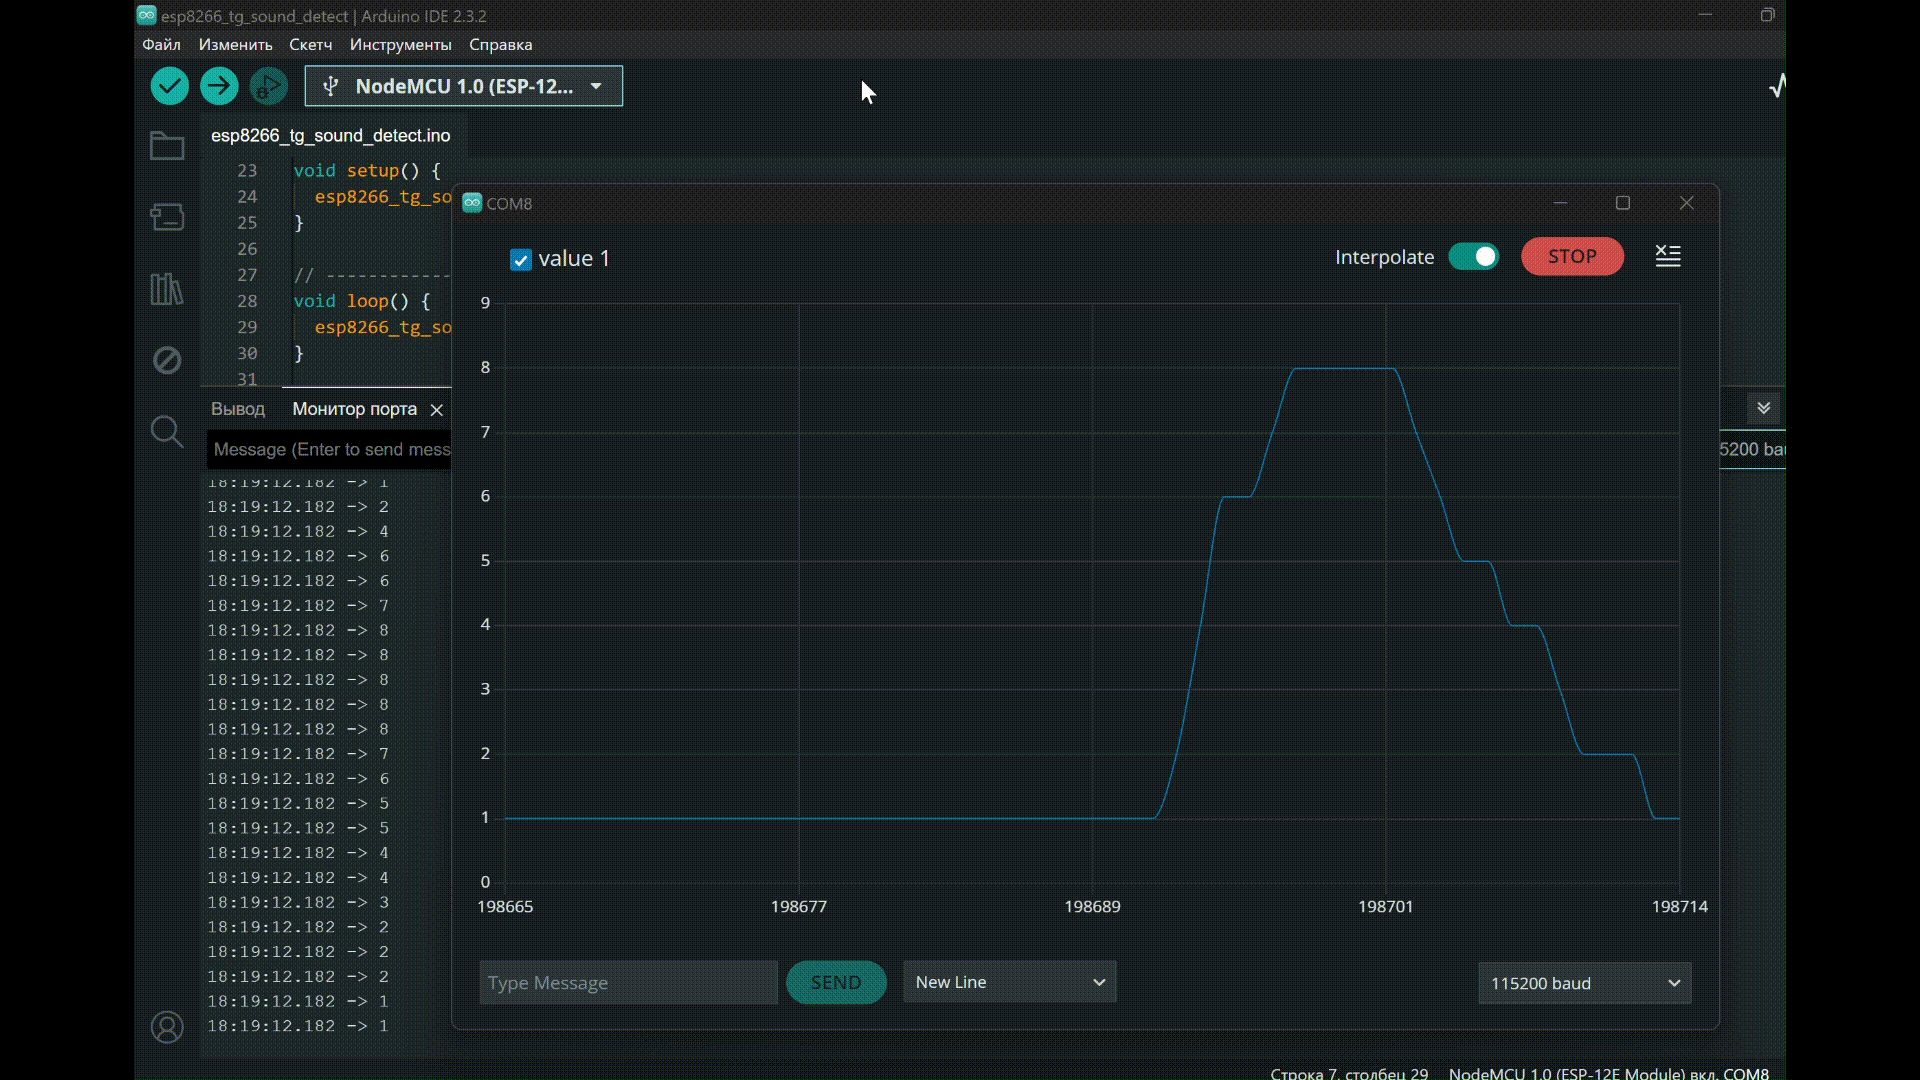
After successfully compiling the user sketch and uploading the code to the controller, the following output can be observed in the monitor of the Arduino IDE port:
When sending messages containing the specified commands to the Telegram bot, you can observe the following bot response::
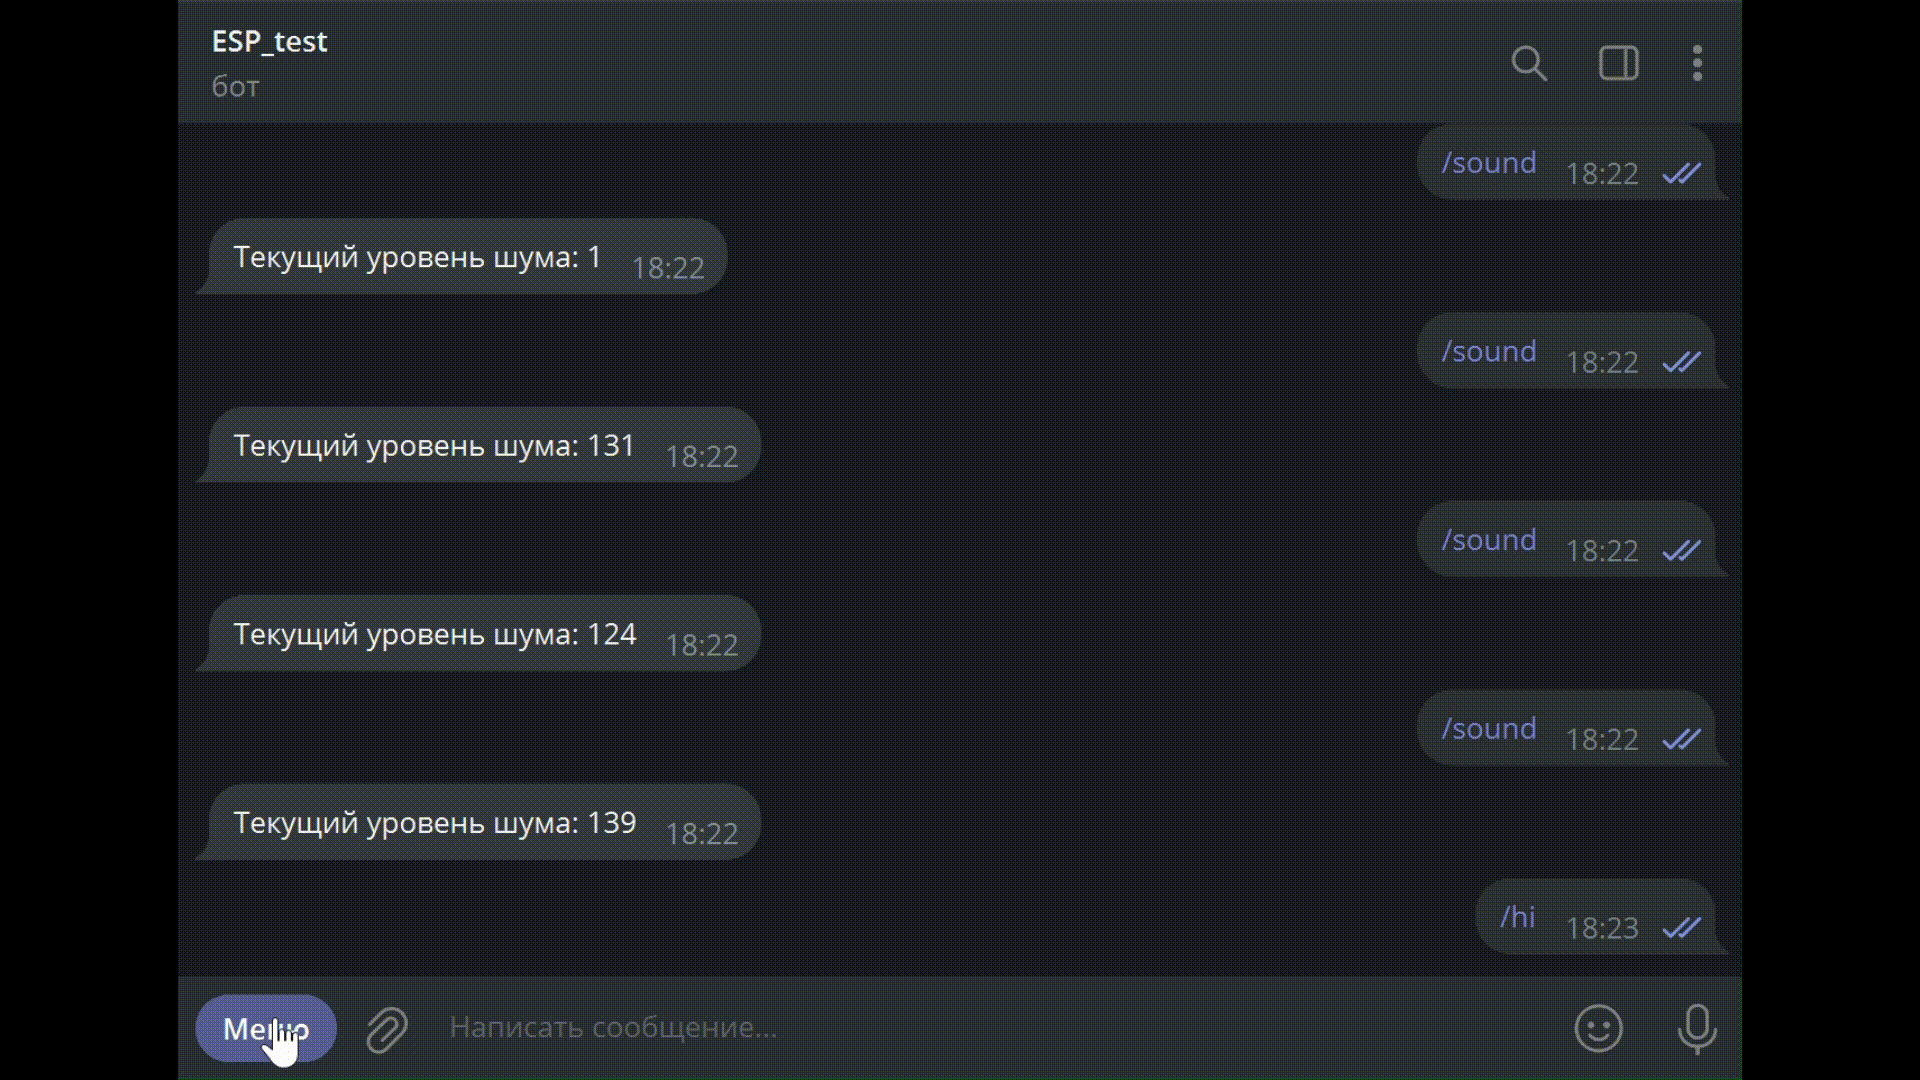
As can be seen from the results of the program, the algorithm specified in the Engee model is reproduced on the target device.
Conclusion
In this demo, we discussed the process of creating an Engee model that supports operation from the controller's peripherals - an analog input, a serial port, and a WiFi module. The model also implements: processing of the analog signal taken from the sound sensor, configuration and monitoring of the Telegram bot.